Monday 24 March 2014

Torching and Blading - Sonnia Cridd


Holy crap. This is already more than 3000 words and I haven’t even finished. So let’s make this intro short, shall we? ;)
                                     
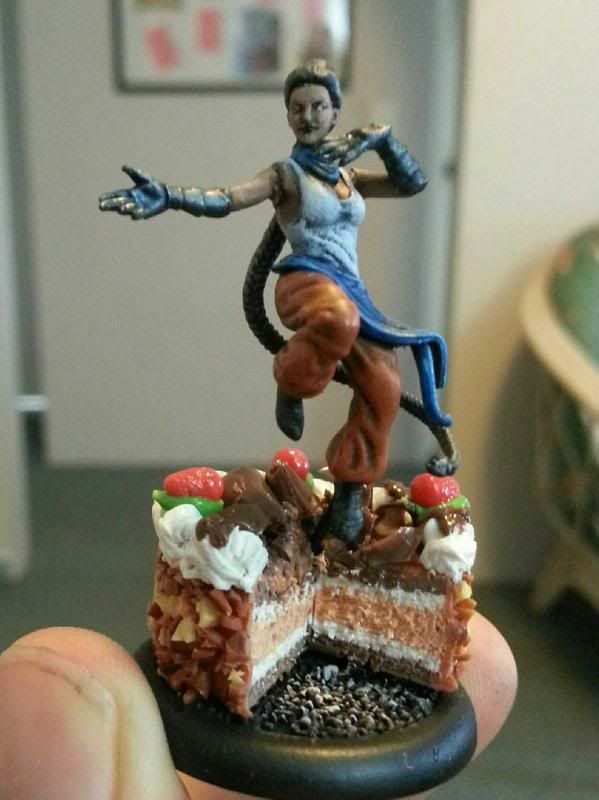
Hey look, it’s Sonnia Cridd! She finally got some cool models to go with her extra cool Witchling Stalkers, so with what is rapidly turning into me just playing all the Guild Masters one after the other, I thought I’d give her a whirl for the Rainbow Challenge. This game was against Kyle. Poor Kyle, who’s rapidly becoming my most regular opponent! Much like our Lady Justice game Kyle went for McMourning, this time as a Resurrectionist.


The Paint Job   
      
While I always loved the Witchling Stalker models, I never liked the metal sculpts for Sonnia and Samael. Sonnia’s hair just never seemed to work in both her incarnations, not to mention her proportions just seemed a little off. As for Samael, my feelings were well echoed by the nickname a friend of mine gave him – Captain High-Pants.

Some proper basing will come later...maybe even this year if I'm lucky. ;)

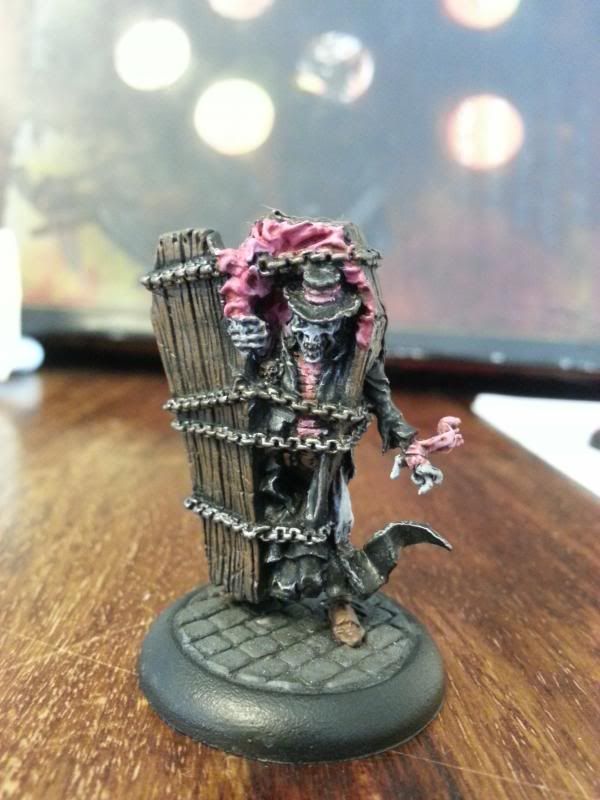
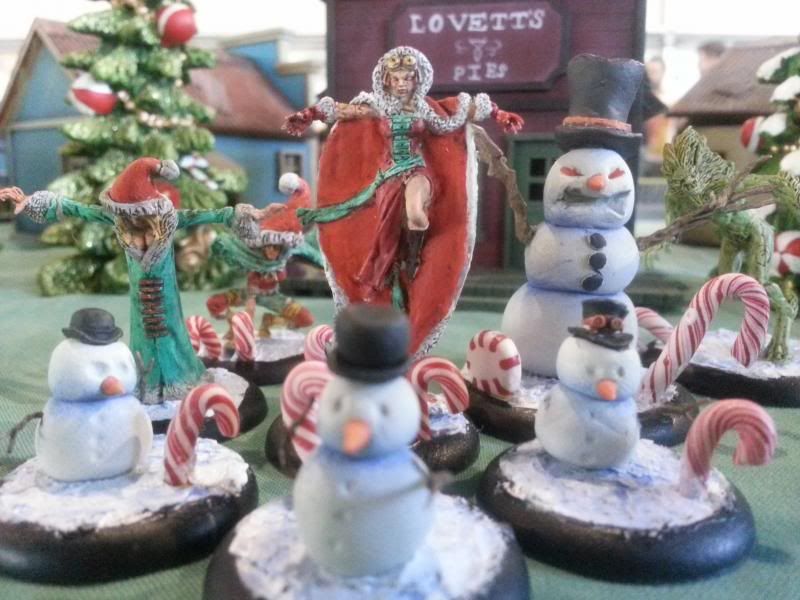
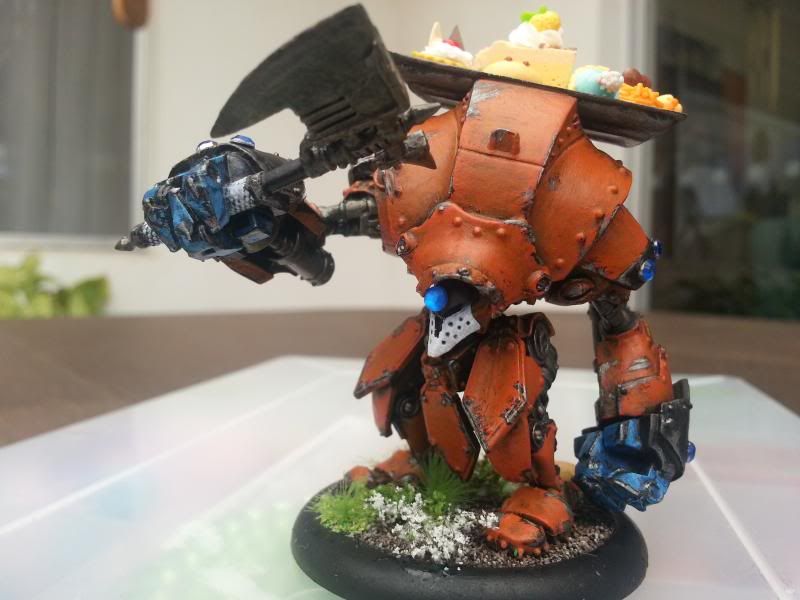
With the new plastic models I finally, finally had some sculpts for her crew I could get excited about! Of course I always feel a little wrong building a crew without a theme of some kind, and Sonnia was no exception. This time, it was fairy floss (aka. Cotton Candy or Candy Floss for anyone outside Australia). I have no specific reason why I went with fairy floss, only that it’s wackier than fire, and that’s all it needed to be! Anyway, the fairy floss itself was made with cotton wool glued to a paper clip and dyed with a magenta ink. The cotton wool actually became pretty solid once the ink dried so from there, it was just a matter of trimming it into shape with a scalpel blade and drybrushing it with pink and then white.


The Advice

So my impression before this game was that Sonnia has become a living artillery piece. Basically use Witchling Stalkers to put Burning onto enemy models, whom I then nuke with Sonnia and Samael. Sounds simple enough, right? ;) Along with knowing she was relatively fragile, that’s about all I knew about Sonnia before going into this game.

That said, there’s a lot of commentary out there on M2E Sonnia. A trawl of the Wyrd threads brought up quite a few discussions, and I even managed to find a blog too;


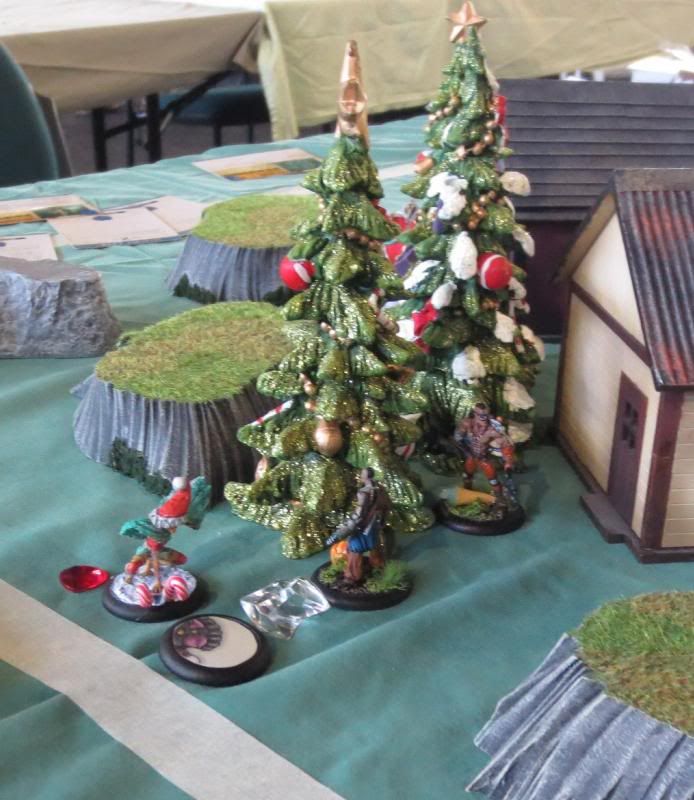
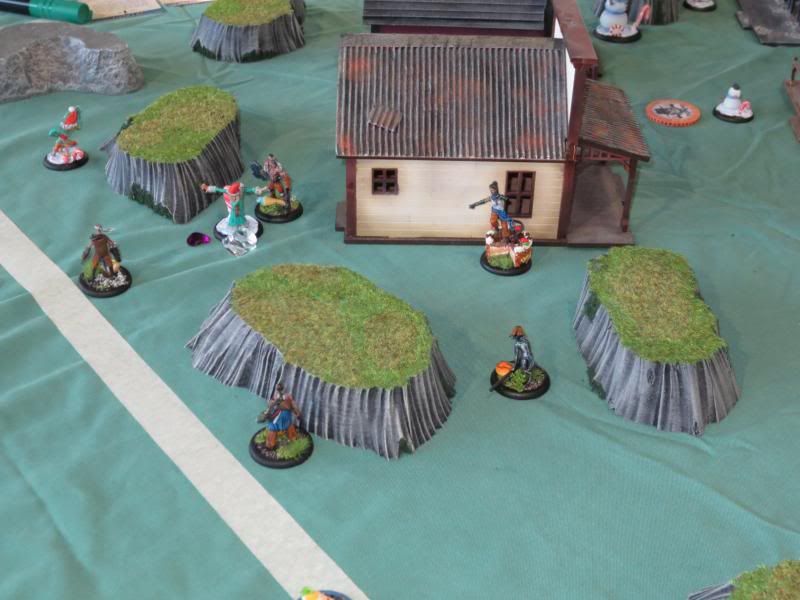
Today's terrain setup for the game. I deployed in the bottom left. 

The Game

45SS, Standard Deployment
Strategy: Reconnoiter
Schemes:
- Distract
- Protect Territory
- Murder Protege
- Take Prisoner
- Line in the Sand

Recon with Guild vs the traditionally summon-heavy Ressers. Needless to say, I’d need to take advantage of my crew’s killing power to keep the crew’s numbers in check and ensure I keep scoring points.

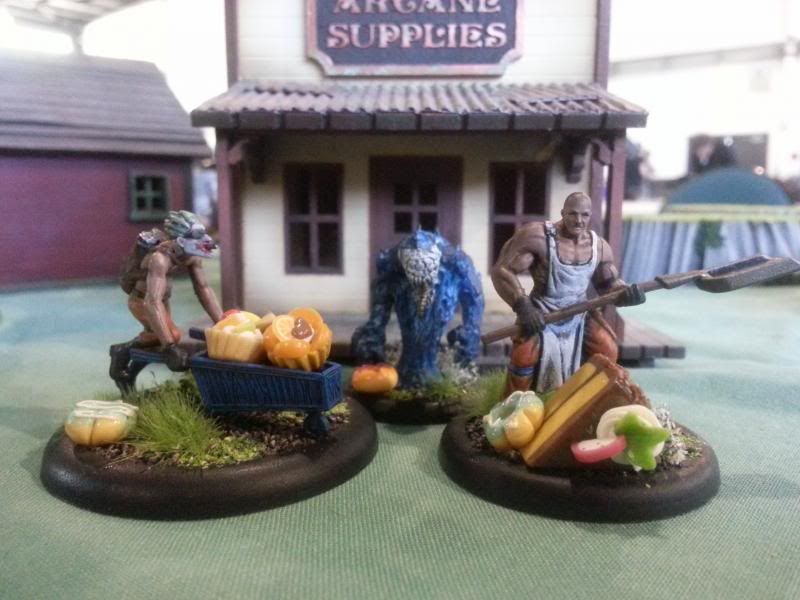
Mmm. Delicious Candy...
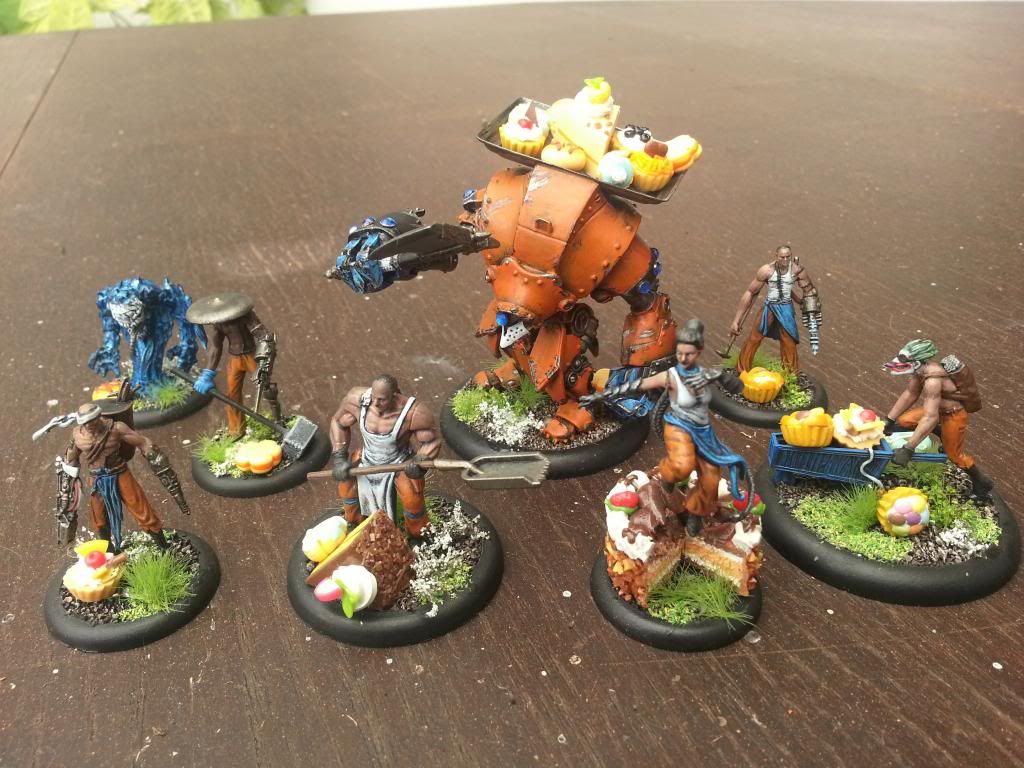
The List

Sonnia Cridd
- Reincarnation
- The Mask
Samael Hopkins
Purifying Flame
3x Witchling Stalkers
Austringer
2x Guild Hounds

So short story – stick with the starter box plus Guild Hounds to help with Reconnoiter and the Austringer for the threat range and mobility tricks he offers. Despite Sonnia’s relative fragility there was no Assassinate scheme on the table, so I figured I was safe to take the other upgrade I really wanted to try – Reincarnation. I agonised over whether to take Disrupt Magic for some anti-magic, but in the end I went for The Mask, since it gave me the chance to counter some of the high attrition models Ressers tend to take with some consistent burning damage from turn to turn.

For schemes, I selected Take Prisoner (Izamu) and Distract. While I thought I could eventually bring down McMourning or Izamu, I didn’t like my chances of doing both. So Izamu became the guy I was going to either ignore or feed fodder for the rest of the game, while Distract has always been a good choice against any crew who’d want to get stuck into melee.


Opponent’s List

McMourning (Resurrectionist)
- Spare Parts
- Evidence Tampering
- Plastic Surgery
Sebastian
- Those are not ours!
- Transfusion
Izamu
- Decaying Aura
Zombie Chihuahua
Nurse
Canine Remains
Necropunk

Another match against Kyle’s McMourning crew and despite being Resser, it was actually fairly similar to his Guild crew I faced in our previous game (in which I was playing Lady Justice). Basically the Peacekeeper became Izamu, while the Witchling Stalker and Austringer became a Necropunk and Canine remains to better support the more mobile/summoning playstyle Kyle was going for.

For schemes, Kyle chose Distract and Murder Protégé on Samael (announced).


Result

Turn 1 was the usual positioning adventures, with me advancing most of my crew (aside from Samael, who I needed to try and keep safe) while McMourning hung back, not wanting to expose his crew early. I activated Sonnia last and not wanting to make the same mistake I made last game, Sonnia went straight for the Nurse, damaging but not killing her with a Flame Burst. Kyle also summoned a Canine Remains with a corpse dug up by his own canine.

Turn 2 was the turning point for the game – Kyle advanced his Canines after using the Nurse to give Hallucinogens (Ml attacks only) to Sonnia. I put the Purifying Flame into melee with the Necropunk, finished off the Nurse with an Austringer and I failed to hit a Canine remains with a pistol shot from a Witchling. The rest of Kyle’s crew advanced cautiously behind cover and the canines, while Samael continued to hold back to avoid getting hunted down by McMourning. Once I’d run out of other activations I used dispel Magic from a Witchling to remove Hallucinogens from Sonnia (Kyle had forgotten I could do this!), who then proceeded to move into within 10” of the Necropunk, then take both the ‘Punk and the Canine Remains to 1 wound with Burning counters. At the end of the turn both models died, and I dropped two Soulstones to turn them into Witchling Stalkers, bringing my total from 3 to 5!
At the end of Turn 2 my numbers ensured that Kyle only claimed one table quarter while I claimed three. This pattern continued for the rest of the game, thanks in no small part to the Guild hounds camping out in Kyle’s deployment zone.

In Turn 3 we both started distracting each other’s models, with me targeting Izamu and McMourning while Kyle targeted Witchling Stalkers and Sonnia. Unfortunately between one of the Distracted Stalkers dieing and Sonnia getting pushed out of melee by an Austringer to (2) remove the distract, Kyle only managed 1 VP from the scheme. McMourning moved in to start putting damage onto Sonnia in melee and summon a Guild Autopsy, while the Purifying Flame responded by double-walking into melee with McMourning to prevent him using any Soulstones with Dampening Field. Sonnia herself cast Cheruffe’s Shackle onto McMourning and started swinging away with her Runed Blade, drawing 1-2 cards and healing 1-2 damage with each swing. I lost one Witchling to some Sebastian-powered poison, but not before killing a Zombie Chihuahua and damaging the dogs with his explosive demise.

 McMourning comes within 2 wds of killing Sonnia...

In turn 4 Kyle once again won initative (just as he did in every other turn this game!), and came within a hair’s breadth of killing Sonnia. Two Transfusions gave Sonnia Poison 8, but he failed to cast Expunge (flipping the black Joker) so after a Scapel Sling attack, Sonnia only barely survived! I quickly responded by dispelling the poison 8 with a Witchling Stalker, and then between Sonnia, 3 Witchlings and the Purifying Flame I dealt enough damage to kill McMourning in response. In fact to add insult to injury, I even summoned a third Witchling Stalker off McMourning’s corpse! After that it was mostly cleanup, with the Guild Autopsy and Sebastian finished off by my Witchlings. In turn 5 Izamu moved up through a forest and finally put a hit onto Samael, taking him below half wounds with one swing! Samael moved into his own melee range with Izamu and Defensive Stanced, at which point the game ended. With that, I scored the full 10 VP for Reconnoiter, Distract and Take Prisoner, while Kyle managed 1VP for Distract.

...only to fall to a pile of Shattered Rune Blade attacks and join their ranks as a Witchling Stalker!


Post-game Thoughts

After the game, Kyle admitted that despite having enough corpse counters, he never had the crows on hand to summon as many models as he was hoping to. Overall he managed to bring out two Canines and a Guild Autopsy, which actually matched my summoning of three Witchling Stalkers! I was pretty wary of the number of corpses nearby McMourning, but fortunately he never reached the required 4 within 6” to summon a Rogue Necromancy.

McMourning was also pretty unlucky to have not killed Sonnia in turn 4, having flipped a Black Joker on his Expunge. That said, by that point Sonnia had done her damage, and even without her I’d scored enough VPs to secure the win and had enough Witchling stalkers around to kill off McMourning (or at least tie him up).

A face for radio?


So as to the girl herself, how did Sonnia fare? Well for the first few turns she did exactly what I expected her to – her crew concentrated on placing burning counters on whoever they could while Sonnia used her Flame Burst and Reincarnation to kill, then summon Witchling Stalkers out of the burning models. In a sense, Sonnia’s blast-heavy playstyle (especially with Pyrokinesis) also added to the mind games. Not wanting to get burnt up by multiple blasts from Flameburst Kyle played very cautiously for the first few turns. He hugged cover, made liberal use of defensive stance and kept the more valuble elements of his crew (McMourning, Izamu, Sebastian) further back than he perhaps should have. So the incredible threat range from Flame Burst definitely had more of an effect that it might look like on the card. In fact the best way to get around it is to get Sonnia into melee, which brings us to the second half of the game…

Once Sonnia got into melee I was actually expecting her usefulness to more or less end. Maybe I could take someone with me with her Inferno spell but other than that, her abilities in melee seemed pretty limited. To an extent that was true – there’s no way she could have taken on McMourning herself and when it came down to it, it was three Witchlings and a Dampening Field from the Purifying Flame that killed McMourning. Her Runed Greatsword was the big surprise though – Ml 5 is nothing to write home about but her Absorb Magic trigger (ie. Draw a card and heal a wound for every Ram in the duel total) proved to be fantastic. With a few swings of her sword she kept herself alive longer than she should have and it helped bolster my hand when I needed it most. The option is there to push her out of melee altogether with a Deliver Orders action from the Austringer (which I did do, if only to remove her Distract condition), but the chance for some card draw and healing means that getting Sonnia out of melee isn’t the only viable option I had.

Confiscated Lore is one of Sonnia’s saving graces when it comes to improving her resilience, but it’s very reliant on winning the initiative flip on those critical turns. I would have loved to use the +2 Df when she was facing off against McMourning, but unfortunately Kyle won initiative every turn so when those critical moments came, McMourning was activating before Sonnia did anyway! Not only that, but I found myself preferring to activate Sonnia later in the turn, once the Witchlings had put out some burning counters. Not to mention that it also prevents you casting Inferno, which is definitely an option if you’re thinking she might die anyway. So while the defensive potential is there, I’m not sure I’d find myself using it all that often in practice. Instead, getting +2 Ca from Confiscated Lore is just obsene. Just. Obsene.

Speaking of Confiscated Lore, the fact that I wanted to use that almost every turn actually made me consider my control hand at the beginning of each turn in a different light. Normally if I have 2-3 low cards I’ll burn a soulstone to draw extras. But with Sonnia those low cards are just fodder for my Confiscated Lore. Add to that any 3+ Tomes for the Witchlings Stalker’s Dispel Magic, and I could wind up with half a hand of low cards and still want to keep them. If the rest of my hand isn’t that great either I’ll still burn a soulstone, but in this game I certainly felt less pressure to do that. It’s probably a very good thing, considering the soulstones I saved went toward summoning Witchling stalkers and keeping Sonnia alive!

Moving on to upgrades, Reincarnation was unsurprisingly a favourite. I really enjoyed being able to summon Witchling Stalkers and while there were a few hoops to jump through, I didn’t find it to be too difficult in this game and the return was well worth the investment. It’s also one of those upgrades that will work regardless of whether Sonnia’s in melee. At a distance she can throw her fire balls about and summon Witchlings herself, but in melee she’s still got the WItchling Stalkers to achieve that job, plus she’s drawing plenty of cards from her Absorb Magic Trigger to fuel the summoning. The only negative to Reincarnation is that it prevents Sonnia from taking Badge of Office. Not only is Sonnia one of the most fragile Masters in the Guild, but her threat range and damage output effectively puts a huge “kill me” target on her head. So more than anyone else, Sonnia really wants that Badge of Office. I don’t’ really have an answer to which is the better choice, even if Assassinate happens to be one of the schemes. Reincarnation felt so useful, it’s pretty hard to justify dropping it.

As it turns out, The Mask was not quite as amazing as I hoped it would be. In this game I only got it off on one model (McMourning), but he died to massed Witchlings before it really came into play. So while I still think it’s handy, it’s certainly not necessary for Sonnia. By contrast, I really missed having access to Sonnia’s various anti-magic tricks, specifically Disrupt Magic and Counterspell Aura. With it’s negative flip to Ca actions for everyone close to a Witchling Stalker (basically most of Sonnia’s crew), Disrupt Magic seems like the better deal. But Counterspell Aura can just shut down a lot of Ca-based attacks that have a suit on their TN. Lure especially becomes impossible on a non-soulstone user. The Grounded Magic half of Counterspell Aura seems a little flat though - why cast that when I could burn something with another Flame Burst? Still, as a 1SS upgrade I still think it’s worth throwing in. Disrupt Magic though – I do wish I’d found the points for a Disrupt Magic!

I passed on Cheruffe’s Imprint this game partly because I didn’t rate the usefulness of Flame Wall, and partly because I figured the Purifying Flame gave me a Dampening Aura if I really needed it. However after the game, I’m starting to see how it might be useful in letting Sonnia switch to a slightly more support and melee-oriented playstyle. I don’t mean melee in the sense that you’re going to charge her in like she was Lady Justice, but in that it makes her much trickier to take on in melee. The Soulstone prevention from Dampening is already a great debuff (as I discovered with the Purifying Flame, below), but the Flame Wall itself can help disrupt charge lanes and prevent enemy models from getting too close to Sonnia (or any objectives, of course!). It also means that Sonnia is going to ge useful whether she activates early or late. Activate early, and she places Flame Pillars for disruption and uses Confiscated Lore to boost her resilience. Activate late, and she boosts her Ca with Confiscated Lore and lets loose on any burning models with her Flameburst. So as an upgrade, Cheruffe’s Imprint actually makes her a lot more flexible than it might otherwise seem!

As the game closes, a wounded Samael takes Izamu prisoner...somehow.


As the announced target for Murder Protégé, Samael took a back seat during most of the game. He took one or two pot shots at a Burning Canine Remains and rapid-fired at a Guild Autopsy engaged with a Witchling. But through either defensive stance or poor luck, he failed to do much damage. His brief run-in with Izamu did emphasise just how fragile he is for a 9SS henchman and looking at his offensive stats, he definitely fits the role of a glass cannon. He’s got some great damage output with Rapid Fire and his Huntin’ Tools (especially if they’re Burning), but unlike Judge, you don’t want him on your front lines.
I’ll admit I did think about taking Samael’s upgrade, Witch Hunt, for some extra Burning, but to be honest I feel like he needs some extra resilience rather than more offensive power. So if I was to take anything for him, (aside from Disrupt Magic) I’d probably go with a Leadlined Coat.

The Purifying Flame was a model I almost forced myself to take, but I’m very glad I did! Being a Peon made it immune to Distract (an advantage I hadn’t seriously considered until now!) and the ability to hand out Burning +1, while small, synergised well with Sonnia. But the real gem was its Dampening Aura to prevent enemy soulstone use within 3”. This alone proved to be a massive pain for McMourning, and made him that much easier to take on with my crew. Sonnia can do the same with her Cherufe’s Imprint upgrade and if I was struggling for SS I might consider using that instead. But Dampening definitely seems to be what makes the Purifying Flame worth taking.

I don't really talk about Guild Hounds today but seriously, they're solid gold for Reconnoiter!

Honestly, haven't I talked about Witchling Stalkers enough?! ;) Once again, Dispel Magic was invaluble in keeping the Poison and Take Your Meds effects off Sonnia and once again, their punching power in melee proved to be the undoing for much of Kyle’s crew. The only difference is that in this game, I took three (well, six after I summoned three with Reincarnation) and with Sonnia's pro-burning playstyle they went from a second line support minion to my front line fighters. After all, if they die then they're just spreading more burning around, which is exactly what Sonnia wants!

From memory, I believe the Austringer used his raptor attack for just one activation, against the Nurse. Other than that he was using Deliver Orders every chance he got to push my models into better positions or simply force interacts to achieve Distract.  If I’m being honest I probably didn’t need the Austringer for his shooting. He doesn’t add any Burning to the crew and Sonnia’s potentially LoS and cover-ignoring fire balls might give you all the threat range you need. Deliver orders is just that good though, especially for getting Sonnia out of melee as I mentioned above. Mind you, if I’m mainly taking the Austringer for Deliver Orders, perhaps there’s another option that could replace him? Nothing comes to mind, but I’ll probably keep an eye out for alternatives.

If or when I pull out Sonnia again, there are definitely a few more models I’d like to try with her. The Witchling Handler is definitely one, for obvious reasons, but I think the Brutal Effigy has a lot of potential for complementing Sonnia with his (0) Fear not the Sword action, which both helps heal her in melee and potentially gives her more cards to draw. Fire Gamin and Iggy are the other ones. I have the models but without her Avatar, I’ve never given them much thought in a Sonnia crew. So that will eventually have to change! Finally, there’s the Freikorps Specialist. There’s been plenty of discussion on using him in a Sonnia crew already,

Sorry, she's a little upset I didn't use her in the game. 


Final Impressions – The Master who Dies.

Going into this game, I initially expected Sonnia Cridd to be a little flat in her playstyle: Basically put burning on stuff with Witchlings, Flame them to death with Sonnia, rinse and repeat. However much to my delight, there was some hidden depth to her playstyle that I hadn’t actually seen until I saw her in action on the table. She still has the potential to be the living artillery piece I expected her to be, but her fragility, combined with all the anti-magic and some neat melee-oriented tricks opens up a whole new aspect to her. She’s a fragile Master with a massive target on her head, so you have to play cautiously with her. But then again, she’s got some neat ways to punish opposing models for getting close to her, even if she dies in the process!

At this stage I’m kind of thinking of Sonnia as the “Master Who Will Die”. Sure, you might be able to play cautiously enough to keep her around for the game (which isn’t a bad thing). But against a good player, her threat level is high enough that I’d expect her to end up in melee, and then dead by the end of the game. So the question, then, is how much of your opponents crew can she take with her? This gets into a whole other level of metagame here, where your opponent is trying to avoid losing too much to Sonnia’s Inferno pulse while still having enough models engaged to kill her.

Anyway, it’s late and I’m dangerously close to just posting useless ramblings about Sonnia (well, MORE useless ramblings!). ;) Suffice to say, I REALLY enjoyed using Sonnia in this game. Her playstyle was a big surprise for me and I feel like I’ve only just started plumbing the depths of what she can do. For a Master I thought might be a little simplistic on the table top, I have to say I’m impressed. J

Till next time,


Adrian

Friday 14 March 2014

(Lady) Justice is Dead!


When I started this Rainbow Challenge to paint/play every Malifaux Crew, one of the things I wanted to do was to hopefully break the poor opinion I have of some Masters. Whether it’s a dislike of their playstyle, memories of their broken state in the previous edition or some other reason, there are a few Masters that I just haven’t been interested in. One of these is Lady Justice. In the previous edition she wasn’t particularly strong compared to other Masters but more importantly (in my mind at least), there just wasn’t much more to her than just throwing her at the enemy and watching her swing that Greatsword around.

In M2E Lady Justice has certainly improved in a lot of respects but I wasn’t yet convinced that she’d escaped her simplistic playstyle of old. So is there some depth to Lady Justice that I just haven’t seen? There’s only one way to find out. ;)

In this game I was facing Kyle with his Guild McMourning crew. McMourning is arguably the ‘other’ melee Master in the Guild crew and while I have no doubt that Lady Justice is better at dealing raw damage, I was also well aware of McMourning’s flexibility and the various tricks he could pull.

Dead Justice Starter - just add Witchlings. 

The Paint Job

So far (and IMO of course), the two “best” Gencons for getting limited Edition models have been 2010, which saw the release of a phenomenal Nightmare Lord Chompy Bits model, and 2011, where we were able to get our hands on Nightmare Teddy and a Nightmare “Undead” Lady Justice crew. Needless to say, this is what precipitated me owning my own Lady Justice crew despite never having an interest in playing her. She and her crew therefore started life as a painting project that helped me develop my “formula” for painting undead flesh (white undercoat, purple & brown washes, elf grey drybrush…really simple, which is just how I like it).

When I realised the plastic set would inevitably make the metals unavailable I added a Scales of Justice. I had plans to expand the crew out to include undead equivalents of the Executioner, Exorcist and Austringer, but it hasn’t eventuated. That said, I still felt the need for an Executioner (or more specifically, a Cheap Executioner) when I went to Cancon in January, so I made use of the Marcus Cunningham model from the Wild West Exodus Kickstarter. After removing the ridiculous horn on his forehead, assembling his arms (a job I completed with 2 hands, rather than the recommended 5) and painting him in my standard Guild “Badass Pink”, he scrubbed up pretty well.

So far, this is the only use I've gotten out of my WWX Kickstarter. Maybe one day I'll actually play a game. ;)

The Advice

Advice? Don’t you just throw Lady Justice at the enemy and watch her kill everything? ;) Seriously though, there’s actually quite a few threads about Lady Justice and in particular, what to take with her. The discussion on how she plays seems to confirm my suspicions about her focus on just killing stuff though – supposedly most of the support and depth comes from her crew.

Matt Spooner is also building Lady Justice for his Tale of Malifaux Bloggers, so I included a link to his blog too.


The Game

45SS, Close Deployment
Strategy: Turf War
Schemes:
- Distract
- Plant Evidence
- Vendetta
- Assassinate
- Line in the Sand

Close Deployment! This would be my first game using this deployment type, and with Lady Justice on the table it was bound to be a bloody affair!


The List

Dead Justice
- Badge of Office
- Thalarian Stone
Judged
Executioner
2x Dead Marshalls
Austringer
Witchling Stalker

So nothing too complicated – Lady J, the Judge and Executioner for killing power, the Death Marshalls for support/scheme markers, the Austringer for movement/shooting and the Witchling Stalker for condition removal. As much as I wanted to tear things to pieces with an Onslaught trigger from Vendetta, with assassinate on the table I felt that Badge of Office was going to be a smarter option. As for the Thalarian stone, I’d heard it works nicely for boosting her Df and getting her Riposte trigger off on enemy attackers, so I thought it might be worth a shot.
I initially wanted add a Scales of Justice for the +1 Wp for the Death Marshalls, making it easier to keep their Pine Boxed targets buried. Unfortunately I ran out of SS so I had to leave the scales at home.

For Schemes I chose Vendetta (Executioner vs Peacekeeper) and Assassinate. With my opponent’s crew being rather good at neutralising scheme markers, I figured I’d stick with what Lady J does best – making stuff dead!


Opponent’s List

McMourning (Guild)
- On the Clock
- Evidence Tampering
- Badge of Office
Sebastian
- Lead Lined Coat
- Plant Evidence
Zombie Chihuahua
Nurse
Peacekeeper
Austringer
Witchling Stalker

Aargh, Peacekeeper! I hadn’t faced one of these monstrosities before, but I’d heard stories. So needless to say, the Peacekeeper moved up to the top of my priority list, right next to “try not to receive too much Poison”. The Nurse/Witchling Stalker combo was there too, so that was another threat I needed to keep an eye on. The last thing I needed was for the Nurse to Paralyse Lady Justice, or heal up the Peacekeeper or McMourning before I got the chance to kill them.

For Schemes, Kyle chose Distract and Plant Evidence. The former in particular was a good choice for facing my melee-heavy Guild crew.


The table at the end of deployment. The entire battle was pretty much fought within a 12"x12" square in the middle!

Result

Both Kyle and I deployed in the approximate centre and as close as possible to the Turf War Marker. Given we started the game about 12” apart, Turn 1 got very bloody, very quickly. The Peacekeeper opened turn by moving, then shooting Judge with his Harpoon, Slowing him and pulling him into melee. McMourning followed up (again, into Judge) but only dealt minimal damage to him. I responded by Charging Lady Justice into the Peacekeeper, which together with Judge’s single attack took off most of his wounds. An Asutringer-assisted charge from the Executioner finished the Peacekeeper, removing the biggest piece from Kyle’s crew and achieving my Vendetta scheme. Sebastian(?) and a Zombie Chihuahua piled the poison onto Lady Justice, but a Dispel Magic from my Witchling Stalker removed it before he could do any damage with Expunge.

In latter turns Sebastian was Pine Boxed by a Death Marshall before he could do any damage and McMourning Distracted Judge, Lady Justice and the Executioner, freeing all three to spend their turn beating him to a pulp but virtually guaranteeing he’ll score some points for Distract. A second activation from Lady Justice saw McMourning meet his maker, although it was only because Kyle forgot he could have healed McMourning with his Nurse. Sebastian did eventually make it out of the Pine Box, but only long enough to get killed by the Executioner. The Chihuahua was killed off early and the Nurse died, albeit later than I should have given how good she is. The Witchling Stalker also died, but took two severely poisoned Death Marshalls with him. Judge was killed too, but only by the Executioner to ensure Kyle didn’t get his third VP for Distract!

By the time the game ended, I’d scored 10VP for my strategy and schemes while Kyle managed 3 (?) – two for Distract and I think one for Turf War.


Post-game Thoughts

I was initially concerned that without her Onslaught trigger from Vendetta, Lady Justice might have lacked the melee power to do what she needed to do. In practice this wasn’t the case. After all, everyone in McMourning’s crew did eventually die! That said, in retrospect getting some extra attacks off against McMourning would have finished him off much faster, and with less risk of the Nurse having a chance to heal him up. I took Badge of Office over Vendetta because Assassinate was one of the schemes, and if we played again I would still be tempted to do the same. But there’s something to be said about the best defense being a good offense - if she’s well supported then the Onslaught Trigger might be enough to finish off any model that might threaten her in melee, effectively negating the need for the Badge. In practice I’m sure it’s not that simple, but I still think Vendetta is going to be the better choice in almost every game, unless Assassinate is on the table. In that case it actually becomes a tough choice.

Unfortunately, the Thalarian Stone turned out to be a bit of a dud. As I said above, I was hoping to use it to make it easier to get the Riposte trigger for LJ, but the soulstone investment just didn’t work out in its favour. If I didn’t have a high Mask in hand then I’d need to burn 2 soulstones (one for the +1-3 Df, one for the mask) to reliably get Riposte to work, and while 3/4/6 is a great damage spread, it’s just not worth the investment. That said, I can’t say I regreted taking the Thalarian Stone itself. It gave LJ a measure of protection against particularly nasty attacks - I’m thinking specifically of McMourning using Rancid Transplant, combined with Plastic Surgery for extra poison followed by Expunge. I also wound up eventually discarding it to (0) heal 2Dg later in the game, which in my mind is a even trade considering the same Soulstone for the upgrade could have instead been used for a damage prevention flip. Sure I could have gotten a similar effect with LJ’s (0) Juggernaught but it isn’t quite as reliable, since it needs a discard and you may need to cheat the healing flip to at least a moderate.

As for Lady Justice’s other upgrades (Implacable, Last Stand and Justice Unleashed), the best I can say is that they’re perfectly balanced. They’re just 1SS each, none of them feel like duds and they’re all situationally useful.

I must admit, I was pretty happy with the paint splatter on this guy. :)

Judge is growing on me, but very slowly. There’s no doubt that he’s a good model – he’s tough, with good melee output and a potentially very useful push effect in Stand for Judgement (the only let down being that it’s a projectile attack). The latter in particular makes him great for pushing Lady Justice further up the field, who in turn can then push Judge and other Guild Marshalls even further with her Last Stand Upgrade. All in all, he’s just a really solid guy. In fact the only reason Judge underperformed in this game was because he was given Slow by the Peacekeeper, then killed a few turns later by the Executioner to prevent Kyle scoring Distract! My dislike of him, though, is probably pure prejudice. He wasn't that interesting in the last edition and he's closely associated with Lady Justice, both of which work against him in ways that have nothing to do with his viability on the table!

While it does seem to be changing, people in the past have underestimated the value of Death Marshalls. It’s not surprising – for 6SS their offensive and defensive stats seem decent, but not exactly amazing. But I think their real value comes from two things – Finish the Job and Pine Box. Finish the Job is practically a guaranteed scheme marker, which makes them great for hunting enemy flankers, placing markers themselves and should they die, placing one last scheme marker wherever you conveniently left them. Pine box, I’ve decided, is Solid Gold. As a melee attack you can use it on a charge and if you win the duel, you bury the target for a turn. It’s also one of those attacks in the Guild faction that’s resisted against Wp, so your opponent is unlikely to have taken Wp benefits going into a game against your Guild crew.

So in light of all that, I think Death Marshalls work as both flanking minions and as a second-line minions. In the latter case they'd follow up right behind Lady Justice and the other heavy hitters, to make the interact actions and/or pine box whatever might be causing trouble. Front line is definitely not their forte though - they just seem to lack the resiliance to stand toe to toe with other dedicated damage dealers. 

While I do appreciate the new plastic Death Marshalls, you just can't beat the Nightmare version. ;)

This was my second game using an Executioner (the first being with Lucius during the beta), and he indeed did exactly what I expected him to do. His reduced mobility was evident at the beginning of the game, but between close deployment and an Austringer to push him into charge range of the Peacekeeper he was able to make his presence known from turn 1. So as far as melee beatsticks go, he’s pretty solid. But what pushed him over the edge for me was his ability to eat enemy scheme markers for extra movement or attacks! From memory the Guild don’t have a lot of those sorts of options, so I think in any game where you expect to see a lot of enemy scheme markers (especially if Spring the Trap or Plant Explosives are possible schemes), the Executioner should be a great choice.

While I’d disagree that Austringers should be taken in every Guild crew (Perdita doesn’t usually need them IMO), they’re still excellent. The shooting attack is good enough, but I’ve found myself using Deliver Orders more and more often. The 2” push plus interact action make it a really versatile Action. In this game (as per above) he pushed the Executioner into charge range of the Peacekeeper, a Death Marshall out of melee to remove an enemy scheme marker and the Executioner … somewhere. Probably into melee with Sebastian actually. In any case, the Austringer is definitely a VERY versatile minion.

(Insert obligatory Witchling pic)

I’ve said it before and I’ll probably keep saying it all year, but Witchling Stalkers should be in almost every Guild Crew. And yes, I know that may sound a bit hypocritical after what I just said about Austringers! ;) Dispel Magic alone is worth the 5SS, but getting a solid melee minion as well is icing on the cake. In this game they first played a support role, removing Poison as needed before moving to a more offensive role as it charged in to help kill the Nurse and Witchling Stalker. This sort of approach has worked very well for me so far, although I suspect that will change once I finally use them with their “native” Master, Sonnia.

I won't say too much about the Scales of Justice. I wanted to use him this game for his +1Wp, which synergises nicely with Pine-boxing Death Marshalls. Unfortunately I just didn't have the room, after taking everything else I wanted to use. I have heard he's gotten a bad rep from other LJ players though, presumably because his card draw and Wp buff are either too tricky to use or two situational to be worth the investment. If I was facing Neverborn or Ressers though, I feel like the Wp buff would be worth while. So Pine Boxing aside, perhaps it's one of those models that's more worth while against certain factions?

Nooo! Why won't you take me?!

Final Impressions

The more I play Guild, the more I’ve come to enjoy the playstyle they tend to offer. Joel Henry has talked about this at great length in his own blog but basically, their reduced mobility compared to some other factions is made up for by easy access to Finish the Job (practically a free AP, and a great ability in itself) and their impressive killing power that inevitably tilts the game in your favour as you remove key pieces in your opponent’s crew. But one of my favourite aspects is the amazing synergy that you find within each crew. Most crews in the game offer some degree of synergy – it’s a big part of what makes Malifaux such a great game. But while that synergy tends to be relatively specific in other Factions (eg. Pandora and Wp duels, Kirai and Spirits, etc.), with the Guild it’s much more prevalent and much less specific. For instance a Witchling Stalker can remove conditions from anyone in your crew, the Austringer’s Deliver Orders is an easy way to move your own models around and most of the Ortega Family models don’t need other Family models for their respective buffs and benefits to work.

Having said all that, Lady Justice seems to buck this trend. There’s no doubt that her killing power is very Guild-like and with 14 wounds plus an easy heal, she’s the very definition of a “Tank” model in Malifaux.  She has some nice tricks that aren’t damage-focused like With Me and Restore Natural Order but much like the Viktorias, killing is really all she does. So at least for me, when it comes down to it, Lady Justice lacks the strong mutual synergies that seem to define the other Guild Masters. There’s been talk about her depth coming from the rest of her crew but then again, can’t I get that same depth by taking the same models with a different Master?

As I said at the beginning of this post, Lady Justice is one of those Masters that didn’t excite me in Malifaux v1.5, and that I was sceptical about in M2E. There’s no doubt that she’s improved and her viability in the game is definitely not something I’d question. I’ll admit it was fun playing her, but only insofar as it was fun playing Malifaux. So when it comes down to it, Lady Justice just doesn’t offer the depth I like to see in my Masters and if I want a Guild melee beater, I’d much prefer McMourning.

Till next time,


Adrian

Monday 3 March 2014

Cake v Christmas – Mei Feng


So as of the last blog post, my Cancon tournament games were finished with. But that wasn’t actually the end of my adventures in Cancon. One of my fellow competitors and a past opponent challenged me to a game on the Monday morning before we made our way back to our respective home towns. Both Jose and I have an appreciation for oddball, themed crews, so we both decided to take the opportunity to play a match with two such crews of ours. Jose brought his Christmas-themed Rasputina crew while I took my Cake-themed Mei Feng crew. What followed was a highly entertaining game as two ideologies very out of place in Malifaux, Cake vs Christmas, fought it out for supremacy!

One other thing - most of the pictures from todays blog were taken by Jose who was kind enough to email them to me after the game. So a big thanks to Jose, without whom you'd be looking at much grainier pictures taken with my mobile. ;)

Might want to skip today's blog post if you're on a diet...

The Paint Job

The origin of my Mei Feng crew begins way back during the playtest for Malifaux Book 4 – Storm of Shadows. As beta testers we were occasionally leaked art for upcoming releases and one of these, of course, was Mei Feng. Looking at the art, with her jumping off/into a pile of railway sleepers, the first thing I thought was “gee, she looks like she should be jumping out of a cake!”. Odd, I know, but there you go. I left it at that for a few months. Being primarily a Neverborn player at the time I instead put my Gencon money toward Jakob Lynch and I figured that maybe, one day, my dreams of a Mei Feng Cake Crew would be realised. Then came Ramses’ Christmas Exchange – an awesome event where you exchange random gifts with people from across the world for a bit of Christmas cheer.

What's the point of a selfie, if you can't look ridiculous?

Yep – my giftee, John Mickleburgh of Malifools fame got me a whole Mei Feng crew! After that I had no choice – Mei Feng moved to the top of the paint list and I went about ordering some dollhouse cakes through ebay. They were not the right scale for 28mm, but the oversized baked goods worked nevertheless. ;) After the Viktorias, this was also the second crew I didn’t paint pink! I guess I just felt like a different challenge to just pink, and on the whole I feel it worked out quite nicely. Let’s be honest though, the paint job is incidental – it’s the cake that makes the crew. ;)


The Advice

Thanks to most of my tine having been focussed on preparing and researching my Cancon Tournament crews, I actually had almost no time to figure out how M2E Mei Feng worked. At the time of writing this there doesn't seem to be much discussion of her on the Pull My Finger wiki or on the Blogs. Still, here's a few decent threads I found;


The Table after turn 1. Big thanks to Aetherworks for lending us the terrain

The Game

50SS, Standard Deployment
Strategy: Reconnoiter                   
Schemes:
- Plant Explosives
- Distract
- Protect Territory
- Assassinate
- Line in the Sand

Feeling hungry yet?

The List

Mei Feng
- Vapormancy
- Seismic Claws
- Price of Progress
Joss
- Bleeding Edge Tech
3x Rail Workers
2x Metal Gamin
Rail Golem

With Reconnoiter as the strategy and Mei Feng’s ability to bounce between constructs with Railwalker, I decided to go with a good complement of cheap constructs, supported by Joss and the Rail Golem for some additional hitting power. Seismic Claws and Vapormancy were taken to give Mei Feng all her great triggers, while the card draw from Price of Progress seemed like a smart move. Joss got Bleeding Edge Tech because, well it’s just awesome when your crew is full of armoured, Hard to Kill constructs!

For schemes, I chose Distract and Protect Territory

Jose's Christmas Crew. My only criticism is that I hadn't thought of it first.

Opponent’s List

Rasputina
- Arcane Reservoir
- Cold Nights
- December’s Pawn
Blessed of December
- Imbued Energies
3x Ice Gamin
2x Silent Ones
Ice Golem

Jose hadn't played with Rasputina since M2E hit so he was in much the same boat as me. Also like me, he basically went with the models he had for his themed crew, plus Cold Nights so he could place his Christmas Tree Ice Pillars everywhere.  

Jose went with Distract and Plant Explosives.

The Golems eye each other off from behind the building. 

Result

The Rail Golem, a Rail Worker and a Metal Gamin set up on one flank while the rest of my crew set up on the other flank. Jose’s crew was roughly spread across his deployment zone, with the Ice Golem and Ice Gamin facing off against the Rail Golem while the Blessed of December and Silent Ones sat across from Mei Feng and friends.

The first turn started as usual, with both crews advancing cautiously. Thanks to Railwalker, Mei was able to push up and charge the Blessed of December, though she didn’t finish it off until turn 2. The Rail Golem faced off against the Ice Golem and two Ice Gamin. A Red Joker damage flip by both ensured their mutual destruction as well as that of the two Ice Gamin, thanks to thanks to Explosive Demise. 


Hot Golem-on-Golem action.

On the other flank I fell hook, line and sinker for his Plant explosives as my crew converged on his Silent ones and within 3” of a scheme marker I’d foolishly assumed was for Line in the Sand. After dealing with the Blessed of December and retreating into cover in the previous turn, Mei Feng charged Rasputina to at least keep her from doing any damage to my own crew. Rasputina’s Sub Zero Trigger prevented Mei from getting more than one attack off each turn, but was killed nevertheless thanks to a few focused Jackhammer Kicks. The Rail Workers and particularly Joss finished off the Silent ones, while a Metal Gamin bested the last Ice Gamin, thanks in no small part to its Magnetism attack.

Mei prepares to kick Raspy in the face really hard...once per turn. 

Both Jose and I distracted enough models over the game to claim full VPs for our respective Distract schemes, and some scheme marker placement by a surviving Metal Gamin and a Railworker who’d hidden himself out on the Rail Golem’s flank ensured that I’d get full VPs for Protect Territory. With me claiming full VPs for Reconnoiter, the game ended 10-6 in my favour.

Joss finds his way blocked by a pile of god damn Christmas trees

Post-game Thoughts

When I talked about Perdita, one thing I mentioned was how mobile she could be with Relocate in a family-heavy crew. Well, Mei Feng seems able to do it even better with her Railwalker action. With a network of constructs or scrap counters for her to jump between, she should be quite capable of jumping from one part of the fight to another, dealing with threats as needed or potentially even just playing the hit & run game, spending her last AP to get out of melee with a Railwalk. It necessitates the use of a crew of cheap constructs, but with it she can quickly move up the field and engage anyone threatening her crew.
Aside from needing a bunch of moderate/high cards to reliably Railwalk along more than a few points, probably the biggest problem with Rail Walker is the risk of putting Mei Feng too far out for the crew to support her. Her Armour, Leap Aside trigger and high Df gives her some good resilience, but it’s definitely not enough to take on the enemy crew on her own. I saw it happen in a game against Mei Feng a few months back, where my opponent threw her into the middle of my Pandora crew… and promptly died to the multiple layers of Misery-inflicted wounds!

While there’s no doubt that Mei Feng is a melee-oriented Master, her attacks still don’t come close to the raw damage output of other Melee Masters like the Viktorias  or Lilith. Instead, Mei seems to focus a lot more on crew synergy, both in improving her own potential and buffing the rest of her crew. She needs a crew of friendly constructs to move around with Railwalker, while her Tiger’s Claw attacks get much more effective if you’ve put Burning on the target before she activates. In turn, Intimidating Pose (for Armour) and Vent Steam (for a better version of soft cover) both help boost her crew’s resilience.

On top of this, Mei’s upgrades grant further layers to her playstyle. Thunderous Smash and Seismic Claws are both “Crowd Control” upgrades, in terms of pushing or killing multiple enemy models. Both grant you some great push effects, with the former also stripping scheme markers (a favourite trick of mine) and the latter also granting additional attacks against other models. The extra attacks from Seismic Claws also helps ramp up her damage output, so I can see it being a regular inclusion in most games. I feel like the card draw/healing from Price of Progress and the Blast effects from Scalding Breath both mark her as a model that favours killing multiple small models over single expensive ones.


I’ve used M2E Rail Workers before, specifically in conjunction with Jakob Lynch as cheap objective grabbers. In this game they once again did not disappoint. For 5SS they proved to be excellent minions, surprisingly resilient, able to dish out some impressive damage in conjunction with their (0) Implacable action and cheap enough to send up a flank to claim objectives. The latter is exactly what I did with the one on the right flank. While the Rail Golem engaged in some mutually assured destruction, my Rail Worker snuck up the flank to put down two scheme markers and help achieve Protect Territory.

I hadn’t really looked at Metal Gamin before this game, and for the most part they performed as expected. They’re a cheap, tough construct – all handy traits for a Mei Feng crew. Metal Protection was good for buffing other models (it didn't occur to me to put it on themselves), but the 3” range made it tricky to use when the rest of the crew (or specifically, the Rail Golem) was trying to advance up the table. The real surprise however, was the (0) action Magnetism. How in the world did this end up with a Ca of 8? Against a construct-heavy crew (like Rasputina’s) it’s a very effective armour-ignoring 2 dg, and it’s what gave my metal gamin the edge against his opposing Ice Gamin. It feels a little off that a supposedly defensive construct happens to have such an effective attack action vs constructs, but there you go. Unless it gets errata’d it’s definitely a great reason to take a metal gamin.

Joss is… impressive. He didn’t feel particularly fast but he proved to be quite resilient and damn, he was just nasty in melee! The damage spread is decent, but being able to ignore Armour, Hard to Wound, Hard to Kill AND Df triggers make those attacks very effective. Rasputina’s crew (actually Arcanists in general) tend to use a lot of such defensive tricks, so being able to ignore almost all of them ensured that he was able to effectively deal with whatever models he got into melee with. It was great to get around the Silent One’s Frozen Statue trigger, although if it hadn’t been for the Frozen Pillar markers Rasputina put up everywhere, he would have ignored her Sub Zero trigger and made short work of Raspy.

Late to the party, Kang instead went out drinking with his also ignored buddies, Emberling and Willie. 

The alternative to taking Joss would have been Kang. To be honest I think they both compare pretty well. I like Kang’s push trigger on his shovel and he’s got some auras that synergise well with the rest of the crew. Thing is, Joss drops scrap when he kills models (handy for Railwalker) and he gives you access to the Bleeding Edge Tech upgrade (specifically the Regeneration +1 Aura), which is great when most of your crew happens to have Hard to Kill! That last part was the main factor in taking Joss over Kang, and I definitely didn’t regret the decision.

No, it's not a Khador Warjack with the smoke stacks replaced by a tray of baked goods. Honest.

While the mutually assured destruction of the Ice Golem and two Gamin was well worth the loss of the Rail Golem, he still felt a little underutilised in this game. Before the game I figured I should get as many burning counters on the Rail Golem as possible. That way I could take advantage of the Momentum trigger to recast Locomotion multiple times for extra movement and attacks. In this case I chose to hit it with a Rail Worker but both Kaeris and the Firestarter would work better, since they can add burning to it without dealing damage. After seeing it in action however, the limiting factor was not the Burning, but the tomes to trigger Momentum. Ignoring any high tomes (because they’re usually better used for something else), in each turn I was lucky to have more than one tome in hand to get the trigger, which translates to only needing two burning counters in any given turn, maybe three if I’m lucky enough to flip or cheat a second tome.  Given that its Redline trigger on the attack also adds Burning, building a crew around adding burning to the Rail Golem doesn’t seem that necessary. The only other advantage to having lots of burning would be the Vent Boiler action, but I’m not convinced that’s enough to design a crew specifically around supporting the Rail golem in that way.

Much like Kang and Joss, the alternative to the Rail Golem would have been Howard Langston. If it wasn’t for me wanting to put my Cake Golem model on the table, I actually would have chosen Howard instead. Locomotion gives the Rail Golem more potential for additional attacks/movement, but it inevitably costs a few decent cards to do so. By comparison, Howard’s Nimble and Flurry gives him a few additional AP much more reliably. That, and Ml 7 on his Executioner Claws feels more threatening than The Rail Golem’s Ml 5 with a positive to the attack flip. So I guess the value of taking the Rail Golem over Howard really comes to how many extra AP you can get out of Locomotion.

Just in case you didn't get enough Cake Golem action.

Final Impressions

It’s always nice to see two painted crews playing against each other, but it’s really something else when they also happen to have ridiculous themes as well! I have to hand it to Jose, he makes a great crew and I loved facing it from across the table. Hopefully I’ll get the chance to play him again some day, although I’ll need to bring something at least as fun as the Cake Crew to face him with. ;)

Overall, I definitely enjoyed using Mei's crew. Railwalker together with her various push effects adds some nice tactical depth to her, plus her preference for a crew of cheap construct minions appeals to me. The only other Arcanist Master I’ve played this year is Marcus and at this stage, I can’t say for sure which I prefer. Mei Feng has a well-defined niche with her crew synergy and crowd control, but Marcus is more like a blank slate – completely adaptable from turn to turn. That said, Marcus isn’t the underdog that initially drew me to him all those years ago and to be honest, I like seeing my Cake Crew on the table a lot more than the old beast models I have for my Marcus crew. So for now Mei Feng is winning but honestly, it may just take some freshly painted (and themed!) beasts to bring my attention back to Marcus. ;) The Wild Card, of course is that other Arcanist Melee Master – Toni Ironsides. But that’s for another blog…

Till next time,


Adrian