Monday 24 February 2014

Short update (and Radioactive man!)


Hey all,

It's been almost two weeks since my last post so I thought I should give a quick update!

Things have been a little slow for the Rainbow Challenge. Various other responsibilities have meant I've only played one game of Malifaux this month (Lady Justice). However with 10 Masters played in January my poor performance in February sort of evens out. So for now at least, I'm still confident I'll be able to play a game with every Master before the end of the year. 

Fortunately, I'm on track with my painting! Thus far I've finished my McCabe crew and I'm halfway through completing Sonnia Cridd, which keeps me well within my aim of doing two crews per month. 

The pink is expected, but what's with the sticks? ;) 

Then we get to the spanner that's been thrown into the works. Tomorrow I'm getting Radioactive Iodine treatment to finally sort out a hyperactive thyroid (Graves Disease - I'm sure you don't really care though!). What it means is that I'll be somewhat radioactive for a few days, and thus will need to avoid prolonged contact with other people! So Malifaux games are out of the question but prolonged isolation does have one advantage - prolonged painting time. ;)

Anyway, this means that I should be able to not only churn out a few painted crews, but get up to date with my blog posts as well. So unless this treatment makes me rather ill, stay tuned! 

Later,

Adrian

Tuesday 11 February 2014

Tea Time with McMourning

For my third and final game at the Cancon Tournament I was sitting on the top table, having decided to go with McMourning. Unlike the other Masters I’d used over the weekend, I’d never actually played McMourning before in any capacity. To make things even more interesting my opponent Todd was using Kaeris – a Master I’d barely even looked at during the Beta. So with my McMourning knowledge limited to a study of the cards and a few forum threads, and my Kaeris Knowledge being even less, I was set for an interesting game!


The Paint Job                    

I was actually struggling to think up a suitably ridiculous paint scheme for McMourning, so I asked for ideas from the Wyrd forums. In the end, I went with a Tea party theme! Taking a leaf from my Mei Feng crew (don’t worry, that’s coming next post), I ordered a dollhouse-sized tea set off ebay and went about preparing the models. As it turns out the tea set was more out of scale than I’d expected it to be, but it kind of adds to the silliness of it so I’m pretty happy with the result!


The Advice

I’m sure there’s a blog somewhere out there that discusses M2E McMourning but at the moment, I just can’t find it. :( In the meantime, here’s some links from the Wyrd Forum;


The Game

45SS, Standard Deployment
Strategy: Reconnoiter
Schemes:
- Make Them Suffer
- Vendetta
- Protect Territory
- Breakthrough
- Line in the Sand

God damn blurry camera. :(

The List

McMourning (Guild)
- On the Clock
- Plastic Surgery
- Evidence Tampering
Sebastian
- Unknowable Pain
Nurse
Austringer
Witchling Stalker
2x Guild Guard
2x Guild Hounds

Being Reconnoiter I tried to go for quantity over quality. The Guild Hounds (who are minons!) and Guild Guard are reflective of that, and I included an Austringer as much for its Deliver Orders action as the shooting it offers. Sebastian had Unknowable pain to help further enable some mobility within the crew and I took the Witchling Stalker both to remove conditions (a good idea with all the burning around, as it turned out) and support the Nurse.
McMourning stuck with his personal upgrades. On the Clock was essential if I wanted to take his Resser friends, and the other two helped improve his mobility, through either pushes from the poison condition or the 6” Scalpel Sling.

For schemes, I chose Breakthrough and Make them Suffer.

Todd's Arcanists for the weekend

Opponent’s List

Kaeris
- Grab & Drop
- Arcane Reservoir
Firestarter
- Imbued Energies
- Warding Runes
Mechanical Rider
- Imbued Energies
2x Fire Gamin
2x Rail Workers

For Schemes he went with Breakthrough and Make them Suffer.


Result

During deployment I placed McMourning and the Nurse on the flank opposite the Mech Rider and Firestarter, while the rest of my crew lined up on the other flank against Kaeris and her minions. Turn 1 mostly consisted of both crews advancing. The Nurse loaded McMourning up with poison +4, who then proceeded to sprint straight at the Mech Rider and damage it with a (0) Scalpel Sling action. Over the next few turns McMourning took down both the Mech Rider and Firestarter while the FIrestarter did it’s best to pile Burning onto the good Doctor. A timely Dispel Magic from the Witchling Stalker kept McMourning from succumbing to the burning, and after finishing off the the firestarter in Turn 4 he had just enough time to advance into the enemy deployment zone and place some breakthrough markers.

On the other flank, a Guild Hound held Kaeris up for a turn (mainly to prevent her moving to assist the Mech Rider and Firestarter), and a Turn 3 charge by Sebastian into Kaeris’s minions ended with a dead Sebastian for no kills. The rest of the crew held off Kaeris and her minions for the rest of the game, with the highlights being the Nurse helping the Guild Guard seriously wound Kaeris, then paralysing & healing her for a turn to further hold her up. The Witchling Stalker was tackled by the two fire gamin, dieing in the process but taking out one of the Gamin in the process. Thanks to McMourning’s killing spree and a Guild Hound hidden in one of my own table quarters, I achieved full points for Reconnoiter while denying 2-4 VP from my opponent (can’t remember how many VPs he scored for the Strategy). The game ended in my favour, having achieved 7VP (no VPs for Make them Suffer) to 3-5VP (having gotten full or near-full points for Make them Suffer).

This also meant that I came first overall for the tournament, so I was pretty pleased with that! :)


Post-game Thoughts

By going after the Firestarter and Mech Rider on the Flank, I don’t feel as though I used McMourning to his fullest potential this game. There was no chance to really abuse his poison mechanic and he was never close enough to his own crew to move them around or buff them with his On the Clock upgrade. That said, I knew I needed to kill that Mech Rider as soon as possible before it started dropping scheme markers and Arachnids in my deployment zone, and McMourning was the only model in my crew whom I felt would achieve that. Fortunately my gamble worked – McMourning was lethal enough to take down both the Mech Rider and Firestarter, and still had time to place enough scheme markers to achieve my Breakthrough.

At least in theory (and bearing in mind I never got to use them), McMourning’s support tricks have a lot of appeal. While it comes at a cost of Poison +2, the (0) action Injection should really help push your crew into position and put out scheme markers. The On the Clock upgrade also helps with this, allowing you to effectively trade McMourning’s AP for (1) interacts on other friendly models. Also from On the Clock is the Spot Weakness spell to let friendly models ignore Armour and Hard to Wound, greatly improving their killing power against certain crews. I would have loved to use any of these actions, the game just didn’t allow for it so at least for the moment, I can only dream of what could have been. ;)

So while he made no use of his crew support abilities, McMourning’s resilience and killing power was definitely put to the test in this game. On paper it seems merely “okay”, with a 2/3/6 damage output. However poison +1 or more from the infect trigger plus the Catalyst trigger adds at least another 1 damage (so 3/4/7), not to mention it ignores armour and Hard to wound (though I note it was no use in this particular game) AND you get up to four attacks each turn from the extra (0) Scalpel Sling from the Evidence Tampering upgrade. A (0) Expunge can also finish off a model if you’ve put enough poison on him so while he might not have the raw damage output of the likes of Lady Justice or Lilith, he’s still a force to be reckoned with in melee.

Resiliance wise, McMourning was definitely not easy to take down. 14 wounds and Hard to wound more than made up for his paltry Df 5, and the consistent Healing from Organ Donor helps him last quite a while. His biggest weakness is definitely his Wp 5 (something that thankfully never came into play in this game). It makes him quite vulnerable to Wp-based attacks, although the condition removal from a Witchling Stalker’s Dispel Magic should go some way in making up for that.

For Guild-McMourning’s upgrades, it’s very difficult to go past his own ones – they’re all so good.  On the Clock is essential if you want to take Nurses (and there’s no reason not to), not to mention the support elements it adds, above. Evidence Tampering can seriously mess with your opponent’s scheme marker-related objectives (since he turns enemy markers within 4” into friendly ones at the end of game) and the extra, 6” attack with Scalpel Slingin’ adds to his mobility and reach.  The poison-fueled 5” push from Plastic Surgery  can also add to McMourning’s mobility (another reason to take the Nurse and load McMourning up with Poison), and while the Skin Graft ability has no immediate use outside the Resser faction, it does synergise with the Judge and his anti-undead Bound by Law attack.

It’s actually a pretty tough ask to consider what, if anything, McMourning could replace his three upgrades with. If you plan to use his other (0) actions a lot it might be worth replacing Evidence Tampering with the Badge of Office for some added resilience. Mind you, he’s already quite tough, so even against an assassinate scheme it might be unnecessary.

I really made a mess of Sebastian in this game. I only charged him up unsupported was because I needed him to start claiming VPs for Make Them Suffer, a scheme that in itself was a bad idea the moment I committed McMourning to killing a pair of non-minions. That move in itself was a bad idea but in retrospect, I really expected far more of Sebastian than I should have. For one, he’s a 7 soulstone model, which is quite cheap for a henchman so I really shouldn’t have expected him to tear chunks out of my opponents crew, Killjoy-style. At first, I also thought that I shouldn’t have been using him without the close support of McMourning (thus adding to the poison synergy of both). However looking back at his card, perhaps that’s not being fair to poor old Sebs. At least in theory (and assuming he survives to the end of turn), a single attack from Sebastian’s Bone Saw is going to deal 5/6/8 damage (2/3/4, plus Poison +1 from Infect, plus 2 Dg from Induction). Any additional poison you get on them translates to another 3 damage, thanks to Induction and then Catalyst forcing that damage to occur earlier. People rightly talk about how good Illuminated are, but Sebastian’s potential damage output actually exceeds what an Illuminated can do! Beyond that, he seems decently resilient but possibly a little slow, which really only means that unlike in my game, you need to ensure he’s got some support!

I’m undecided on Sebastian’s Unknowable Pain upgrade. It should be a good choice in the Resser faction since they’re almost entirely melee focused, but for the ranged-heavy Guild it felt unnecessary. In the crew I took there was nobody who really needed it. Guild Hounds were fast enough and the rest of the minions were more than happy to stay at range from the exploding Gamin and hard-hitting Rail Workers. However if I’d taken more melee-heavy models like the Executioner, Peacekeeper or Papa Loco, Unknowable pain would have been a better option.

I’m rapidly coming to the conclusion that a Witchling Stalker should be mandatory for almost all Guild crews. Condition removal is a powerful effect, and it definitely proved its value after stripping something like Burning +6 from McMourning. Had I the chance, I also could have used it in conjunction with a Nurse, Paralysing and Healing a friendly model with Take Your Meds, then stripping the paralyse condition with the Witchling Stalker. His damage output is certainly nothing to laugh at but when it comes down to it, he’s really only going to be charging models when there’s no immediate use for his Dispel Magic. Otherwise, I’d quite happily leave him in the back lines to keep him safe.

Oh yes, you want at least one of these in your crew. ;)

Speaking of which, the Nurse is another model I was not disappointed with this game. Her ability to easily load McMourning up with Poison for extra movement with Plastic Surgery is pretty good in itself, but her Take Your Meds action is incredibly useful, allowing you to heal your models (see the Witchling Stalker, above), boost your own models or neutralise your opponent’s models. In this game she put it to good use, paralysing Kaeris for a turn and boosting a Guild Guard’s damage output significantly. Had I the chance, I would have also liked to use the Downers trigger (Armour 2 and negative flips to all duels) in conjunction with McMourning’s Precise ability or Spot Weakness action, which basically allows you to ignore the armour you just gave to that model!

The Zombie Chihuahua was a model I tried to fit into the crew, but as a non-minion I couldn’t really find the space to justify its inclusion. In a Guild crew his Horrific Odor pulse is going to be more of a hinderance than a help, since you don’t want him near anyone but McMourning (the only model able to benefit from having Poison). However McMourning seems fast enough to leave the Chihuahua behind after the first turn, so it seems that the Nurse is a far better option for granting McMourning Poison. If you can get him into your enemies lines, then accelerate the poison with Sebastian’s Induction and Catalyst Auras he’d probably do well though. So while he might work, I’m not yet convinced that he’s an essential inclusion for Guild McMourning.

As for the rest of the crew, the Guild Guard surprised me with their cost effectiveness. I they did much more damage in melee that I expected them to (even without the Nurse) and their resilience kept them in the game long enough to keep Kaeris occupied. The Guild Hounds were typically fragile and while I didn’t get to use their (1) charge against models near scheme markers, the fact that they’re 3SS minions made them a great choice for Reconnoiter. As for the Austringer, he claimed a scalp or two with his ranged attack and used Deliver Orders to move Sebastian up, so he performed as well as I expected him to.

In terms of crew construction, I’m starting to see how your average Guild McMourning crew “should” go. After taking McMourning and his three personal upgrades, the first choices are undoubtably a Nurse and Witchling Stalker. After that it depends on the Strategy and Scheme pool. The Executioner, Peacekeeper, Judge and Sebastian would offer good killing power (especially with Spot Weakness from McMourning), while Unknowable Pain from Sebastian can get them moving and Take Your Meds/Drain Magic from the Nurse and Witchling Stalker can keep them healed up. Objective running would necessitate the use of Guild Guard and/or Death Marshalls. Taking super-fast models is less necessary since after all, McMourning use his Tactical actions to move them and/or place the required Scheme Markers for them.

Scheme Markers!

Final Impressions

I only have a vague idea on how McMourning  is supposed to work in Ressers, but while playing as the “Good Guys” (if you can even call the Guild that!) McMourning actually reminds me of how Marcus works. Both masters are incredibly flexible at what they do, capable of changing roles from turn to turn as the situation dictates. McMourning himself is resilient and very fast when he wants to be. He can support his crew extremely well (especially when it comes to scheme marker placement) and if needed, can leap into combat himself and deal a respectable amount of damage.

That flexibility is something that’s really drawing me to McMourning. Much like Marcus and Zoraida, I feel like there’s enough that you can do with him to keep him interesting for quite a while. The fact that you can also use McMourning as a Resser only adds to his “replayability”, so to speak. While I haven’t yet committed to playing every Duel Faction Master in both their Factions for the Rainbow Challenge, I am very tempted to try Resser McMourning, if only to see what new dynamics the Faction switch might add to his playstyle.

Till next time,


Adrian

Saturday 8 February 2014

All Your Base are Belong to Neverdita


For day two of Cancon I was playing in my second tournament for the weekend. The format was roughly the same as day one – Single Faction with one henchman led game and two Master led. This time I was planning to take Guild as my Faction, and the first Guild Master to tick off my list for the Rainbow Challenge was Perdita. Funnily enough, my opponent Mike was also taking Perdita. In four years of playing Malifaux I’ve NEVER faced a mirror match so I was interested to see how it played out, with Mikes “Good” Perdita against my “Neverdita”.

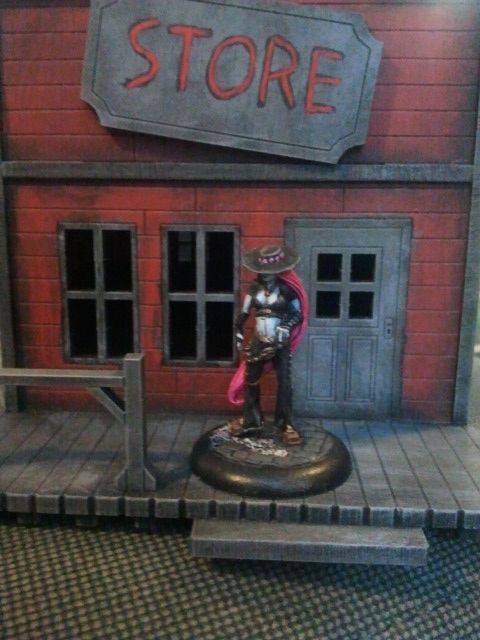
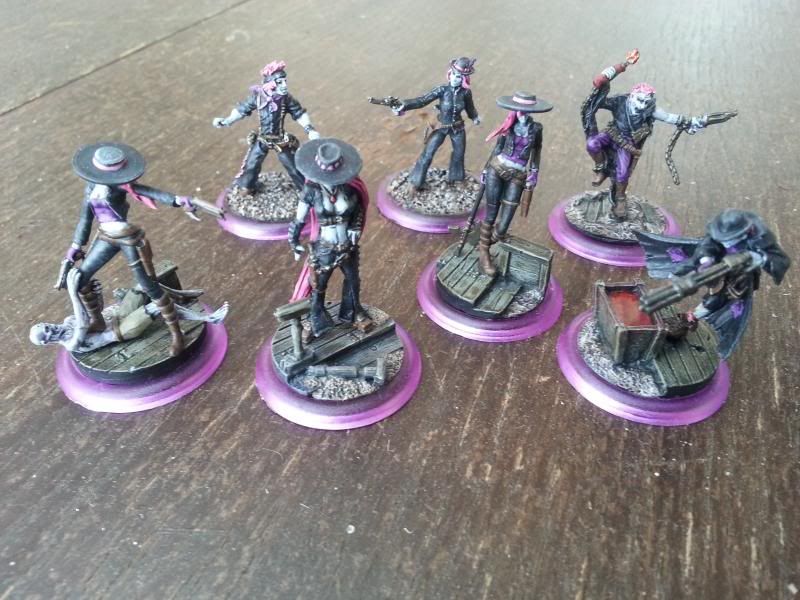
Gotta love those purple bases. :)

The Paint Job

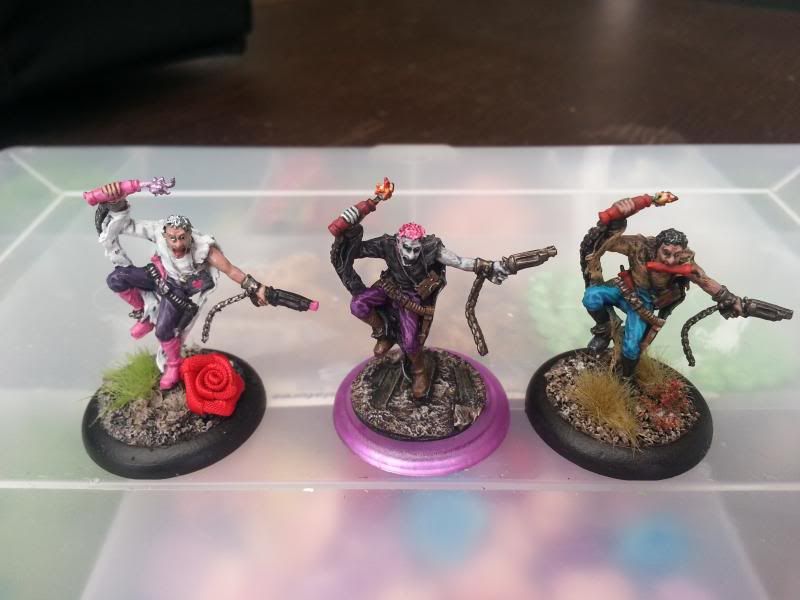
The inspiration for my Perdita crew originally came from Perdita’s new perspective on things after “The Event” (it’s in the fluff – look it up!) and in particular a comment attributed to Perdtia herself – “We’re all Monsters here”. The idea of a Neverborn version of Perdita really appealed, so I painted her crew up accordingly! Nino got a barrel extension (thanks Hats and Guns of Malifaux pack!) and Fransisco and Santiago were replaced with Franscesca (formerly Miss Sterious) and Santana, both limited edition plastic figures from Wyrd. Perdita was originally on a resin Victorian street base, but as I started painting the rest of the crew I transferred her over to the metal 
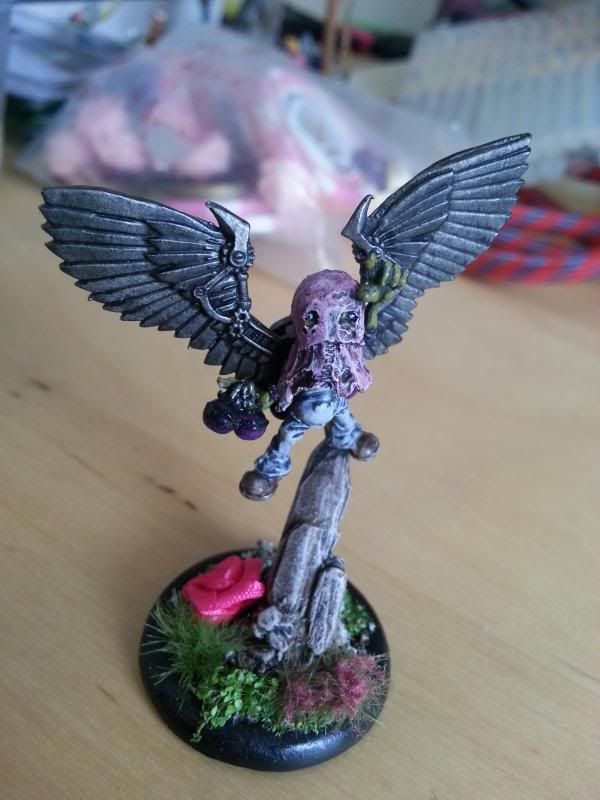
Wyrd Ghost Town inserts with purple translucent bases. The Brutal Effigy, having Neverborn origins and all, was a natural inclusion for the crew and when I get the chance I’ll be adding the Pale Rider and Avatar Perdita (who’s been sitting on my painting desk for months) as well.


The Advice

You know, there’s really not a lot of talk on Perdita around the internet. I’m guessing that means everyone thinks she’s pretty simple to use, or people are just taking more interest in the newer, flashier Masters! Still, here’s a few threads that might help;
http://wyrd-games.net/community/topic/98412-returning-player-with-perdita/

It is worth mentioning, however, the recently started Tale of Malifaux Bloggers. I wasn't able to get in on it myself (the Rainbow Challenge doesn;t really give me a chance to concentrate on a single crew this year!), but there is at least one guy doing Perdita (Dave/sssk again!). So while it's early days, he should have a few things to say about Perdita as the Tale progresses.

Dave's Intro page;
http://playitlikebeatdown.wordpress.com/2014/02/03/a-tale-of-malifaux-bloggers-tomb-intro/

...and the list of bloggers with their respective Masters;
http://wyrd-games.net/community/topic/98442-tale-of-malifaux-bloggers-tomb/


The Game

40SS, Corner Deployment
Strategy: Turf War
Schemes:
- Murder Protege
- Plant Explosives
- Bodyguard
- Assassinate
- Line in the Sand

Looking back, this crew actually feels pretty small, That's 40SS games for you.

The List

Perdita (aka Neverdita)
-Trick Shooting
- Os Veo
- Badge of Office
Fransisco
- Wade In
Santiago
Brutal Effigy
2x Pistolero de Latigos

For the most part I was just intent on sticking with the themed models for my Neverdita crew. So that meant no Austringers, Guild Hounds or other nonsense. In any case I wanted to avoid taking too few models in this crew, so rather than stick with just the original family I threw in the Brutal Effigy and two Pistolero de Latigos. In addition to being low-cost minions, all three offer some form of protection to the rest of the crew so I figured they’d prove useful when facing another high-damage Guild crew.
For upgrades, Fransisco got Wade in to help out in case he was picked for Murder Protégé, while Neverdita got Trick Shooting (to ignore cover), Os Veo (for Bullet Proof) and Badge of Office (for some Assasinate protection)

For schemes I chose Murder Protégé (announced, Judge) and Line in the Sand (announced).

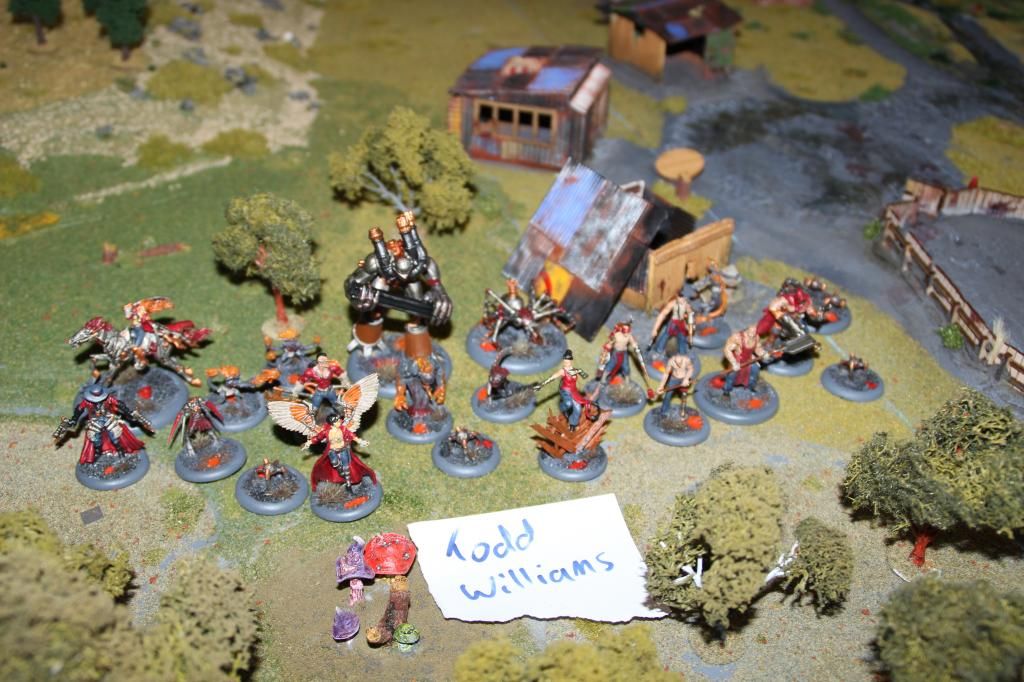
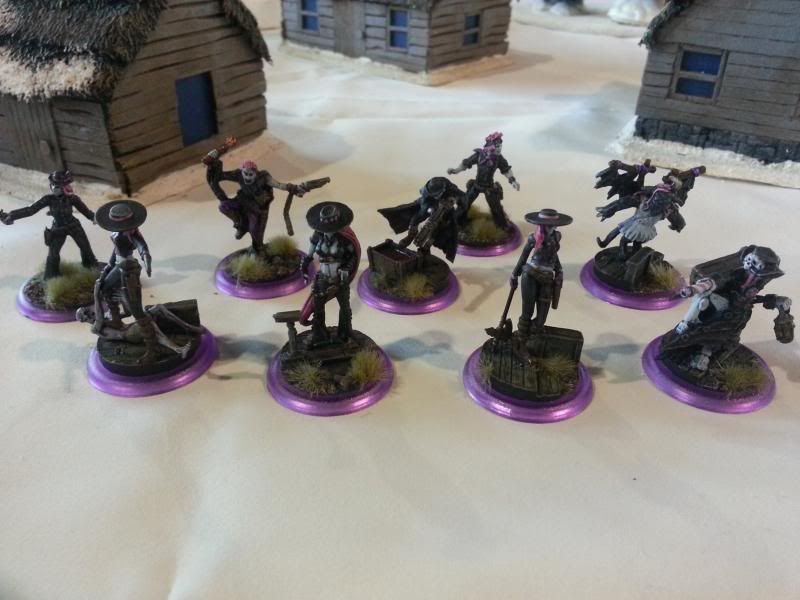
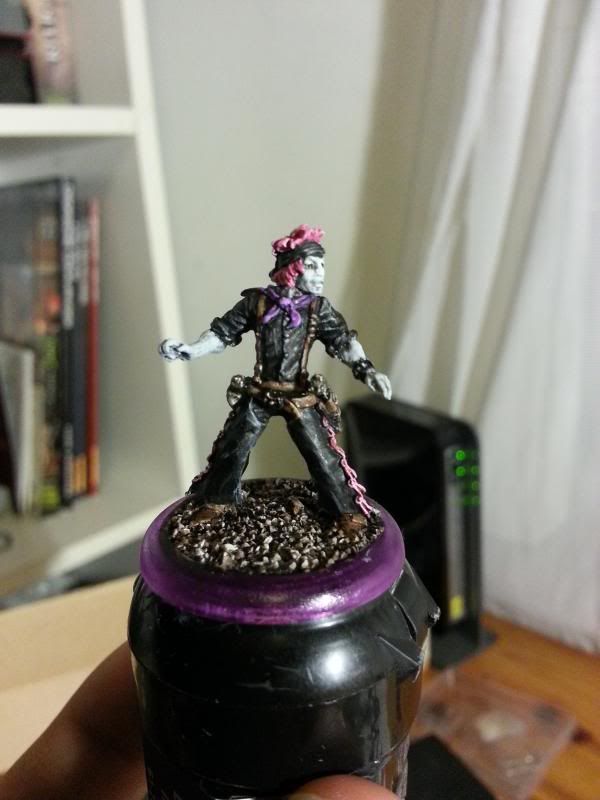
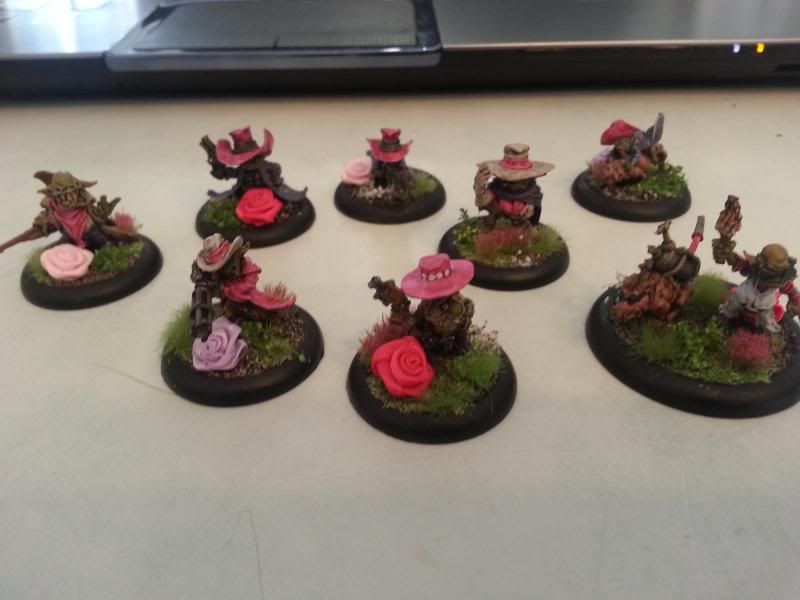
I don't have a pic of my opponent's crew, so here's another crew I painted for a friend!

Opponent’s List

Perdita
-Trick Shooting
- Os Veo
Fransisco
- Wade In
Judge
Nino
- Rapid Fire
Austringer
Enslaved Nephilim

Mike’s list was broadly the same as mine, except he replaced Santiago with Judge for more melee power, and replaced the Wave 2 models with Nino, the Austringer and an Enslaved Nephilim.

For Schemes Mike chose Murder Protégé (Announced, my Fransisco) and Bodyguard (his Fransisco).
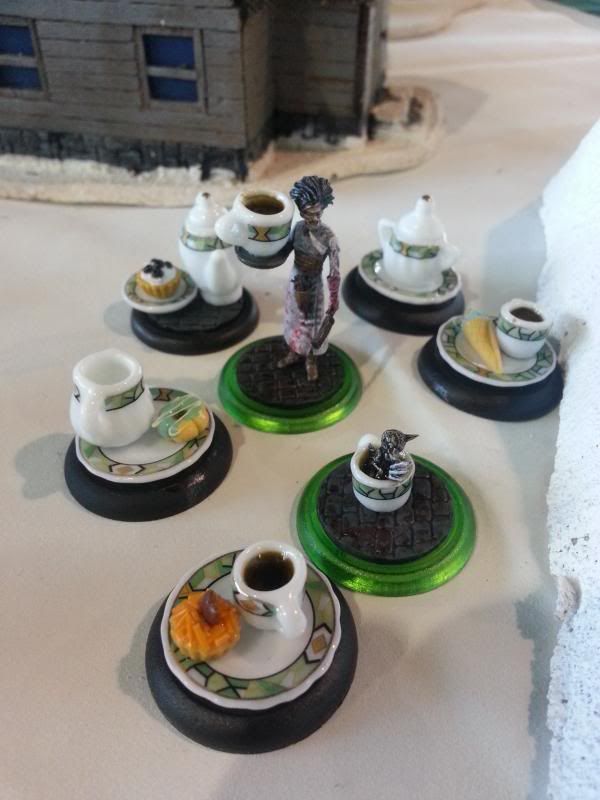
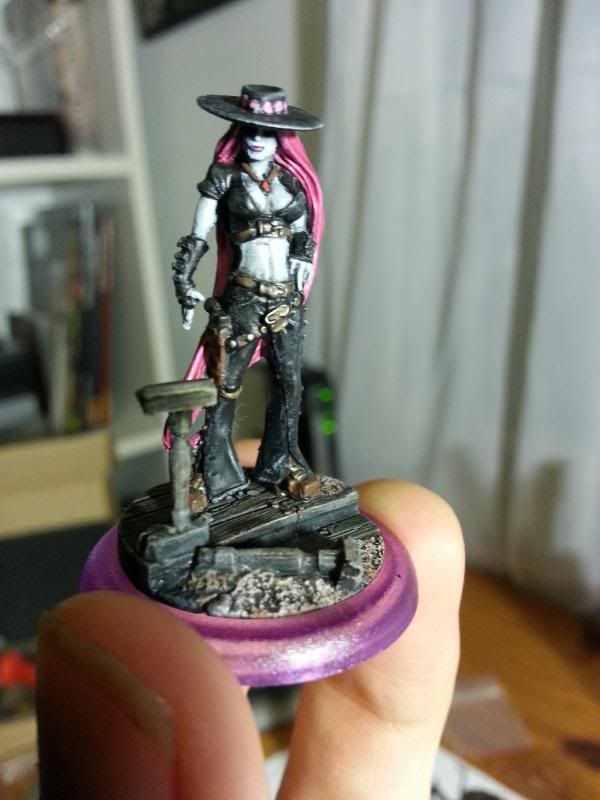
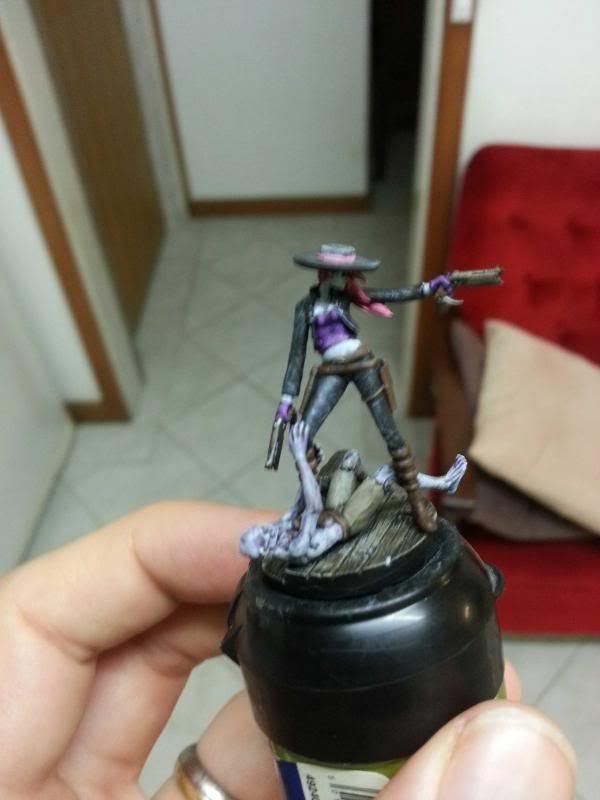
Neverdita rebased

Result

I started the game hiding my Fransisco up behind a building moving a Pistolero and Santiago up a flank in preparation to plant Line in the Sand Schemes later on (and also outside LoS of Nino). Thanks to Relocate and a well positioned Pistolero, Neverdita managed to push up far enough to shoot and kill Mike’s Austringer (who’d advanced earlier in the turn). Mike responded by advancing and shooting Neverdita with Perdita, only to miss and receive a quick draw trigger for her efforts, flipping a Red Joker for damage! Other than that, both crews cautiously advanced, keenly aware of the other crews shooting potential.
In turn 2 Nino started out with a Rapid Fire on Neverdita, only to miss to a Quick Draw trigger with Neverdita, once again, flipping the Red Joker for damage and killing him! After that, the game became a bit of a meat grinder as Neverdita most of the rest of the game killing Judge and taking Fransisco below half wounds, while Mike worked his way through my models to try and deny me Turf War. Between the Pistoleroes, Santiago and the Brutal effigy I also planted more than enough scheme markers for Line in the Sand. Late in turn 4 I pulled Fransico out of his hiding spot to help secure Turf War for the last VP, however my positioning was not great so when Mike claimed initative in Turn 5, a companioned activation betwee his Perdita and Fransisco allowed him to take my Fransisco down. Still, it was too little, too late and I managed to win the game by something like 10-5.

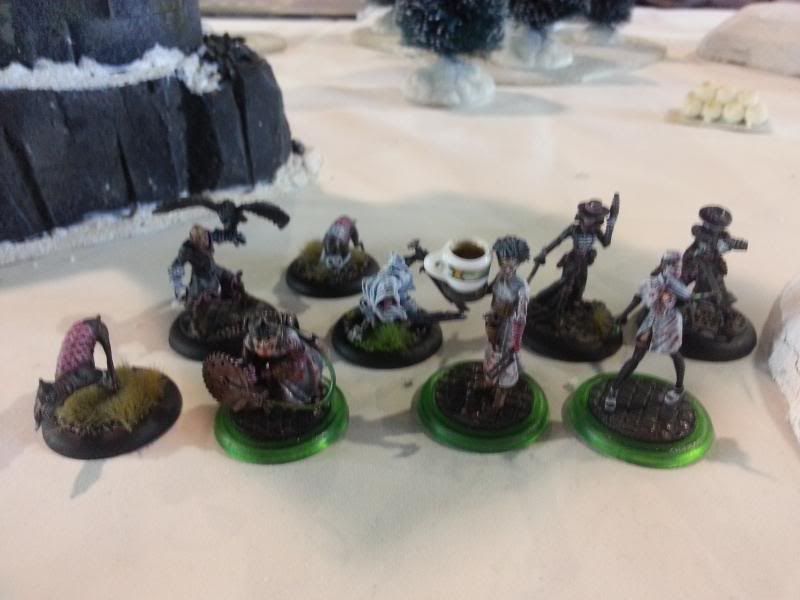
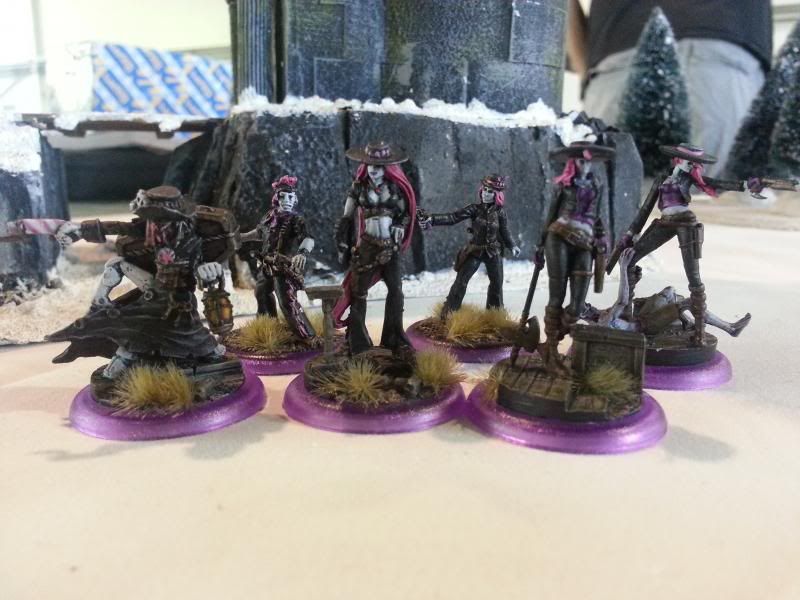
I'm just gonna bombard you with Neverdita pics today...

Post-game Thoughts

One of the great things about the Perdita mirror match is that I got to see how Mike’s playstyle and crew choices compared to mine. Whereas I took a family-heavy crew to benefit from their inherent synergies, Mike instead took the Austringer and Judge, the latter in particular to add some extra melee punch to an otherwise shooty crew. Mike himself is a big fan of Nino, however I dropped him in favour of Santiago – a model that Mike actually isn’t keen on. Nino would have been great to deny scheme marker placement with his Spotter ability but I wanted Santiago for his ability to shoot into melee (helping to make up for my relative lack of melee models) and because he was tough enough to help claim turf war. Well, that was the theory at least. It turns out even Santiago could stand up to some serious shooting from Mike’s Perdita! Personally though, I’m happy with my choice of crew compared to Mikes, the reasons for which I’ll discuss in more detail below.

I initially considered myself very lucky to kill Nino so quickly with the Red Joker damage flip on Quick Draw. However when I think about it, Nino’s days were numbered the moment he decided to Rapid Fire at Perdita. Thanks to Quick Draw you just can’t use shooting attacks against Perdita. Between Quick draw and possibly bulletproof (if she’s taken the requisite upgrade) she’s just too dangerous in a gun fight. If Nino hadn’t shot Perdita, I still would have used Perdita to kill him off in my own activation, it just would have meant fewer AP spent on targeting Judge in the early turns.

I really love how Perdita herself now plays. Her shooting has always been something to fear – Both her Critical Strike and Witched Bullet upgrades ensure that every hit is going to deal a good chunk of damage and while she’s a little more vulnerable in melee (thanks to the lack of anti-Ml defences), that extra Ram gives her the kind of damage output that starts to rival Lady Justice. But I think the hidden gem on Perdita’s card is Relocate. This ability gives her some amazing mobility, so long as you’re smart with the placement of your family models. In this game I was able to use Relocate to push up to a Pistolero and kill Mike’s Austringer early on. I’ve heard people say that Perdita doesn’t really need a lot of family models in her crew but honestly, I think Relocate is all the reason you need to fill out on Family. With a network of cheap family minions, you can have her racing around the board from turn to turn, hunting down those targets you need dead. At least in theory that should also make her pretty damn good at protecting a flank from those cheap, fast objective grabbers like Silurid or Necropunks.

In this game at least, I didn’t get a lot of use out of Perdita’s actions other than her Peacebringer. Being a Zoraida player I know how good Obey can be, what with the granting extra attacks to your damage dealers or repositioning them to claim/deny objectives. But without the required mask it’s not an easy spell to cast, plus Perdita’s already a serious damage dealer herself so it’s tougher to justify spending that AP and mask to let someone else take a hit. It’s funny, Obey is a large part of what makes Zoraida as good as she is, but stick it on Perdita and it’s suddenly relegated to being a situational, if useful, option.
Other than that, Faster ‘n You seems the kind of action to use in Turn 1 if Perdita couldn’t get the drop on the enemy (again, Relocate is awesome for that!). Heroes Gamble has the potential to be great, ditching your remaining bad cards for something hopefully better. The chance to cycle through you deck like that is definitely good, but it’s also competing with Perdita’s (0) actions from her Trick Shooting upgrade…

Santiago/Santana. Such an awesome sculpt. 

Speaking of which, at the moment I’d consider Trick Shooting almost essential – cover is usually a decent way to mitigate ranged attacks so being able to ignore that with a (0) action is just amazing. The fact that it comes with the (0) True Mark action to ignore Armour and Incorporeal is a great bonus, and really improves her damage potrential against a wide variety of targets. In this game I chose Os Veo for the Bullet Proof (I knew I’d be facing Guild, after all), but together with Stubborn this actually becomes a very flexible upgrade. Ressers and Neverborn both feature Wp-based attacks fairly heavily, Gremlins tend to have alot of shooting and Outcasts are varied enough to make this a solid good choice against them too, so that’s already five out of seven factions in which Os Veo is probably worth taking. I wouldn’t say that both of these upgrades are auto-includes, but they definitely aren’t bad choices.
So that leaves the possible third upgrade. At least in this game, Badge of Office was a natural choice with Assassinate as a scheme although it does feel as though it might be unnecessary otherwise. Perdita was never in any real danger this time around (thanks to Bullet Proof), but at least in theory Perdita’s ranged playstyle and mobility *should* keep her safe from getting killed. Mind you I might consider it against Ressers, simply because the Decaying Aura upgrade is so damn good for assassinating Masters.
As for what else to take, the two remaining options I’d consider are Vengance Bullet. Giving a one-off damage bonus on Perdita’s gun seems like a good option, so if she’s playing a Strategy or Scheme that will require her to take down a Henchman or Master, this would be the logical choice. Aura Ancestral seems, well, okay. I’d take it against Neverborn (where she’ll really want to protect her crew against Wp-based attacks), but otherwise it feels like the most situational Perdita-specific upgrade.

Diestro is an upgrade Mike and I debated – there’s no doubt that having a model that can wade into melee and let your shooters blast the engaged models to pieces is amazing. But thus far the 3SS cost has kept me away for it. Still, Mike believed it was well worth the cost and in fact, he would have given it to Fransisco if he was willing to drop the Enslaved Nephilim. At least for now I remain unconvinced. If I want to shoot into melee I’ve got Santiago for that job and as above, Perdita’s no slouch in melee either. I don’t doubt that the negative flip against shooting it provides is powerful but again, it comes with a very steep cost!

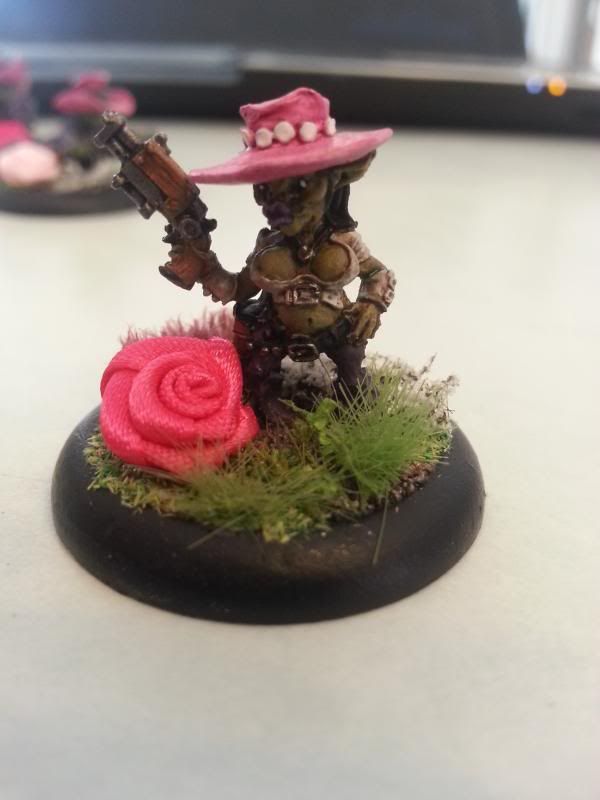
My biggest complaint with the Pistolero de Latigo is that their name used to be so much easier to say


So the Family Enforcers/Henchman I took this game were Santiago and Fransisco. Unfortunately Santiago didn’t get much of a chance to shine - he really should have been advancing along side Perdita instead of skulking around the flanks and thinking about scheme markers. As the announced target for Murder Protégé, Fransisco didn’t really do much either and when he did, putting him flurry range of the other Fransisco was definitely not the smart thing to do! Anyway, despite their respective performances these games I don’t doubt their value. I’ve used them both in previous games (a henchman-led game, in fact) and they’ve proven themselves pretty useful. Santiago himself can put out some serious damage with Trigger Happy, and as the token melee guy Fransisco seems almost mandatory in the shooter-heavy Perdita crew. Unfortunately (and thanks in no small part to his impressive El Mayor buff) it also makes him a big target for enemy attacks. It’s why I think his Wade In Upgrade to boost his resilience is so important. Lead Lined Coat for Armour +1 might make him a little too expensive but if there’s one model I’d give it to, it’d be Fransisco.

I’ve really like the Pistolero de Latigos. For 5 soulstones you get a minion who directly supports your other Family members with a positive flip to Df, is okay in the damage department vs activated models and perhaps most importantly, are cheap enough to claim objectives and lay down scheme markers while the big boys do the killing. They’re also great targets for Perdita’s Relocate ability, or at least they were in my game! In future games with Perdita, I can see myself taking at least one Pistolero de Latigo quite often. They just offer too much to the crew to ignore.

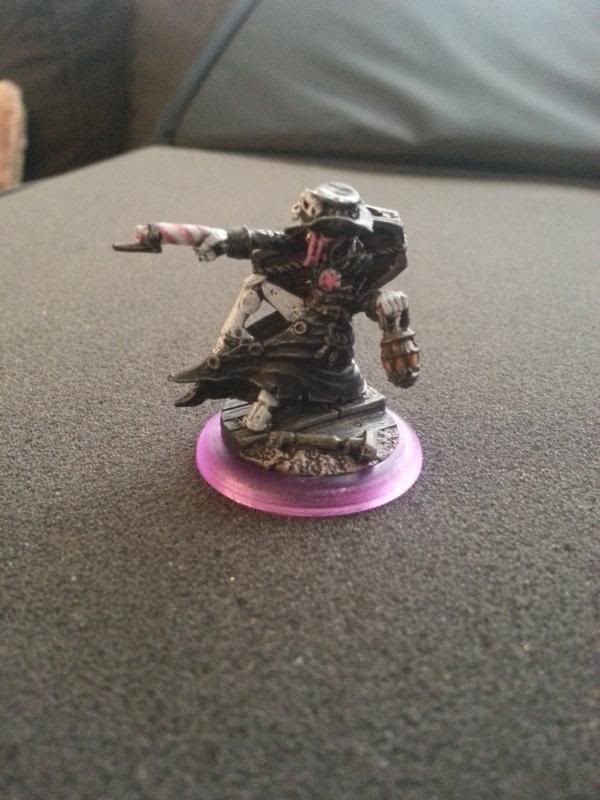
Turns out Neverdita loves her some Brutal Effigy. :)

I’ve come to the conclusion that the Brutal Effigy is a great choice for Perdita. As the sort of master that seems to damage/kill models on a regular basis she gets a lot of use out of Fear not the Sword, plus the Effigy itself is a decent package in its own right. It’s a cheap, resilient minion with Finish the Job, making it great for placing scheme markers and making interacts on Perdita’s behalf. I’ll admit I never actually used it’s Chastiser attack, but it’s not a terrible use of its AP.

This blog post is already pretty long, but it feels wrong not to at least mention some of the other Family members and potential crew choices for Perdita. So in no particular order;
The mobility offered by the Enslaved Nephilim is solid gold – Mike got a lot of good use out of it in my game against him with So’mer, and the only reason I didn’t take it this game was because I felt I needed the Badge of Office more, which in hindsight was probably a mistake.
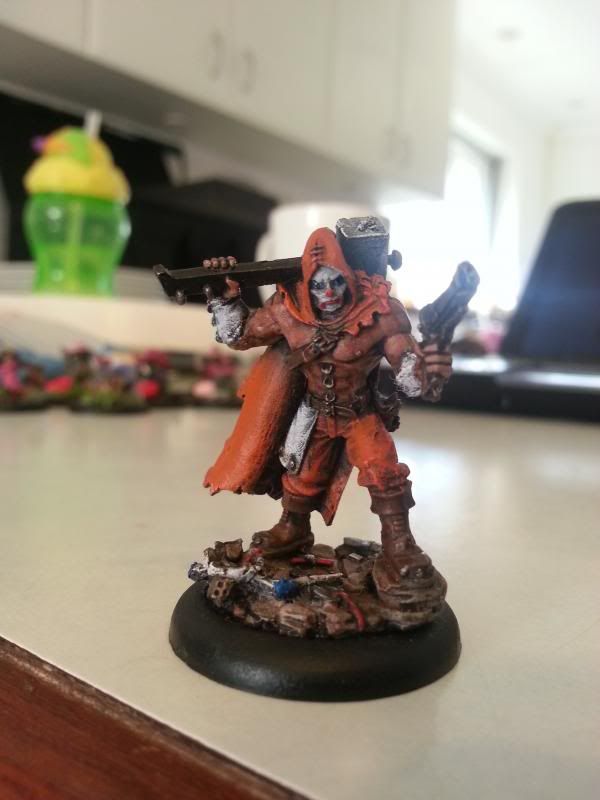
Papa Loco feels like the combination between a tactical nuclear missile and an area denial tool. However his ability to give positive damage flips to a friendly model makes you want to keep him near one of your own models. At least at first. ;) I can see him doing horrible things to the enemy if you can get him pushed up quickly (hello Enslaved Nephilim & Obey!)
I’d take Nino for his ability to deny Interact actions with Spotter, but only if he could get in a good position for it. Mike swore by the Hair Trigger for Nino but I remain unconvinced – I think I’d rather Focus-Strike with him.
People have said that the Austringer is always a good choice in a Guild crew, but I don’t think that’s usually the case for Perdita. Tricks related to Deliver Orders aside, she just doesn’t need another shooter.
I’ve barely even looked at Abuela, so I might leave that to someone else. ;)

Yep, I've painted three Papa Locos. It is NOT my favorite sculpt. :P

Final Impressions

In Malifaux v1.5 Perdita was one of my least favourite Masters. She shot things to hell and she could companion her entire crew to do the same all at once, but that was about the extent of it. It just felt pretty flat. Fortunately, M2E Perdita is a lot more interesting. When it comes down to it, she still does much the same thing. The Companion and shooting is still there, but now she and her crew offer a lot of direct synergy between family members and other friendly models, as well as more than a few movement tricks to get them around the table. And when it comes down to it, those synergies and tricks are what turns her from a boring Master to one with a lot of depth to her playstyle. So despite the fact that she still basically just shoots things, in the few games I’ve played with her I’ve found Perdita 
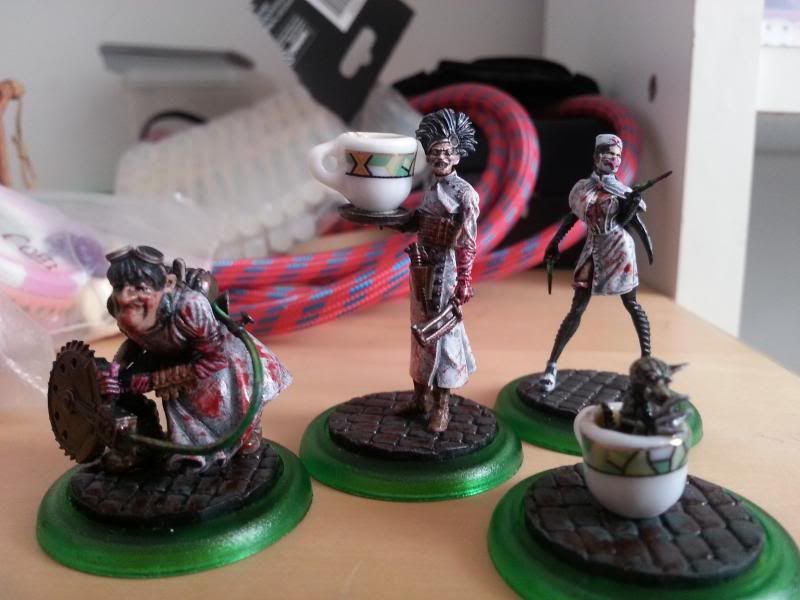
much more enjoyable to play.

Of course, the paint job I did for my Neverdita crew remains one of my favorites. So I have to admit that it plays no small role in her appeal for me!

Next on the list is McMourning, the last Master I used at the Cancon Tournament. After that it's Mei Feng and then the Lady Justice game I played last night. Then just maybe I'll have caught up on my blog posts by then!

Till next time,


Adrian

Monday 3 February 2014

Snack Time with Ophelia


For my second Master-led game at the Cancon tournament I decided to take Ophelia, being the only Gremlin Master I had who I hadn’t used this year! This was the final game for the day so being on two convincing wins, I was set to play Dave, Resser player extraordinaire. Dave is one of the best Malifaux players in Australia. I’ve faced him twice before and it’s been a hard fought battle every time I’ve faced him. So I knew this was going to be a very tough match for me!
                             

Well at least the hat makes her stand out...

The Paint Job

I originally painted Ophelia’s crew quite a long time ago and to be honest, I’m not all that happy with the job I did on Ophelia herself. It’s the hat. I never thought I’d say this, but it’s too pink. If I ever get a chance to repaint them, that would probably be the first thing I fix. Anyway, for the purpose of the tournament I did need to add some Young LaCroix to the crew which of course, got the same colour scheme to fit with the crew.


The Advice

Really, the standard line people have re: Ophelia is that she’s not complicated to use. You just point her crew at the enemy and shoot! As I mentioned in my last article, Kris’s (who is a guy, not a girl ;) ) blog, the Black Swamp Bayou, is a great source for all things Gremlin at the moment. He’s written a fair bit on Ophelia and of her kin, and in fact was nice enough to publish his Ophelia article early so I could give it a read before the tournament!


The Game

50SS, Standard Deployment
Strategy: Squatter’s Rights
Schemes:
- Make Them Suffer
- Take Prisoner
- Protect Territory
- Assassinate
- Line in the Sand

 I blame my overactive thyroid. Stupid shaky camera... :(

The List

Ophelia
- Dirty Cheater
- Gremlin-See
Young Lacroix
Johan
Fingers
Merris
- Teamwork
Raphael
- Dirty Cheater
Francois
- Stilts
- Teamwork

The overriding thought in my mind when I wrote this list was how much I loathed facing Hanged! In fact, I hated them so much that I took both Johan and Gremlin-See (for a (0) Shrug off action on Opehlia) to help deal with any possible Glimpse the Void Conditions that landed on Ophelia and my crew. Beyond that I went for a bit of an all-star crew – mostly enforcers and henchmen, with a Young LaCroix as my only minion/peon. My reasoning is that if I took a traditional gremlin horde then Make them Suffer would be an easy scheme for my opponent to achieve. So instead, I figured I’d take my single Young LaCroix, use him to give Ophelia a gun and then hide him up the back for the duration of the game.

Francois and Raphael were in, of course, and I grabbed Merris to help claim the Squatters Rights markers. Fingers was a late addition – with his Chatty Aura I figured I’d be able to lock down two of the Squatters rights markers for as long as he lived, making it much tougher for Dave to claim any for himself.

The schemes I chose were Make them Suffer and Assassinate. The former was a good choice for a crew like Ophelia’s against Ressers but Assassinate was definitely a mistake. Nicodem is NOT a good choice for Assassinate!


Opponent’s List

Nicodem
- Maniacal Laugh
- Undertaker
- Shadows Embrace
Mortimer
- Corpse Bloat
Killjoy
- Decaying Aura
Grave Spirit
Nurse
Necropunk
Rotten Belle

Dave went for what I believe is a standard sort of summoning crew, with the addition of Killjoy with Decaying Aura to take down whatever he gets into grips with but more specifically, Ophelia! For schemes he selected Assassinate (Ophelia) and Take Prisoner (Young LaCroix). I’ll be honest – I hadn’t thought he’d go for Take Prisoner, not Murder Protégé  on the Young LaCroix, but there you go.

 The art might suggest otherwise but my god, she's ugly up close!

Result

As you’d expect for any game with Killjoy on the table, it was a bloodbath. I took an early lead in the first two turns, claiming three Squatters Rights markers to Daves zero and knocking out his Nurse, Necropunk and Rotten Belle for no losses thanks to some great LaCroix shooting. Killjoy (with Fast from Nicodem) made his appearance at the end of turn two after Dave summoned a flesh construct off of a mindless zombie, and the big bastard almost killed Ophelia if it wasn’t for her squeal trigger. I thankfully got initative on turn three, and between Francois and Ophelia I took both Killjoy and the Flesh construct down, but not without both finishing their activations seriously wounded. Unfortunately Ophelia didn’t see the end of that turn, with a Black Joker damage prevention flip finishing her off.

The rest of the game saw flesh constructs devouring almost my entire crew as I held on to my Squatters Rights markers, but at the end of the game he just edged out the win. I’d scored 4VP for the strategy and 3VP for Make them Suffer, but Dave had 3VP for assassinate, 3VP for Take prisoner (on the Young Lacroix I’d kept hidden the entire game…damn summoned necropunks!) and 2VP for squatters rights. If the game hadn’t continued to turn 6 (giving him that last VP) it would have been a draw! For the purpose of the tournament, with both of us previously on two wins that flip for last turn ultimately meant the difference between getting first or second overall!

Francois and Raphael - awesome killing machines...right up until they get devoured by a flesh construct. :(

Post-game Thoughts

Given how close this game was I have to say I’m very happy with the narrow loss, especially considering the calibre of player Dave is. But probably the most vivid memory I’ll take from this game is how nasty Devour is against Gremlins! I may have been concerned about the Hanged, but it was the Flesh Constructs who really took a toll on my crew!  If I was to play this again, Ophelia would have gotten the Stilts (for Ht 2) and I would not have worried about taking Gremlin-see. Flesh constructs really are the biggest threat to Gremlins against Ressers.

Other than that, my biggest mistake this game was taking Assassinate for one of my schemes. With his impressive defensive stats, a playstyle that encourages him to hang up the back and wave upon wave of summoned fodder to throw at the opposing crew, Nicodem is definitely not an easy Master to kill. A better choice would have been Protect Territory – a scheme Merris Lacroix could have easily achieved while Nicodem was busy dealing with the rest of my crew. Oh well, lesson learnt!

Ophelia herself proved to be a gun slinging, damage dealing monster. Well, at least for the three turns in which she was alive! The Thinkin’ Luck trigger is just incredible – one damage is a small price to pay for what amounts to a 4/6/8 damage track so she was reliably killing whatever she aimed at. Not only that, but she has a great array of defensive tricks as well. Her Df trigger, Second Loudest Squeel can put an end to subsequent attacks from a charge or flurry and in fact, it was the only reason Killjoy (who was fast at the time) didn’t take her out with his two initial charges. Dirty Cheater (to heal after cheating), Stilts (to prevent all damage from a Ml attack) and Gremlin-See (to remove conditions) can also help keep her pretty safe. Finally there’s her Plink ability. I have to admit I actually forgot to use this at the critical moment, when a Flesh Construct hit her for her last point of damage and I Black Jokered the Prevention flip. I really should have just prevented the damage altogether with Plink, which would have saved her for another turn. Mind you, Dave also should have just Devoured Ophelia at that point instead (he had the Red Joker in his hand), so realistically Ophelia was on her way out anyway!

In terms of Upgrades, it seems to be a bit of a balancing act between taking the good stuff like Stilts or Dirty Cheater, and leaving enough room for the Gun upgrades she’ll likely be swapping in and out. At the moment I like the guns mostly for the (0) actions they grant. The movement effects from Jug Rocket and Threatenin’ Gun are both favorites of mine, although the ability to remove slow and paralysed with the Hooch Igniter definitely has its uses. Sadly, I didn’t get a chance to use any of her movement tricks in this game, but when I have used them in the past (particularly to slingshot Pere Ravage into the middle of a Lilith crew!), it’s been fantastic.

When it comes to Ophelia dealing damage I tend to think that her standard “Rough Riders” attack tends to win out, so long as you can cheat or soulstone a Ram for Thinkin’ Luck. The other guns have their niches (eg. ignoring LoS with the Jug Rocket, or dealing mass-damage/horror duels with the Hooch Igniter/Theatenin’ Gun), but the fact that you only get one shot with them before you have to reload is a bit of a pain. Anyway, what all that means is that I was happy having only one slot available for a gun. I got to pick the (0) action I preferred (in this case, Jug Rocket) and with only one Young LaCroix who was intent on hiding up the back, I figured I wouldn’t be doing much reloading anyway.

My opinion on Francois and Raphael hasn’t changed since my match with So’mer, apart from how susceptible they are to Devour! Speaking of which, that alone has made me start to wonder what I can do about models with Devour when using Gremlins. Unless they have Stilts, Raphael and Francois might not be the best choice against Ressers for that exact reason – they’re just too juicy a target for something like a Flesh Construct. That means I’d need to find a suitable replacement for them. A quick look through the Wave 1 & 2 models gives me a few options. Some of the more promising ones might be the Warpig, Bayou Gator and Mancha Roja, so I might be looking into them next time I face Ressers with a Gremlin crew. Speaking of anti-Flesh Construct tech, that would bring us to…

Johan, aka Clownface. Honourary Gremlin.

Johan was a model I’d initially included for the condition removal but as it turned out, he’s actually a great model to use for the Gremlins against Flesh Constructs. Being Ht 2 he’s immune to Devour, and the double positive damage flip against constructs on his Relic Hammer makes him pretty good at taking them down too. His only problem is a lack of mobility, and there’s nothing I can recall in the gremlin faction that would help him with that. All the movement tricks gremlins have seem to target Pigs, Gremlins or Ht 1 models, none of which Johan is. In any case, I think with his anti-Flesh Construct and anti-Hanged tech he may become a common inclusion in future Gremlin vs Resser games.

This was my third game with Merris LaCroix, and this time she helped me to claim a Squatters Rights Marker and wound the Graveyard Spirit with a flaming bottle and getting eaten by a Flesh construct in return. It was not the most stellar performance for my Wannabe-Kaeris and as I said above, Merris would have been far better off running away to plant scheme markers for Protect Territory. Much like my beloved Silurid, she really needs to stay out of the centre of the fight. Nevertheless, my experience this game has not swayed me away from Merris – like I said in my So’mer blog post I firmly believe she’s an excellent option for Gremlin crews.

While I don’t think he was a terrible choice in this kind of game, I feel like Fingers didn’t pull his weight. He spent most of the game protecting scheme markers but when it came down to it, that really only became relevant in turns 5 and 6, when Dave really started trying to score those points for Squatter’s rights. Maybe from Dave’s perspective he was much more troublesome than he seemed to be but with hindsight, I can’t help but feel I would have been better off taking a model with more killing power to help take on the flesh constructs. Preferably something that was Height 2-3 as well (Lookin’ at you, Mancha)!

Merris. Just take her.

Final Impressions

In my So’mer blog post I talked about Gremlins have a tendency to Lose Their Way to Victory. I think this also applies to Ophelia and her crew, but in a slightly different way. Whereas So’mer sends wave upon wave of his cheap Bayou Gremlins to bog down the enemy (at least until the surviving gremlins achieve their objectives), Ophelia’s more elite crew tends to sacrifice their own wounds for some ridiculous damage output. Bayou Gremlins also have this in the form of Dumb Luck but the LaCroix, with their sturdier guns and thus higher damage profile, use it to much better effect.

On top of that, Ophelia has the added benefit of having a bunch of ways to move her crew around, mainly through her Gun upgrades and Teamwork. Like I said before I didn’t really get to use those tricks in this game, but it’s definitely a big drawcard for me.

Compared with So’mer, Ophelia makes for a far more elite crew that hits like a truck. But at this stage I think Ophelia’s mobility is why I prefer using her over So’mer. While So’mer’s summoning and horde tactics really appeal, I’m less fond of his tendency to stay in one spot. Still, I’ve had fun playing both Masters, and I’m certainly interested to see how the rest of the Gremlins Masters play too!

Till next time,


Adrian