Thursday 30 January 2014

State of the Challenge - February Edition


So the January has come and gone, so I thought I might take a break from the endless Cancon reports (trust me, I’ll get back to them!) and give an update on where I’m at with the Rainbow Challenge.

So for those who joined us late, for the Rainbow Challenge I’m basically setting out to…
  1.          Play at least one game with every Master
  2.          Have a painted crew for every Master

So how did I go? Lets look at each part separately;

Molly - one of the crews I painted this month

Playing every Master

So in January I got quite a few games of Malifaux in, thanks in no small part to the Cancon Malifaux Tournament I attended over the 25th/26th. In total, actually managed to play;
  •           Zoraida (as Gremlins)
  •           Seamus
  •           Viktoria of Ash
  •           Marcus
  •           Tara (as Ressers)
  •           So’mer
  •           Ophelia
  •           Perdita
  •           McMourning (as Guild)
  •           Mei Feng (as Arcanists)

I have to admit, 10/39 is a lot more than I thought I’d play in a month! While I don’t expect to play through quite so many Masters in later months, I still believe I won’t have trouble getting through a game with every Master. In fact, this probably means I’ll have time to play each dual faction master in both of their factions. That’s less important for some Masters like Mei Feng or Jakob Lynch (where their playstyle changes very little between factions), but it’ll be great for the likes of Lucius, Zoraida and especially McMourning, where their crew composition and playstyle can change quite a lot. It also gives me an excuse to give Tara another try which like I said previously, is something I’d really like to do.

So with the gaming well under way, how about the painting?

One of my Henchmen-led crews Cancon. I used no less than 4 proxies, including the Gator and Merris I painted up this month. ;) 

Painting every Master

This month, I managed to paint the following;
  • Molly’s Starter Box crew (plus the Necrotic Machine)
  • McMourning’s Guild Crew (ie. McMourning, Sebastian, Nurse & Chihuahua)
  • 3x Young Lacroix
  • Merris LaCroix Proxy
  • Bayou Gator Proxy (actually just rebased, but still!)
  • Enslaved Nephilim Proxy
  • Executioner Proxy
Ready for a bit of Executing

So not a bad effort at all – basically two crews completed, plus a variety of bits and pieces for my existing crews (which was entirely to prepare for Cancon). This keeps me on track for painting two crews per month, although with my wife back at work in February and me back to being a full time Dad, I’m a little worried about keeping up this pace. I guess we’ll just have to see how it goes!

In addition to the painting, I also bought…um…quite a lot of new stuff. :P

I don't have a problem...honest...

I wasn’t planning to buy quite so much at Cancon, but when one of the retailers is selling all the metal Malifaux sets at 50% off and you get a few bucks in gift vouchers for coming first and second at the tournaments, what would you expect me to do?!

Anyway, what you can see there are the parts I need for Sonnia, Nicodem, Kirai and Hoffman crews! On top of that I also got the parts for a Colette crew in a trade, and the Hamelin starter box from Ramses as part of the Christmas exchange! In total, that’s SIX new crews, leaving me with just two released crews that I’ve yet to buy, as you can see below;

Complete (21)
Incomplete (10)
Yet to Buy (2)
Unavailable (6)
Lady Justice
Sonnia
Ramos
Toni
Perdita
Hoffman
Misaki
Wong
Lucius
Nicodem

Ulix
McMourning
Kirai

Mah Tucket
Seamus
Rasputina

Shenlong
Molly
Colette

Brewmaster
Marcus
Von Schill


Kaeris
Hamelin


Lilith
McCabe


Pandora
Yan Lo


Zoraida


Collodi


Dreamer


Viktorias


Tara


Leveticus


Jack Daw


Mei Feng


Jakob Lynch


So’mer


Ophelia


Technically I only need Ramos himself to complete his crew (I have all his other bits), but Misaki is going to require more than a few new buys – at the very least her starter, some Archers and Yamaziko.


February and Beyond

I’ve worked out that if I can keep painting two crews per month, I’ll have finished all the released Masters by the time Gencon rolls around in August! That would leave me August to December (5 months) to acquire and paint up crews for the 6 currently unreleased Masters. I’m hoping at least a few will be available for sale at Gencon (which I’ll be attending, so no reliance on crappy postage this year!), otherwise I’ll be looking into getting a few proxies for those crews!

Anyway, for February I’ve decided to make it Guild Month and paint my McCabe and Sonnia crews – a total of 14 models or about one model every two days. Actually When I put it like that it sounds pretty daunting. Damn. Well wish me luck then!

I've been trying to get that Witchling Handler finished for a good year now. :P

Till next time,


Adrian

Tuesday 28 January 2014

Losing your way to Victory - So'mer Teeth Jones


So over the Australia Day weekend I flew to Canberra for Cancon – a three day gaming convention during which two 1-day Malifaux tournaments were run. It’s a long way to travel for a few games of Malifaux (its about a 4.5 hour flight from Perth), but this was my chance for a quick holiday from my Dad-associated responsibilities and in any case, it lets me catch up with some of the guys I’ve come to know in the Eastern States!

 So anyway, the two tournaments were three games each, single faction, with the first being Henchman-led only. I have a tendency at tournamnets these days to take Masters I’ve never or rarely played before, and Cancon was certainly no exception to this! In any case this was a good chance to slam through four Masters in one weekend for the Rainbow Challenge. ;)

Anyway, for Day 1 I decided to take Gremlins, which gave me a chance to tick So’mer and Ophelia off my list. And with my first Master-led game being Reconnoiter, it was only natural that I take So‘mer.
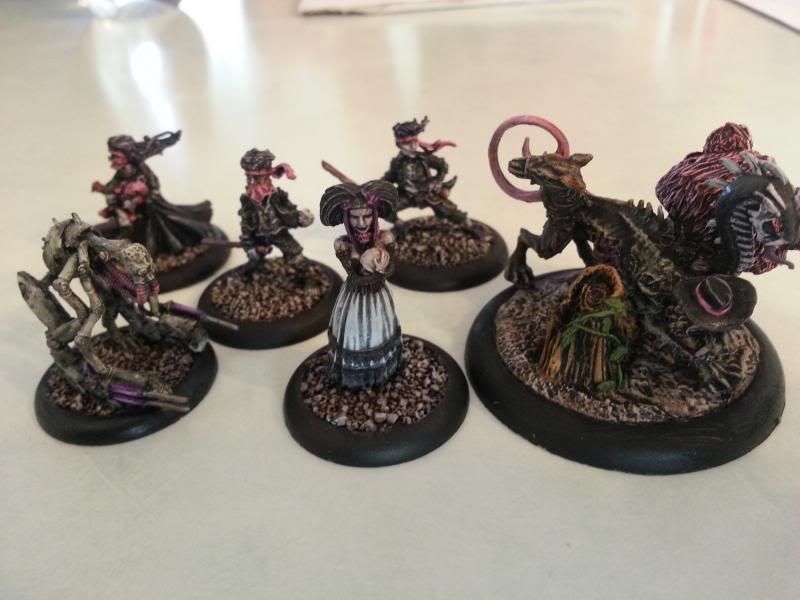
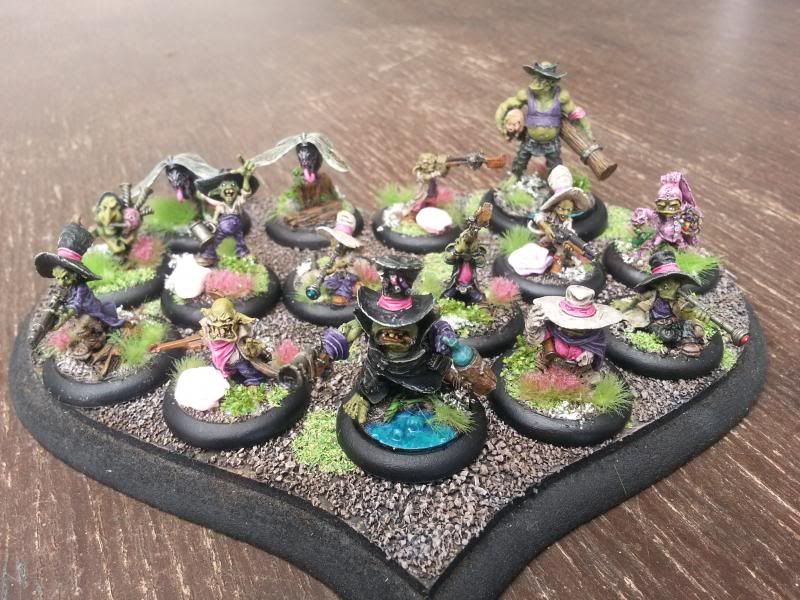
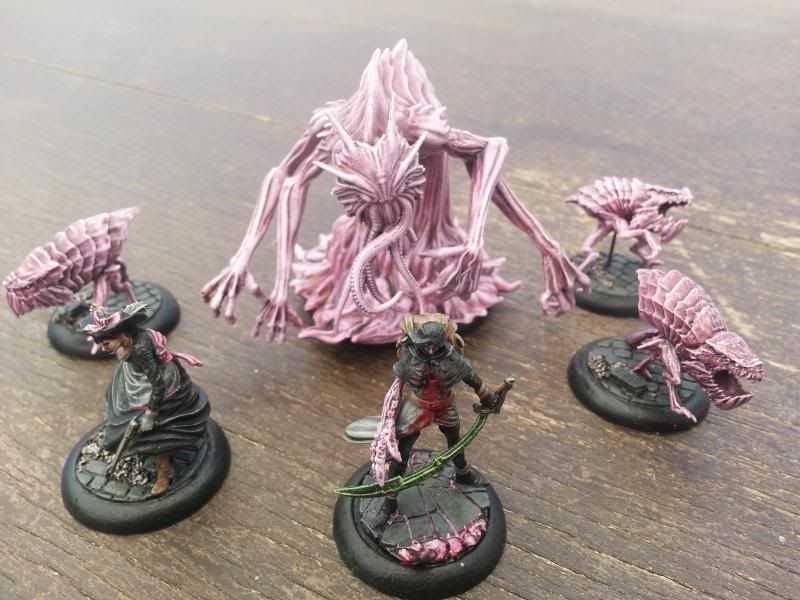
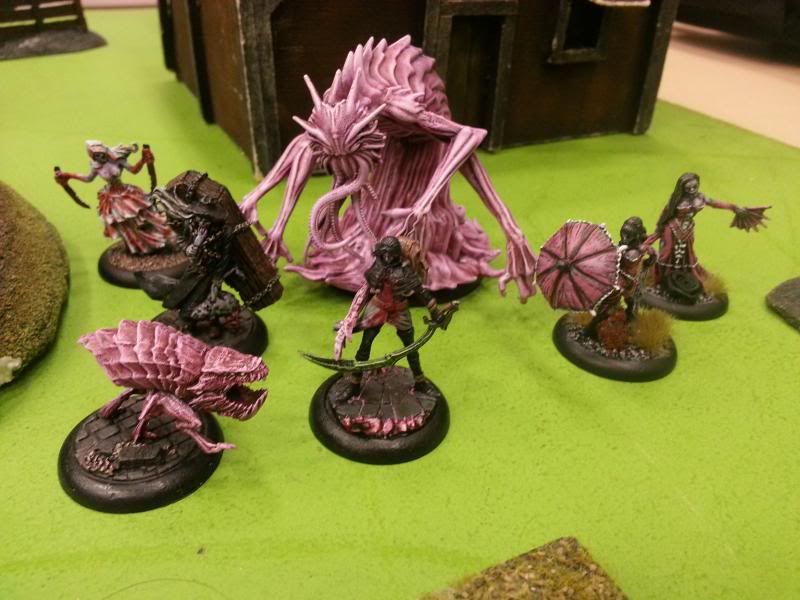
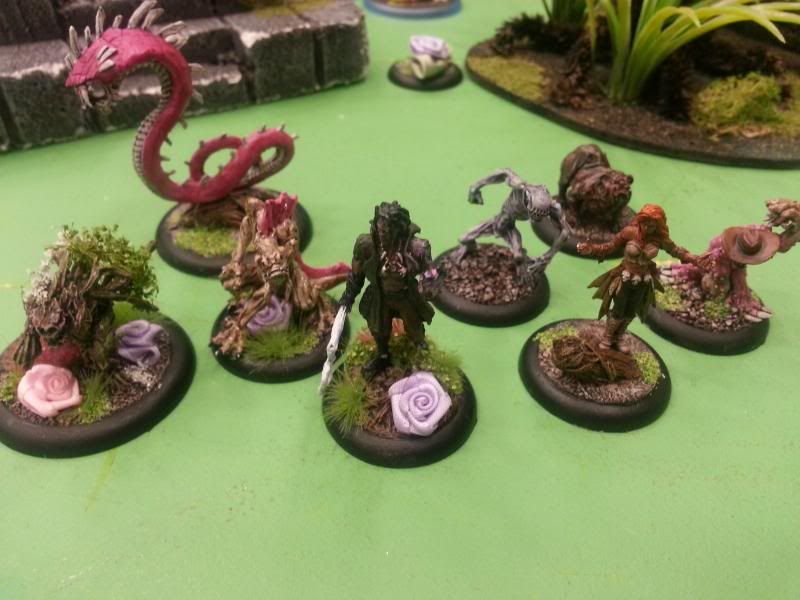


The Paint Job

So’mer is actually one of the more recent crews I’ve painted, having finished them for a tournament late last year. My paint job for these models was actually pretty ordinary this time, Greeny-yellow skin (to suit their cowardly ways), black, purple and brown for the clothes with dash of pink (or course!) to bring them together.

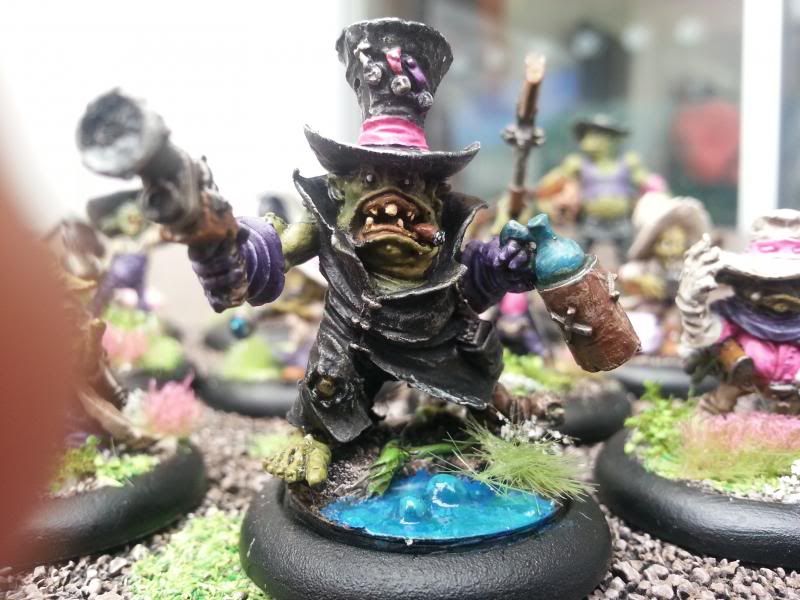
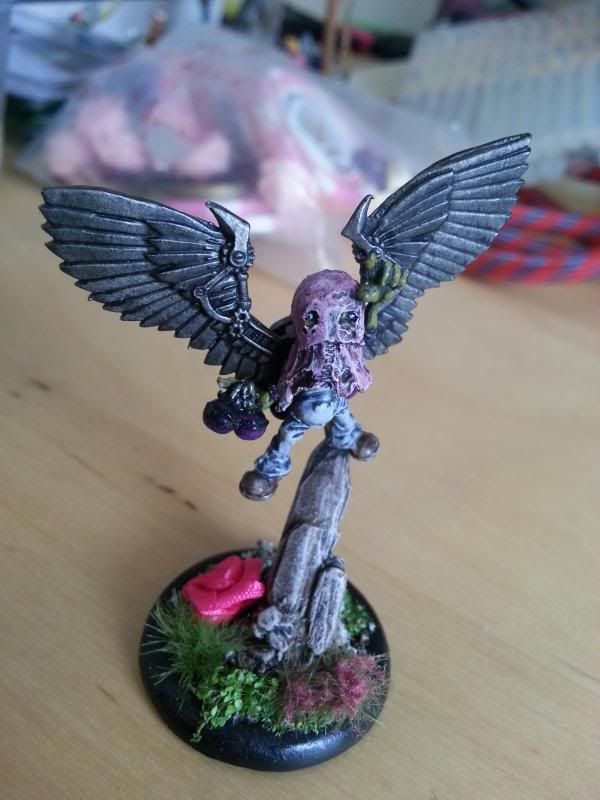
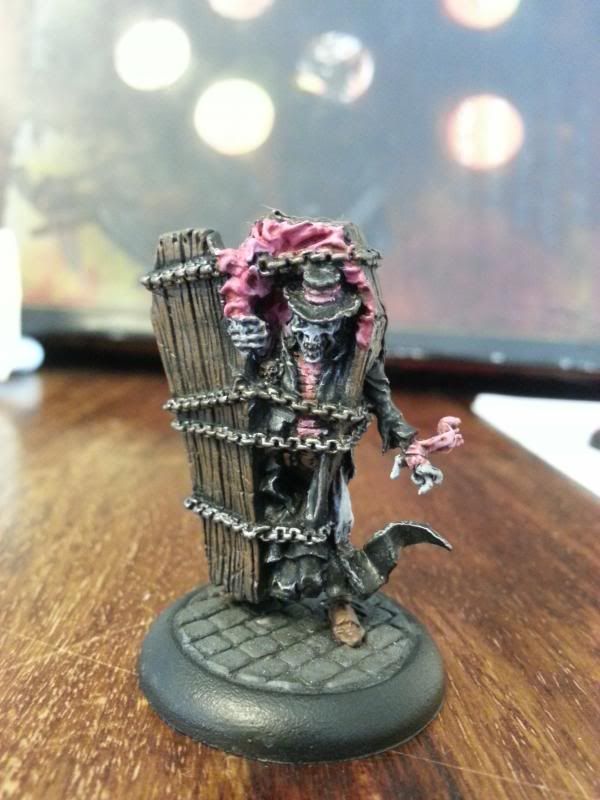
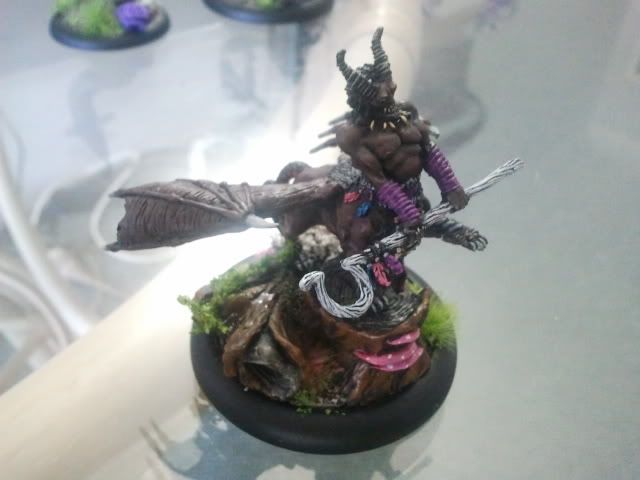
The most recent addition to the crew was Merris LaCroix, one of the new Wave 2 models. Merris finally gave me a reason to use the spare set of Kaeris wings I had lying around (I gave my Kaeris a backpack instead), as well as a headless gremlin who’d been sacrificed to provide a hat for Zoraida waaay back when I started Malifaux. Add to that Carver’s spare head and a pile of grenades from the Warhammer 40k Kroot box and I had myself a fine looking wannabe-Kaeris gremlin!


Merris. Who would have thought that headless gremlin would actually come in handy?

The Advice

Having already taken them to a tournament last year, I had a pretty good idea of how So’mer worked. Some Gremlin - related sources of info I've checked out in the past, however, are the Black Swamp Bayou blog (by Kris Ingram), the Chasing Bacon podcast and the Bayou Broadcast. 

Kris hasn't yet talked about So'mer in any detail but what she has written about Ophelia is very good, so I expect he'll have some good input on So'mer when he works around to it. Hence why I'm including him here. 

Chasing Bacon is more or less a dedicated Gremlin podcast and Bayou Broadcast, while not necessarilly Gremlin focussed, does tend to feature gremlins pretty often in their content. It's also hosted by Dom (@Dumb_Luck89 on twitter), who was the first to give me some solid advice over Twitter on how to build a decent So'mer crew. 

http://blackswampbayou.blogspot.com.au/
http://chasingbacon.podbean.com/
http://bayoubroadcast.podbean.com/

As usual, if I've missed any good sources of So'mer related info then let me know!


The Game                         

50SS, Standard Deployment
Strategy: Reconnoiter
Schemes:
- Outflank
- Bodyguard
- Breakthrough
- Deliver a Message
- Line in the Sand


The List

So’mer Teeth Jones
- Family Tree
- Can of Beans
2x Skeeters
Francois LaCroix
- Dirty Cheater
- Stilts
Raphael
- Dirty Cheater
Merris LaCroix
- Team Work
Slop Hauler
4x Bayou Gremlins

The most glaring omission in my list is probably Lenny. A lot of gremlin players seem to swear by him, but in the few games I’ve taken him I’ve never been all that impressed. His Auras look pretty good but they also force you to bunch a large chunk of your crew close together. That sort of bunched up playstyle has never appealed to me and in any case, I don’t think it’s a good way to go when the Strategy is Reconnoiter. Personally, I prefer the impressive killing power offered by Francois and Raphael. The LaCroix brothers have always been star players in my crews, and they provide the offensive power that So’mer’s crew is otherwise lacking.

The Skeeter’s job was and has always been to hold up my opponent’s key pieces for a turn or two. They may have only 3 wounds but with Df 7 they’re very hard to hit and Wk 10 gets them exactly where you want them. Merris (or at least the 01/14/2014 version I used) was there to run up the flank and achieve breakthrough. The Teamwork upgrade I think is a hidden gem – by the wording she can use it to push herself out of combat, making her very slippery and thus perfectly suited to keeping out of reach of the enemy.

Other than that, Family Tree on So’mer and the Slop Hauler provided me with my summoning machine to maintain the Gremlin population, while the Bayou Gremlins were there to make up the numbers.

My chosen schemes were Line in the Sand and Breakthrough. Both solid choices when you're taking a horde of cheap fodder.  


Opponent’s List

My opponent for this game was Ross, who had brought his Perdita crew;

Perdita
- Os Veo
- Aura Ancestral
Fransisco
- Wade in
- Lead Lined Coat
Nino
- Hair Trigger
Papa Loco
Enslaved Nephilim
2x Guild Guard

Ross went for Bodyguard on Fransisco and Breakthrough.


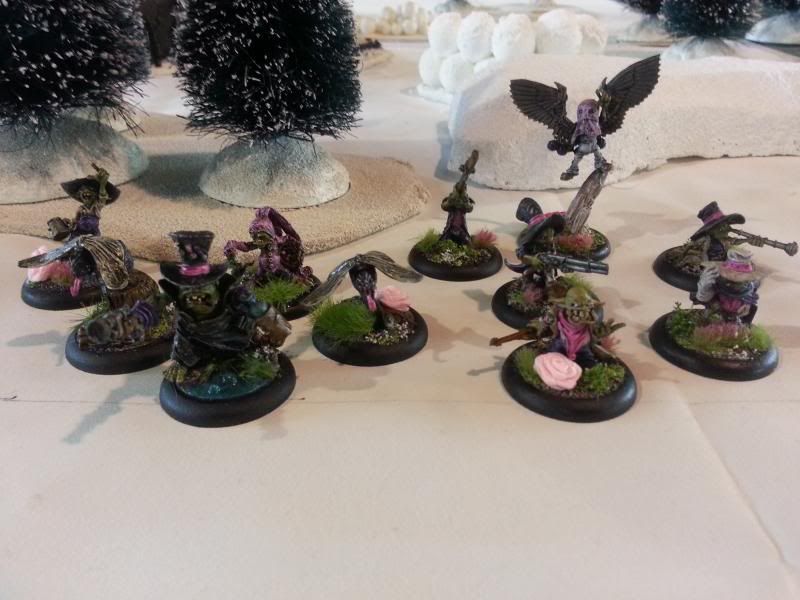
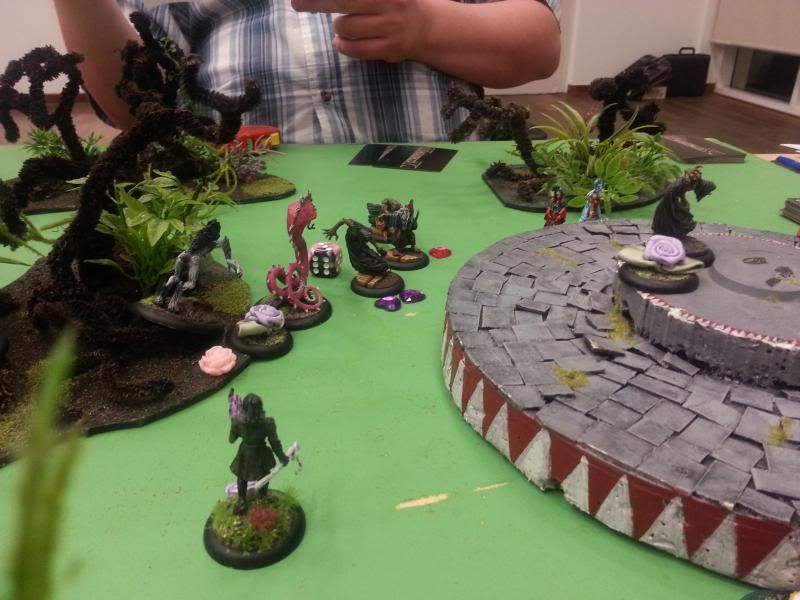
I saw this ice table an awful lot over the two tournaments.  

Result

Merris, Fransisco and a Bayou Gremlin deployed on the flank opposite Perdita, the Guild Guard and Fransisco, while the rest of our respective crews deployed on the opposite flank. The early turns saw the Skeeters tie up (and die to) Perdita and Nino, while Nino and my Gremlins led by So’mer and Raphael traded shots with Nino. Francois took advantage of reckless to charge and kill a Guild Guard, engaging Perdita in the process. He held that flank up for another turn (Dirty Cheater and Stilts proved invaulble) before Fransisco eventually killed him with a Flurry. Merris took this chance to slip past the fighting and spent the rest of the game planting scheme markers in Ross’s deployment zone. Thanks to the distraction provided by Francois, the Skeeter and a few Bayou Gremlins, Perdita and Fransisco only had time to plant one scheme marker for Breakthrough before the game ended.

On the other flank, Nino eventually fell to the sustained shooting from Raphael, So’mer and a few Slop Haulers, giving me enough time (and gremlins) to put down enough scheme markers for Line in the Sand. Papa Loco and Santiago both tried stopping this, but between So’mer and Raphael they were both killed before they had a chance to kill enough gremlins. The game ended with a comfortable win for me, having achieved both my schemes and scored full points for Reconnoiter and both schemes while Ross managed only one for Reconnoiter, 2 for Bodyguard (Fransico ended the game under half wounds) and one more for breakthrough (or two? I can’t remember).


Post-game Thoughts

Once again, the gremlin horde pulls through! At the start of this game I was pretty concerned about the amount of firepower Ross’s crew could put out. Perdita’s mobility and reach looked to be a major threat, so a large part of my efforts in this game involved holding her up so she couldn’t bring her guns to bear on something I didn’t want him shooting. In the end she and Fransisco waded through a Skeeter, Francois, 2 bayou gremlins and a hastily redirected Slop Hauler, but the pile of dead gremlins at Perdita’s feet proved to be a worthwhile price for denying her the freedom to do what she wanted.

In this game So’mer proved himself to be superbly versatile. He spent half of the game summoning gremlins, half of it shooting Ortegas with his Boomer and the last half (yes, gremlins cheat ;) running up the board to help secure Line in the Sand and Breakthrough. For the first three turns he barely moved while he spent his AP summoning and shooting. I was a little worried that his static nature was going to leave him out of position in the late game but as it turned out, he proved quick enough in turns 4 and 5 to catch up with and support Raphael and the advancing Bayou Gremlins.

For So’mer’s upgrades, Family Tree didn’t disappoint at all. The ability to just keep churning out gremlins (with a Slop Hauler to heal them of course) is well worth the investment, especially in Reconnoiter. On the other hand, with the Skeeters sacrificing themselves early to hold up Perdita and Nino, I actually got no use at all out of the (0) actions granted by Can o’ Beans. With hindsight I think one upgrade I should have taken (either replacing or in addition to Can ‘o Beans) was Quality Mash Liquor for the healing action. So’mer’s summoning was totally dependent on the Slop Hauler being able to heal the damaged gremlins so if Ross had killed the Slop Hauler early, my summoning would have effectively shut down. It’s for that reason that I’m starting to think that Family Tree and Quality Mash Liquor really need to go hand in hand. Either take both upgrades, or leave Family Tree at home.

Bayou Gremlins are easily one of my favourite minions in the game. They rarely seem to hurt, let alone kill other models but with Bayou Two-card acting *kind of* like a positive flip they’ve proven to be remarkably resilient for their cost. Combined with their mobility and fantastically low cost they’ve actually proven to be excellent at taking objectives. Sure, your opponent will kill a few but there’s usually two more for every one they kill (So’mer’s summoniung helps, of course) so I’ve always managed to get enough into position to claim objectives like Line in the Sand, protect territory, Turf War or Reconnoiter.
One thing I haven’t really tried with the Bayou Gremlins is to up their killing power with stuff like Lenny (for Pseudo-Armour and the Ram to their shooting attacks) and the Encouragement upgrade (for the positive flip to attacks). This goies against what I normally use Gremlins for, but I have to admit I am curious to see whether it’s enough to make up for the loss of Raphael or Francois (who’d be exchanged for Lenny).

Speaking of which, Francois and Raphael continued to prove themselves a mainstay of my Gremlin crews. Francois’s efforts in holding up Perdita, Fransisco and the Guild Guard both prevented Ross from scoring full points for Bodyguard and Breakthrough, plus he gave Merris the chance to slip into Ross’s back lines to achieve breakthrough. Raphael managed to survive the game and the shooting from both he and So’mer managed to kill Nino, Papa Loco AND Santiago before the game finished. Stilts has always been great for keeping Francois alive and Dirty Cheater works very well for both LaCroix – it helps keep Raphael above 1 wound for his Hard to kill ability and Francois’s (0) Showdown action gives him an easy way to cheat down a card to heal a wound (usually from Reckless!).

I’ve become a big fan of Merris LaCroix (although again – this was her Beta version). To me, she’s the Gremlin version of a Silurid– quick, excellent at planting scheme markers where you want them and with Team Work, very good at slipping out of melee. I’ve heard some people argue that a pair of Bayou Gremlins can fulfil the same role for as many or fewer soulstones but I disagree. Flight makes her more mobile, she can’t easily be held up in melee and she can give herself Reckless every turn for another AP (as opposed to the Bayour Gremlins with Drunk and Reckless). Combined with her (0) Bombs away action, that last part means she can consistently place two scheme markers per turn. That she’s got a better shooting attack (A cover-ignoring Flaming Bottle for Burning +3) is icing on the cake.

So that leaves… the Skeeter? I have to say I was a little disappointed that they only lasted one turn, but I shouldn’t be surprised given they were facing a crew like Perdita’s and in any case, they did their job! If they lasted a little longer they might have had a chance to use Pull My Finger (from Can o’ Beans) for a bit of potential damage, but I wasn’t particularly fussed by their loss.


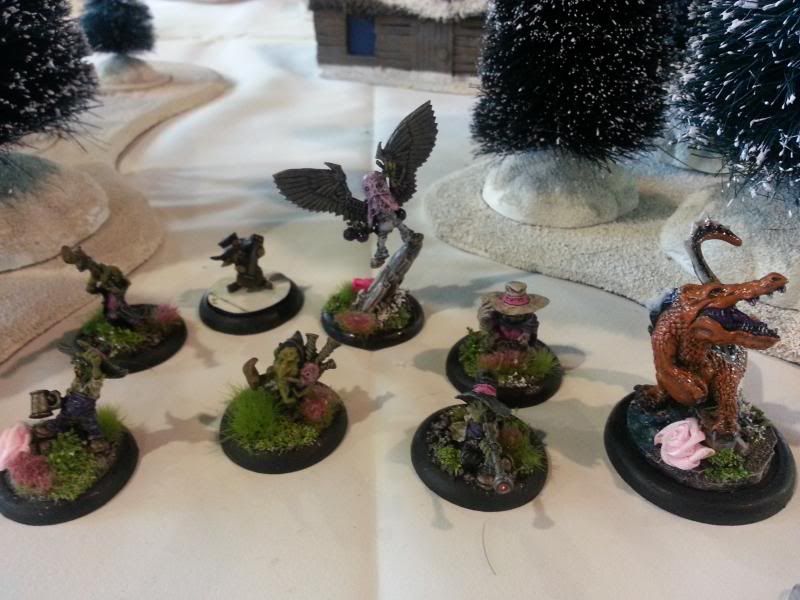
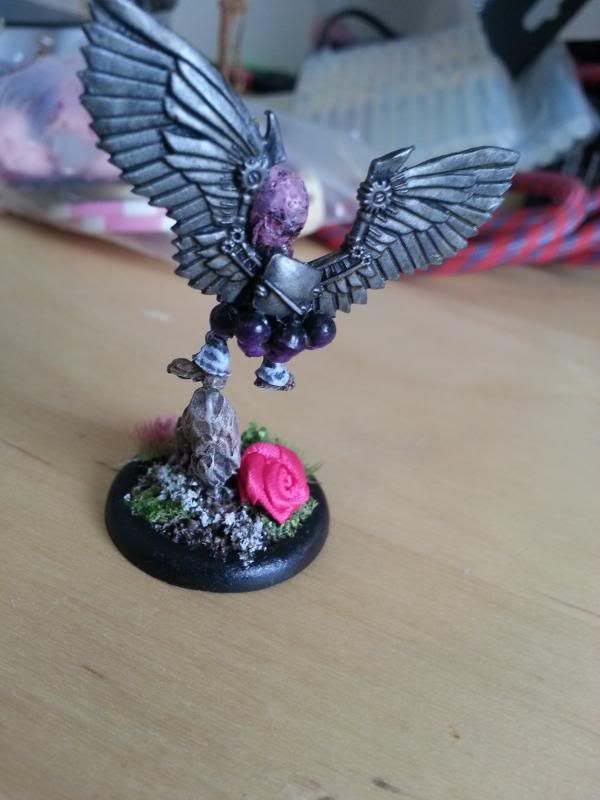
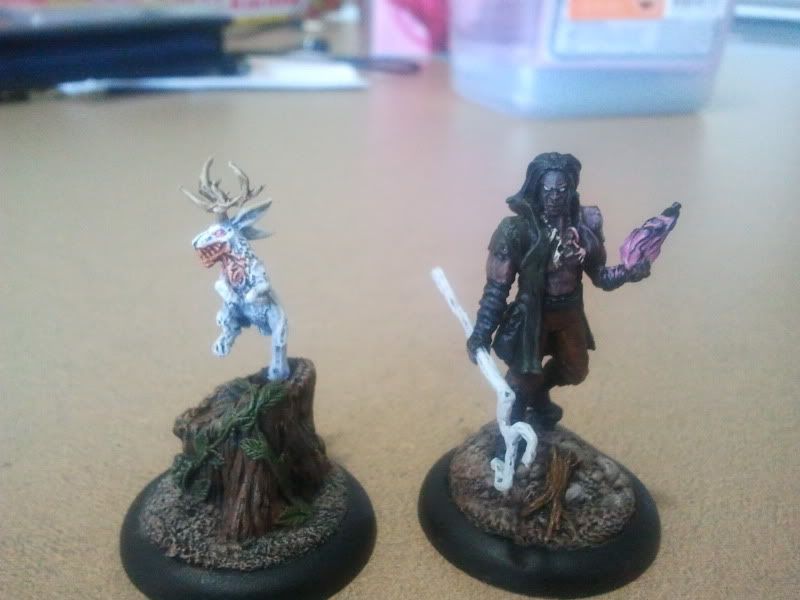
I've run out of photos of So'mer, so here's one of Merris's arse. ;)

Final Impressions – Losing Your Way to Victory

I think the best way to describe So’mer’s and possibly the entire Gremlin faction’s playstyle is that they Lose Their Way to Victory. You take a ton of crappy models, summon more crappy models, send them against your opponent and watch them die. But in the process they’re also holding up your opponent’s crew and achieving objectives like Reconnoiter and Line in the sand by virtue of their sheer weight of numbers. In short – Gremlins die, but you win the game anyway so it doesn’t matter! It’s for this reason that So’mer’s been a lot of fun to play. I’ve almost always felt outmatched by the harder, more elite crews I’d face with So’mer, but his ability to just throw wave upon wave of his own gremlins at the enemy somehow lets him pull through for a win.

I have to admit, Som’er was a Master I’ve wanted to play for years. However the sheer number of models I needed to paint for a decent crew put me off. Of course it seems pretty silly now, considering I’ve now painted 21 crews and am looking at another 18 to finish before the end of the year! In any case, I’m glad I finally gave So’mer a shot. He really is a fun Master to play and while there’s nothing in his rules that’s particularly unique, his horde tactics definitely keep him interesting!

Till next time,

Adrian

Monday 27 January 2014

Tara got Obliterated!

I’ve heard a lot of things about Tara. As the newest Master (not counting the Wave 2 unreleased Masters) she’s gotten a fair bit of attention, both on the Wyrd forums and locally as people give the crew a shot on the table. I’ve only played or seen a few games against Tara but she’s never been that difficult to face, and a lot of the talk about her tends to emphasise how tough she is to use. So I was curious to try Tara and see for myself how she played. For this game I was facing Chris with his Beta Hamelin crew. I’ll admit I hadn’t faced Hamelin since his original (horribly broken) incarnation in version 1.5 so I was interested to see how he’d go.

I completely forgot to take pictures of the game, so I apologies for the lack of illustrations today!

The Paint Job

Being the consummate Malifaux whore that I am, it was only natural that I get the Limited Edition Tara box during Gencon 2013. My original plan for painting her crew was to try for a monochrome colour scheme. Unfortunately, my efforts at monochrome were utterly awful, so I “sadly” had to resort to good old reliable pink. ;) Tara herself got her claw repositioned slightly to make her look a little less 2-dimensional, and gave her a back pack (being an adventurer and all). Karina got a hat, because that’s the kind of classy/insane girl Karina is. In any case, the crew was very easy to paint. There was nothing too tricky about the girls and the Nothing Beast and friends were little more than a drybrush job.


The Advice

My main source of info when I was figuring out Tara before the game was actually the Cheated Fates Podcast Tara Episode. There’s also a few threads on the Wyrd forums that have gone into Tara in good detail, although I’ll admit I didn’t have time to read it all.


The Game                         

45SS, Standard Deployment
Strategy: Reconnoiter
Schemes:
- Make Them Suffer
- Distract
- Frame for Murder
- Assassinate
- Line in the Sand


The List

Tara (Resurrectionist)
- Obliteration Symbiote
- Dead of Winter
- Knowledge of Eternity
Bete Noire
- Decaying Aura
Nothing Beast
Void Wretch
2x Rotten Belles
Death Marshall

I went for Tara as a Resser for one reason – Rotten Belles. I love movement effects like Lure and I figured they’d be great for pulling enemy models in for a Temporal Shift pulse (granting Fast) from Tara. My experience against John’s Tara crew in my game with the Viks taught me that Tara should probably have more than one heavy damage dealer in the crew. For that role I went for the Nothing Beast and Bete Noire, with her incredible Decaying Aura (which prevents damage prevention and healing within an aura). Decaying Aura is so good, it’s practically mandatory in a Resser crew. I honestly wouldn’t be surprised if it gets an errata at some point down the track.

Finally, I filled my crew out with a Void Wretch and Death Marshall. This left me with the base cache of 4SS. Not my ideal, but I figured my only SS user (Tara) wasn’t going to be getting into the fight all that much anyway.

I didn't bother taking Karina in this game. I've heard that people have trouble getting much use out a her in a Tara crew and when it came down to it, I just couldn't fit her in after taking the pieces I wanted. 

As it turns out this was a tough scheme pool for facing Hamelin. He generally doesn’t have enough non-peons without Nihilist to Distract, Tara lacked the Henchmen or Killing Power herself to really do Make them Suffer and I wasn’t prepared to try and kill Hamelin. So that left Frame for Murder (Void Wretch) and Line in the Sand.


Opponent’s List

Unfortunately I didn’t get a chance to note down Chris’s Hamelin List but from memory it was based on the 01/14/2014 beta rules and it went something like this;

Hamelin (bunch of upgrades)
Obedient Wretch
2? Stolen
Nix (with his upgrade)
Rat Catcher
Pile ‘o’ Rats

Chris went for Distract and Line in the Sand. 


Result

The game started with a Rotten Belle and the Void Wretch advancing up one flank, the Death Marshall charging and Pine Boxing the Nothing Beast on the other flank and Tara and a Rotten Belle moving cautiously up the centre to hopefully pounce on something nasty. After that, things didn’t go so well for poor Tara. Hamelin then put something like Blighted +6 on Tara, which forced her to drop the Nothing beast to Hide behind (and fight off Rats) and Bete Noire to try and deal with Nix and Hamelin. Both Bete and the Nothing Beast killed their share of Rats, Stolen and Rat Kings, as well as the Obedient Wretch and they put a dent in Nix (who promptly healed himself). Unfortunately that wasn’t enough to stop the tide of Blighted attacks. Both eventually fell to Hamelin, as did Tara once Hamelin was finally able to draw a bead on her.

The Rotten Belle and Void Wretch wound up stuck in combat with a Rat Catcher, who Distracted them to fulfil the scheme, while a few Rat Kings helped to both fulfil Line in the Sand, kill off the Rotten Belle and remove the scheme markers for my own Line in the Sand. The poor Death Marshall spent most of the game out of position as he planted scheme markers, so his effect on the game was pretty minimal. I can’t remember exactly what the score was, but it was a very comfortable win for Hamelin.

The ill-fated crew....

Post-game Thoughts

I have to admit my inexperience facing M2E Hamelin didn’t help me in this game but to be honest, I lost this game because I made lots of mistakes. ;) For one, the Death Marshall and Void Wretch should have traded roles, with the latter planting scheme markers for Line in the Sand and the former either supporting Tara or helping the Rotten Belle on the Flank. I should have been more wary of Distract and while I did a good job keeping the Rat Kings under control (until most of my crew died!), my crew was poorly equipped to achieve Line in the Sand anyway (I should have taken a Necropunk if I wanted to pick that scheme). Frame for Murder would have been a decent choice had I put it on the Nothing Beast but like I said above, the Void Wretch just wasn’t enough of a threat for Hamelin’s crew to want to kill.

At least in theory I can really see why the Death Marshall is a solid choice for Tara - he's a solid choice for burying models, both friendly and enemy, with his pine box. But like I said above, I misused the Death Marshall in this game. He really needed to be supporting the crew in combat instead of skulking around claiming markers. 

I think the Void Wretch is a model that's best off running objectives. Wk 5 and Incorporeal makes him pretty good at getting to where he needs to be but when I think about it, a Necropunk would be much better for placing scheme markers. So at least in a Resser crew I'd say the Void Wretch's purpose in life lies with his bury synergies (ie. his (2) actions to hurt or heal buried models and his ability to hand out slow to enemy models. 

The only problem with the Rotten Belles this game was that they never got into a position to really get good use out of their Lure. But I still love the Belles. I think they retain alot of great potential with Tara and when it comes down to it, I'd still want at least one in any Resser crew I'd make. 

Bete Noire more than pulled her weight, but in a Tara crew she wasn’t as good a choice as I was hoping. The Void Wretches and Nothing Beast are neither living nor undead (preventing Bete from being unburied when they die) and their preference for a small control hand works against Bete’s need for a 10 to bury her should she die. If I hadn’t taken the Nothing Beast then I wouldn’t have felt the need for a small control hand. So I think it’s really a matter of taking either the Nothing Beast or Bete, but not both.

Speaking of the Nothing Beast, I have to say I wasn’t impressed. It has a solid stat line and the Bury trigger in particular has great potential. In fact I did manage to bury Nix with it once but I never got to take advantage of it – he returned to play later that turn when Bete started killing Stolen. But what I really don’t like about him is his Pure Nothingness ability, which links his Df stat to how many cards you have. In theory it seems okay – you just need to drop you three worst cards and he’s suddenly at a very respectable Df 6. However I can’t help but feel he’s responsible for me having an empty hand in those times it really counted (like when I needed to bury Bete or resist something with Tara). But perhaps I’m being overly harsh on the Nothing Beast. Like I said, he’s got some solid stats so perhaps I just wasn't able to use him right. 

Anyway, this brings us to Tara herself. In this game Hamelin’s Blighted condition prevented Tara from doing much more than hiding behind the Nothing Beast, so I wasn’t really able to use her at her best. The most I was able to do was bury Nix (which could have been timed better), grant Fast to the Nothing Beast to help him dish out some serious damage and unbury Bete Noire to take on Hamelin. At least on paper she’s got a lot of great tricks and combos that should make her a great denial/support type Master. But actually getting them to work with her crew proved harder than I expected.

Gotta love the Dead Marshals

Final Impressions

Between a few key mistakes and facing a Master I had little idea about, I don’t feel as though I was able to get a good feel for Tara. One thing I did realise though, is that Tara is not a simple Master to use. It’s going to take some practice to get the hang of her Fast/Bury tricks, and balancing her need for a control hand with Pure Nothingness on the Void Wretches and Nothing Beast is not a simple matter.

At this stage, I’d suggest that Tara is one of the harder Masters to use well in Malifaux. I might even go as far as saying she might be the new Marcus for M2E – potentially great, but requiring an experienced hand to use well. Between this and my abysmal game against Hamelin, it actually makes me want to give Tara another run. Like I keep saying, the potential is there so just like when I started Marcus, the challenge of “Mastering” Tara definitely appeals to me. Right now the Rainbow Challenge is a priority, but we’ll see how quickly I play through these Masters and hopefully, I’ll be able to fit in another Tara game or three. ;)

Till next time,

Adrian


Saturday 25 January 2014

You Don't Mess With The Marcus


So before I get into this week’s blog, The past two weeks have seen me playing A LOT of Malifaux games. At the time of posting I actually played this Marcs game about two weeks ago, and have since played (and thus need to write posts for) Tara and then 4 other Masters at the Cancon convention over in Canberra! So I have a lot of blog posts to get through over the next week, so get ready for an avalanche! Anyway, back to the Master of the day…

Ah, Marcus. He was my second love after Zoraida and between the two of them, they’re responsible for me buying at least a third of the crews in the game (seriously, they have some huge hiring pools)! My opponent for this match, Paul, wanted to get some practice in with his Kirai crew before flying to Canberra this weekend for a tournament we’re both attending at Cancon (ie our local Australian gaming convention). I wasn’t particularly fussed with who I played in my game so I let Paul choose my Master, which in this case was Marcus! So it was time to blow the dust of my Beasts, pull out his cards and figure out how the hell he now works in M2E!

                                
The Advice

Marcus has a bit of a fan base on the forums so there’s actually a pretty long and detailed thread of people discussing him. That said, for the purpose of my game I mostly just read through the writings of Dave (aka iamsssk), who has written about Marcus and his friends in great detail on his blog (below). I’d thoroughly recommend to anyone who wants to try out Marcus to take a read of his blog, and his writings certainly clarified a few tricks I could use in my own game.


The Game

Paul and I decided to play one of the missions from the Cancon Malifaux Tournament next week, so…

50SS, Standard Deployment
Strategy: Squatter’s Rights
Schemes:
- Make Them Suffer
- Take Prisoner
- Protect Territory
- Assassinate
- Line in the Sand

Marcus and his friends for the day

The List

Marcus
- Feral Instincts
- The Hunger Cry
- The God’s Domain
Myranda
- Imbued Energies
Shikome
Razorspine Rattler
Waldgeist
Silurid
Canine Remains
Moleman

One of the things I picked up from Dave’s blog was that Feral Instincts (for Feral) and The Hunger Cry (for Domesticate) was a really potent combination, effectively letting you give negative flips to a single model for two (0) actions, so those two upgrades were in. Choosing between Trail of the Gods and The God’s Domain was tough, but in the end I thought I’d try a more supportive approach with Marcus and so figured Domain was the better option for that.

According to Dave, Myranda should come with Imbued Energies as standard and after looking at the upgrade myself, I can see why. For the rest of the crew I went for a variety of different beasts. The Silurid, Canine and Moleman were my objective grabbers, the Waldgeist was there to hold some Squatter’s Rights markers with his 4” engagement range and the Shikome and Razorspine were my combat pieces. Unfortunately I couldn’t fit in the lauded December Acolyte on account of not having his model, and while the Jackalope has been a mainstay of my Marcus crew in the past, she just seemed like a bad idea when one of the schemes was Make Them Suffer.

For schemes I chose Protect Territory and Take Prisoner on the Lost Love. I figured the Canine Remains and Moleman should be able sort out the former while the Lost Love was the kind of model I could ignore for most of the game, then swamp him with a few models on turn 5. Unfortunately I didn’t realise that the Lost Love was the kind of model who’s likely to be sacrificed before the end of the game, so that was a mistake.


Opponent’s List

Kirai
- Absorb Spirit
- Unforgiven
- Swirling Ether
Datsuba
- Spirit Whispers
Lost Love
Onryo
2x Drowned
3x Gaki

We were using the 1-8-2014 rules for Kirai (and my Shikome, of course!), but given that Ikiryo’s infinite summoning trick was likely to change (which it did), we decided to house rule that Ikiryo could only be summoned through Malevolence once per turn.

Paul went for the same schemes I did – Protect Territory and Take Prisoner on Myranda. Like me, Paul wasn’t familiar enough with the opposing crew to realise that his Take Prisoner target was a bad idea. Oh well. :P

 Marcus prepares to take on the Gaki and Kirai in a double-charge

Result

Turn 2 started with Marcus casting Feral and then Domesticate on Datsuba (effectively neutralising her), before using Alpha on his Shikome to let him change the Onryo threatening the markers on the right flank. This didn’t go down so well, with the Onryo resisting Adversary, surviving the Shikome’s attacks and summoning Ikiryo in the process. Ikiryo made short work of the Shikome, preventing me from activating him a second time as planned. So much for that Alpha! The rest of the crew claimed or guarded squatters rights markers, while Myranda shape shifted into a Blessed of December and proceeded to threaten Kirai. Marcus spent most of the game neutralising one model each turn with Feral and Domesticate, and using his (1) charge trick to finish off Gaki and threaten Kirai (which didn’t work so well – her defensive trigger is solid!).
Between the Silurid and the canine/moleman I was able to score full points for both Squatters Rights and Protect Territory, while Paul also achieved the same objectives but with less VPs for each thanks to my efforts in getting in his way.

 My Shikome proxy. Much nicer than the standard mini IMO!

Post-game Thoughts

Both Paul and I were really impressed with just how much Marcus could do, both with his variety of different actions and the sheer volume of things he could do in a single activation. Turn 3 really showcased this, where in a single activation he was able to Charge Twice (killing a Gaki and hitting Kirai), use Howl for the Wp buff/debuff and then Feral/Domesticate Kirai to neutralise her for a turn. If he hadn’t been charging, he could have played a more supportive role instead with Alpha, the Law of Meat and Darzee’s chant. So with Marcus, you get a model who can debuff enemy models, buff his own models and/or wade into combat himself to kick arse and take names. Not only that, but he’s no slouch in any of those roles either. Marcus really is the toolbox Master, able to take on any role you need him too!

One thing I will say though, is that I feel like I misused Marcus a little this game. The (1) action charge from Domain of the Gods is excellent, but to get the most use out of it you need to ensure he stays unengaged so he can keep charging things. I guess it’s either that, or give him Trail of the Gods instead so he can just mix it up in melee better with the extra attack!

One of the things I wanted to see this game was how the Silurid compared with the Moleman/Canine tag team, since both were taken to fulfil similar roles. As it turns out, neither objective grabber disappointed me. The SIlurid was obviously much faster but the Canine and Moleman had the benefit of both better resilience and more AP. There are certainly schemes that the SIlurid does better over the Canine/Moleman and vice versa, and this seems to be defined by how fast your objective grabber is going to need to be.

Myranda was interesting. I originally intended to keep her around for at least a few more turns but after losing the Shikome I really felt as though I needed another heavy hitter. So rather than let the Razorspine benefit from her defensive aura for a little longer Myranda decided to pick up the slack and turn into a Blessed of December. I guess that flexibility is Myranda’s biggest strength - her shape shifting allows her to be exactly what you need when you need it. In this game I needed more killing power but if the game called for more scheme markers, Myranda could have shape shifted into a Silurid and done that instead.

Myranda’s chosen Beast form, the Blessed of December performed well enough. The alternative form was the Sabretooth Cerebrus, but I picked the Blessed instead for two reasons – one is that she seems somewhat tougher than the Cerebrus, while the other was that I still have flashbacks to how bad the Cerebrus was in 1.5! The Blessed’s great melee value and healing really served her well but I found that her biggest asset was her Leap. It got me away from more problematic models like the Drowned when I needed to and unlike the Cerebrus, it didn’t require a Mask so it was not too hard to cast. On the whole then, I quite enjoyed throwing the Blessed around. As for the Cerebrus, I’ll just have to give her a fair go some other time!

I honestly keep forgetting just how tough a Waldgeist is. Armour 2, Perfect Camouflage and a potential 4” melee range made it perfect for guarding the squatters rights markers and it was able to hold up Pauls advance quite nicely too. As far as tanks for a Marcus crew goes, I’m not sure you can do much better than a Waldgeist.

If there’s one model in my Marcus crew that didn’t get a chance to prove itself, it would be the Shikome. I had big plans for my poor Shikome, but his failure to cast Adversary on the Onryo plus his early demise at the hands of Ikiryo meant that his impact on the game was minimal at best. Fortunately that was also the only appearance of Ikiryo this game, thanks to Kirai’s placement and Paul not having the right cards at the right time.

While the Shikome barely got a chance to shine, the real disappointment for me was the Razorspine. It did do okay, holding up a Drowned and refusing to die thanks to Defensive Stance, but honestly I’m not in love with it. While there’s nothing particularly wrong with him, he seems to sit in a middle ground between the killing power of a Sabretooth or Blessed, and the resilience of a Waldgeist. It does have some nice in-combat mobility but when it comes down to it, I think I’d prefer something with a more defined role.

One day, Avatar Marcus, one day...

Final Impressions

Marcus definitely saw a change for the better when he was revised from 1.5 to M2E. He retains his fantastic tool box of abilities, except now they’re better and he’s actually able to be great at everything, rather than decent at a one thing at a time but crap at everything else! Not only that, but he supports his beasts much more effectively so unlike in the last edition, you actually want to use a crew of beasts with him. Overall then, I’m very happy with Marcus. I feel like his flexibility in what he can do keeps him interesting, and it also makes him pretty strong in-game as well.

In fact, after getting a feel for how he works I’m actually a little afraid to face him across the table. While he doesn’t have the raw killing power of some Masters, the sheer flexibility and disruption potential that Marcus offers makes him an amazing threat. So on one hand, I’m glad to see that the infamous underdog has come into his own with the new edition. But on the other hand, god damn, he’s going to be a scary mother f*&$er to face…

Till next time,

Adrian