Wednesday 30 October 2013

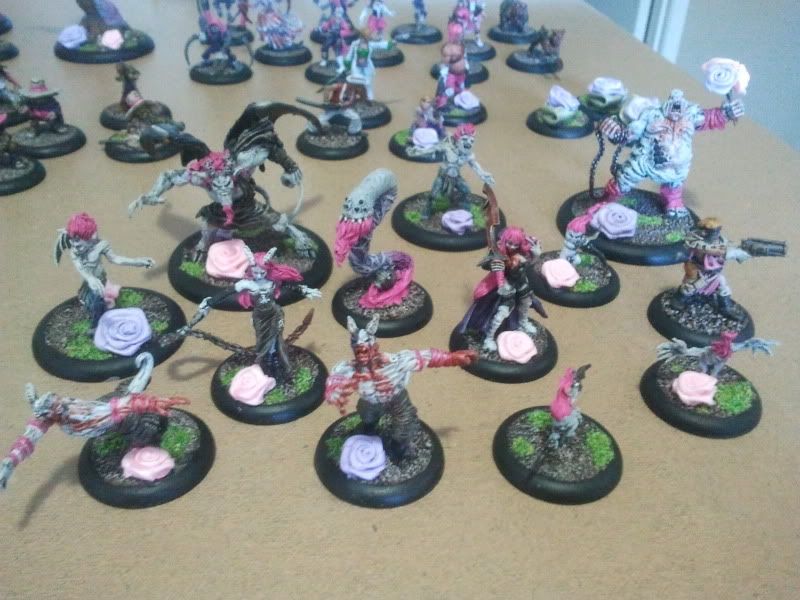
Rathnard Does Neverborn – Lilith


Lilith and I have always had a difficult relationship. In Malifaux 1.5 I played all of the Neverborn Masters to at least some degree but of the 5 Masters (+Collodi) available, Lilith was my least favourite. Sure she was good – her and her Nephilim crew’s ability to smash face in melee was almost unrivalled. But ultimately (and in my opinion of course) it led to a fairly flat playstyle. It really wasn’t until later books, when she gained access to more supportive minions like Nekima, the Blood Shaman and Those Bastard Twins (Lilitu and Lelu) that her playstyle developed some more depth. Even then, it was never enough for me to tear myself away from the super-tricky, multi-dimensional playstyles of Marcus, Zoraida or Lucius.

Fast forward to M2E, and Lilith is a changed girl. She’s still a force to be reckoned with in melee, but her higher fragility and a new set of tricks has made her much more interesting and dynamic on the board. Thus far then, I’ve enjoyed using Lilith quite a lot.

Say Hello to Mummy

While Lilith is undoubtedly designed as a melee fighter, she’s not the sort of melee fighter you can just throw into your opponents force and watch her grind through them. Despite her high Df, I’d maintain that Lilith is not particularly tough. There are plenty of melee specialists with a melee stat to match her Df value, and any hit that does connect with her is going to hurt. Lilith is especially vulnerable to blasts or anything else that doesn’t need to force a Df resist, especially with her pitiful Wp of 5. That low Wp alone is going to be a serious weakness against the right crew, so any enemy model who can exploit that is a serious threat to Lilith.

I think the key to using Lilith well, then lies in her ability “Master of Malifaux”. If she doesn’t need line of sight to target enemy models (melee attacks aside), why should you expose her in the first place? So what I’ve tended to do is hide in cover or outside Line of Sight, then use her to take down isolated targets, by either charging them herself or using her positioning spells like Transposition to pull them out of safety. Beyond this general playstyle, there are a few extra facets to how Lilith goes about her business, depending on her crew and upgrade selection. For me though, I’ve almost entirely focused on her tricks associated with push effects.

Rotten Belles? We don’t need no Rotten Belles!

In terms of upgrades for Lilith, my usual setup has been Living Blade, Wicked Mistress and then either Beckon Malifaux or Summon the Blood. While upgrading Lilith’s greatsword attack is undoubtedly great, I take Living Blade for Thirsty Mandrake. As a pseudo-pounce ability, it allows Lilith to make free attacks on anyone who pushes to within 1” of her.  Combine that with Wicked Mistress to push enemy models their charge toward her and you have a Master who can easily suck enemy models out of safety and into the waiting arms of Lilith. The alternative to Wicked Mistress would be to use Tangle Shadows. It’s certainly more flexible in it uses than Wicked Mistress, but it won’t give Lilith that free attack and I’m not overly fond of the high casting requirements.

Of the other Lilith Upgrades, Beckon Malifaux has often been a favourite of mine (who doesn’t like mobile, line of sight blocking terrain?), but I’ve also dabbled in using Summon the Blood. While it does wound your own models, the ability to deal irresistible damage to enemy models is very handy when you’re facing something who’s otherwise very difficult for Lilith to kill conventionally (eg. a Nothing Beast with no cards in-hand).

The one action I’ve yet to really try with Lilith is Wicked Vines. In theory it should work really well with Wicked Mistress or other push effects, or even just holding a model in place to keep them from disrupting your own plans. In later games, once I’m over the awesomeness of luring in enemy models for dispatching by Lilith, I’ll probably give this more consideration.

Rapid growth deserves it’s own heading, so…


Growing Up

I’ve only taken Rapid growth in one game thus far, and when I had the chance to grow a Terror Tot onto a Young Nephilim, I actually didn’t bother since I wanted the higher mobility of the Tot at the time. Other than that, I’ve generally avoided taking Rapid Growth in my crews. While I can’t deny the value of upgrading one of your Tots mid-game, it’s always felt a bit like a “win more” upgrade. If I’m already slaying enemy models left right and centre, do I really need the additional killing power of a new Young Young Nephilim? In any case, most of the time my Terror Tots have been sent out to the flanks to achieve objectives or delay enemy models rather than bunch them up close to Lilith (or whoever’s been given Rapid Growth). So thus far my kind of playstyle hasn’t really worked well with getting the most out of Rapid Growth.
That said, I did once play a game against another Lilith player who used Rapid Growth to great effect. What he did was use Transposition to pull isolated minions into a waiting swarm of Terror Tots, who then pounced on the hapless victim and with the help of a swing or two from Lilith’s oversized butter knife, killed it off to grow one of those Tots into a Young Nephilim. The strategies and schemes themselves where very geared toward killing so with no flanking objectives to worry about, the bunched up, Rapid Growth-friendly style worked really well for him.


He’s a Barbie Girl, in a Barbie World

As Liliths very own Henchman I think Barbaros (or Barbie, as I’ve taken to calling him) deserves special mention. On his own I’ve found Barbie to be a decent little package – armour, high Df and Wp stats and his Knock Aside Trigger give him some good resilience (especially for a Nephilim), and the extra walk action from nimble makes him quite mobile. His damage output is merely “okay”, but what really draws me to him is how easily he pushes enemy models around. Pairing her with Lilith using the Living Blade upgrade makes it very easy to push enemy models to within 1” of Lilith and give her a free attack courtesy of Thirsty Mandrake. You can do the same with Terror Tots (who have Pounce) and that still doesn’t take into account all the other tricks you can pull when pushing enemy models around, whether it’s to get them out of melee or on/off objectives.

I generally haven’t prioritised giving upgrades to Barbie – he’ll usually only get 1 or 2 if I happen to be short a few spare soulstones in my crew. When I have though, it’s usually been Obsidian Talons for the Flay trigger – something that’s very useful for boosting the melee power of Terror Tots in particular (more on that later). Nephilim Gladiatus seems like the sort of upgrade I would enjoy. After all, it’s another easy push effect! But while I’ve taken it before, I’ve yet to remember to use the ability! Still, it’s a decent (0) action for 1SS so I’m sure I’ll be taking it again. I might even remember to use it in the future!


…and all the rest

So far, my standard Lilith crew has been very similar to what you get in the plastic starter box, with Barbie, a Cherub, Terror Tots and then whatever else I feel is going to help achieve the strategies and schemes.

Of all the models I’ve used with Lilith, her Cherub is the one that’s proven to be the surprise hit. Honestly, there’s very little that seems bad about the Cherub. He’s quick with a high Df for avoiding attacks, and his Our Land ability makes it so much easier for your crew to achieve any scheme requiring interact actions (especially when it’s a (2) interact that’s required). What really surprised me though, was Cupid’s arrows. It’s rarely going to kill a model for you, but granting slow AND pushing that model 5” is amazing for disrupting and tying down enemy models. I once did exactly that to Taelor, and successfully tied her up for the least 2-3 turns of a game.

Like I said above, I’ve mostly used Terror Tots for running up the flanks, placing scheme markers and generally spending AP on the things my heavy hitters are too busy smashing face to do. Once they’ve achieved their main task though, I’m quite happy to throw them into the fray, either by holding up enemy models, positioning them for a pounce attack or simply charging in for the kill. One thing I’ve found though, is that Obsidian Talons REALLY helps improve their damage output. With a damage spread of 1/3/4 you really want to be dealing at least moderate damage with each hit, so giving them a trigger that lets them cheat that damage flip helps them punch well above their weight.

I’ve only rarely used Young Nephilim and never used a Mature Nephilim in my games with Lilith thus far. The Youngs seem okay, but they’re a glass cannon, which is something the crew already tends to have in spades. Regarding the Mature Nephilim, it might provide me with another relaitively tough model but he’s usually competing for space with Barbie, and I’ve enjoyed Barbie’s push mechanics too much to consider dropping him from the crew.

Of the non-nephilim available to Lilith, Waldgeists have been an obvious choice. Their forest markers may not block line of sight like Lilith’s Illusionary forests, but they’re still good for some easy soft cover, slowing enemy models down and giving themselves an impressive 4” melee range when no other severe terrain is available. Most importantly though, they’ve been great as a resilient model for an otherwise fragile crew. They’ve also proven to be an excellent front-line model for the enemy crew to crash into, before the Nephilim follow up for a counter-attack – something they’re far more suited to their glass cannon playstyle.

I know a lot of people will automatically turn to Terror Tots for schemes requiring an interact, but I’ve still found a place for Silurid in that role. Sure, one is almost as costly as two terror tots, but they’re more reliably fast than a terror tot (needing only a 5 of any suit for their leap, rather than a mask) they’re harder to attack thanks to Perfect Camouflage and they can very easily escape melee thanks to Leap. They’re also able to place two scheme markers a turn (interact – leap – interact), and their impressive mobility allows them to make interacts and place scheme markers wherever they want. I still take Terror Tots for their cheapness and flexibility but with the right scheme (eg. Power Ritual, Breakthrough, Deliver a Message), I’ll consider a Silurid purely for achieving those.

---

Well that’s it for today.  Until next time,


Adrian

Tuesday 22 October 2013

Rathnard Does Neverborn – Zoraida

Another Blog entry, and this time, I thought I’d talk about my experiences with Zoraida.

Ah, Zoraida. While she wasn’t my first Master in Malifaux (that title belongs to Pandora), she was definitely my first love. I’ve heard from some people (well, just one podcast, to be honest) that Zoraida is completely different to how she was in v1.5. To that, I say Hogwash! It’s true that Zoraida got a few revisions to her various spells and actions - Hex and Crystal Ball both became upgrades with very different functions, while Bewitch’s role also fundamentally changed. But she still plays pretty much the same way she did in her previous incarnation. Zoraida remains a control freak at her core, able to buff her own crew while disrupting her opponents. At least to me, she remains one of the most flexible Masters in the game, and has definitely reinforced her position as my favourite Master.


All Hail the Hag!

On paper Zoraida’s resilience didn’t change all that much, but with soulstones able to grant positive flips on the attack her main defense, Proper Manners, is now a lot easier to get around by Masters and Henchmen. Losing the infinite range, no LoS Obeys via her Voodoo doll also means she needs to play much more up close and personal, so not only is she easier to kill, she’s easier to catch too.  This isn’t too much of an issue – so long as your opponent is tackling more immediate threats (like a Killjoy to the face), I’ve found that Zoraida tends to remain relatively unmolested. Still, the last thing you want to do is put her within charge range of Lady Justice, for instance.

Obey is as good as it used to be. Losing the ability to make a (2) Charge was a pity, but it’s more than made up for by being able to cast it multiple times per activation. Most of the time I’ve found myself casting Obey on my own models, whether it’s to move them into better positions, activate a Tactical Action that might be handy or attacking other models. If nothing else, it means I don’t need to cheat down a high card to prevent my opponent resisting the obey. When I’ve used it on enemy models, it’s usually to either Walk them out of position, or to attack another enemy model without having to expose my own crew.

Bewitch went through a major change for Zoraida, going from imposing a no-cheating effect to letting you draw cards whenever your opponent’s model does something. To me, this has become Zoraida’s new secret weapon. When you Bewitch your opponent’s model, they’re faced with the choice of either using them as per normal and giving Zoraida 4-6 cards, or holding the model back to prevent the card draw. Either situation has been great for me. Having so many cards gives you some incredible cheating power in duels, but if they’re holding back then it frees my crew up to do what it wants without getting molested in the process.
This dilemma for the opponent was clear in my last game. In it, I took a Zoraida list with Killjoy against a Viks crew with Taelor and Johan. My opponent had paired up Taelor and Johan, and was looking to hunt down Killjoy when he emerged to achieve the Murder Protégé scheme. After Taelor charged out to crush a Terror Tot, Killjoy unburied to wipe Taelor out in short order. Johan however, was Bewitched so my opponent decided against giving me cards and left my Killjoy unmolested, presumably hoping to team up with the Viks to take the Beast down. 
Later in the game, (after Killjoy had killed Johan and positioned himself in preparation for the showdown with the Viks) Zoraida Bewitched both AshVik and BloodVik, after they’d activated. In that next turn my opponent had no choice but to activate the Viks as normal, but I gained a bucket-load of cards in the process, which allowed me to almost wipe out Ash Vik (Survivalist plus a black Joker kept Killjoy from his prize!) and keep the rest of my crew (Silurid, basically) able to do exactly what they wanted.

Big Mamma’s House (of Upgrades)

Zoraida’s one of those Masters who doesn’t have that need to fill out her upgrade slots. While none of her specific upgrades are bad, she’s quite effective on her own anyway so when it comes down to it, I’m usually picking just one of her Limited upgrades (Crystal Ball or Animal Shape), plus maybe one more if I have the soulstones spare.

In most games I’ve used Crystal Ball to draw an extra card, although it’s less useful if you have or will be drawing cards from Bewitch that turn. The other effects on Crystal Ball have definitely come in handy on occasion. If my opponent only has three or less cards in hand then seeing what they are gives me a much better idea of what they’re capable of. Forcing a random discard can be a bit hit and miss, depending on how high a card they lose, but it’s been well worth the misses I’ve forced them to lose a severe card or a joker.

Animal Shape has always been a favourite upgrade of mine. Effectively teleporting Zoraida 15” makes the girl very mobile, and is excellent for getting her out of danger should she find herself threatened by a sufficiently nasty Henchman or Master. The only negative is that if you’re using Raven Form during a turn, you’re more or less wasting most of Zoraida’s activation just on moving. Generally then, I’ve found that it’s best to use Raven Form to get her into a nice, commanding position on the first turn where she’ll have to move very little, and then use it in the 4th or 5th turns to position her for strategies and schemes.

In terms of when I select Animal Shape over Crystal ball, it’s usually been in games where I suspect my opponent will be hunting my Master (eg. Assasinate is on the Scheme List), or when I want to achieve a positioning scheme like Outflank or Entourage. Otherwise, Crystal Ball has thus far been my preferred upgrade.

I’ve previously considered Hex Bag to be a take-it-or-leave-it upgrade but actually, I’m really starting to like it. For 1SS it gives something for Zoraida to do with her (0) action, and it offers a way for her to easily deal damage to enemy models. The curse trigger though – nobody likes being denied their soulstones, so that trigger alone makes it worth throwing in. I guess the only negative is the short 6” range but with the way I play her, Zoraida tends to be pretty close to the action anyway.

Hexed Among You is neat, but I haven't really given it a good run in it’s current form. I don’t rate it for Silurid, who are fast enough and possibly wanting to interact on the first turn anyway (for Squatter’s Rights or Line in the Sand, if I’ve taken it). Waldgeists might get some use out of it, but I’d only really want it if I was taking at least two such minions.

Tarot Reading is the one Zoraida-specific upgrade that I so far haven't tried. I’ve yet to find a situation in which I’d want to use Fickle Winds of Fate to move scheme markers around and while I like Bayou Servants, I’ve yet to really feel the need for swamp fiends in a Gremlin list. I’d consider a Silurid (of course!), but it’s cheaper to pay the 1SS Mercenary tax on a single silurid than the 2SS for this upgrade. That leaves the Mend action to heal wounds on the Voodoo Doll, but there’s a very good reason why that’s never been useful to me…


Voodoo Who?

Since the start of the M2E playtest, I’ve actually only rarely summoned or otherwise used Zoraida’s Voodoo Doll. It’s not that the Voodoo doll is a bad option, quite the opposite actually. It’s a very effective way of neutering a key model in your opponent’s crew and unless your opponent has some condition removal, it’s difficult to counter.  In fact in one of the games I did use it, I targeted Taelor with Hem, got her to punch her own crew with that meaty hammer of hers and then paralysed her for two turns with the help of a Sorrow casting Doldrums on the Voodoo doll itself.

That said, I often seem to find more immediately useful things to spend Zoraida’s AP on. One way or another, summoning a Voodoo Doll is a big investment – Zoraida will often wind up doing little else in that turn. So most of the time, I’ve preferred spending those 2AP on doing something that provides a more immediate benefit to my crew.

I’ve considered actually hiring the Voodoo doll for 3SS (thus avoiding that whole 2AP issue), but I feel like it’s 3” Wk is going to mean it gets left behind in most games. Anyway, I’m still looking for excuses to summon a Voodoo Doll in my games, so hopefully I’ll report back with better news on him. In the meantime, the Malifaux Child has been a great alternative. Not only can he cast Zoraida’s Obey to help support the crew, but he’s got a nice healing spell and is tricky to take down if he hasn’t activated yet (yay for Disguised and Manipulative!)

Zoraida’s Facebook Friends

Much like her 1.5 incarnation, Zoraida seems to work well with whatever crew you throw her into. Aside from being a Swampfiend (which helps out Bad Juju, to an extent), none of her actions or abilities synergise with any model type or playstyle over another. One way or another, any model you take is going to love getting extra AP (Obey) and extra cards to cheat (Bewitch).

One thing I will say though – with Zoraida being so completely focused on playing the support game, her crew really does need some killing power to make up for it. A lot of the time I’ve been taking crews loaded with evasive minions (Bayou Gremlins, Silurid) and while they’re usually great for the task I set them (usually laying down scheme markers), having something that can actually eliminate threats is still necessary.

Rather than go through a few models I feel have worked well in a Zoraida crew, I thought I’d instead just put out a few crew lists I’ve previously used and go over why I took them. Most of this is from memory so while I probably remembered the most important elements, there may be the odd upgrade or model I forgot;

Zoraida
- Animal Shape
- Liquid Bravery
Francois
- Dirty Cheater
Warpig
5x(?) Bayou Gremlins

One of my few games with Zoraida in the Gremlin Faction, back during the Wave 1 playtest. The Bayou Gremlins were mostly for Line in the Sand, while Francois and the Warpig were my heavy hitters. Dirty Cheater is a particularly handy upgrade when Zoraida lets you keep drawing cards, and the Warpig’s (1) charge action is a solid choice for Obey.  Liquid Bravery is always useful in a low Wp crew, but the comic value of having an inebriated Zoraida leading a crew of Gremlins is arguably worth it alone.

Zoraida
- Animal Shape
- Hex Bag
2x Silurid
2x Terror Tots
Killjoy

This was the above-mentioned game against the Viks. Zoraida’s Obey helped get Killjoy into position while Bewitch gave him the cards he needed to annihilate some of the opposing crews heavy hitters. The rest of the crew was taken to achieve the interact-heavy Stake a Claim and Power Ritual, but in retrospect the crew really would have valued another heavy hitter to help kill stuff. Animal Shape was chosen partly to help her escape the super-killy Viks, but mainly to ensure Zoraida finished the game in the opposing deployment zone to achieve Entourage.

Zoraida
- Crystal Ball
Malifaux Child
Johan
2x Insidious Madness
Lelu & Lilitu
Silurid

Another Playtest game, this time vs Kaeris. The Malifaux Child would Heal and Obey Johan, who’s Rebel Yell proved great for clearing those burning effects. Zoraida could support Lelu and Lilitu with her Obey (especially their (1) actions that grant an effect to themselves) but again, Bewitch proved to be great for getting the cards I needed. 

Zoraida
- Crystal Ball
Convict Gunslinger
- Pact
Sorrow
Waldgeist
Silurid

This was for a Story encounter vs Lady Justice, where the aim was to move an informant into your deployment zone (so kind of like the old Treasure Hunt strategy). Zoraida used Obey to get the Convict Gunslinger into position for Rapid Fire, which enabled him to claim a few scalps during the game. The Silurid did his usual scheme marker shenanaigans and while the Sorrow was taken to paralyse voodoo dolls (and hence the Voodoo Doll’s Hem target), in reality he just clogged up some enemy models for a turn while Zoraida obeyed the model leading the informant to come towards my deployment zone.

Till next time,


Adrian

Sunday 13 October 2013

Rathnard Does Neverborn – Jakob Lynch

One of my problems in Malifaux is that I just have too many crews (21/39, at last count!), and as much as I’d like to play them all I just don’t have the time. So when M2E came out, I decided that I needed to pick a single Faction and just concentrate on mastering all the crews and intricacies of that one set of models. 

Actually picking a faction was tough for me. There are aspects of each faction in M2E that I really love, whether it’s Marcus and his Beasts form the Arcanists, the utter chaos that exemplify the Gremlins or the great scheme marker synergies that the Guild tend to offer.

Eventually though (perhaps inevitably) I settled on the Neverborn. They were my first faction when I started Malifaux and I’ve since expanded them out to include all 7 Masters and almost all of the Faction’s models. So what do you do when you set out to “re-master” a faction? Why, you blog about it of course!
So for the time being, I thought I’d post up my thoughts on the Neverborn Masters/crews as I play them, hopefully learning something in the process. And to start with, I thought I’d talk about everyone’s favourite Gambler, Business Owner and Drug Peddler – Jakob Lynch.


The Little Tournament that Could…

My experience with Jakob Lynch in Malifaux 1.5 was actually limited to maybe 3-4 games, all of which involved his pre-Storm of Shadows playtest version. He seemed okay, but by the time I actually got a crew together I was still pretty keen on Marcus and subsequently Mei Feng (who was a gift from JD Mickelborough via Ramses’ Christmas Exchange Initative, so she HAD to get played!). So Lynch fell by the wayside up until a few weeks ago, when I pulled him out for a small tournament here in Perth.

The turnout wasn’t great, 4 people playing including myself. That’s probably expected given the absence of the rulebook and arsenal decks in stores at the time, so it should hopefully pick up in subsequent months. Anyway, I ended up randomly picking Jakob Lynch for my crew, but as a 10-Thunders Master! Not exactly the start to my Neverborn Faction focus I was expecting, but his crew selection wasn’t that different after all so there was still plenty to gleam.

The crew I took for this event generally came down to the following;

Jakob Lynch
Hungering Darkness
2x Illuminated 14
Beckoner 7
2x Rail Workers 10 (31SS)

…With upgrades to taste to 35SS. The only other major change was swapping out the Rail workers for a third Illuminated and more upgrades/soulstones in a kill-heavy scenario (Reckoning with all kinds of kill-schemes), but otherwise it remained roughly the same.

I’ll spare you the details of each game (in short – I won all 4 matches against some great guys, facing Nicodem, the Viks and Lilith twice) and instead go straight to my thoughts on the crew itself


Jakob Lynch

In 1.5, Jakob was effectively a coward. Aside from throwing Dead Man’s Hand around for extra cards, his job usually boiled down to staying alive long enough to ensure his Hungering Darkness totem wouldn’t be auto-sacrificed if Jakob dies. In M2E however, he no longer plays second fiddle to the Hungering Darkness. Not only does he offer one of the most reliable ways in the crew of handing out Brilliance with Play for Blood, but he offers some great hand manipulation with Mulligan, Ace in the Hole and Pay Up. He still not the most resilient of Masters, but his back-field playstyle combined with having a crew of very threatening targets made him a relatively low priority for my opponent to kill. He’s certainly survived my games with him thus far.

The small game sizes (35SS), high cost of his minions and Jakob’s very low starting cache made it a tough proposition to take all of the upgrades I might want to for Jakob. In fact in most games I had just 4SS left after selecting my crew (as per above), of which 3-4SS went toward upgrades. During the tournament I tried almost all of the Lynch-specific upgrades, with the exception of Wanna See a Trick and The Rising Sun (which I’ll talk about when I get to the Hungering Darkness).

Woke Up With a Hand was definitely strong – an extra two cards is always handy and I actually managed 6 damage on a model with Final Debt in one of the games. However I did find that the upgrade quite obviously encouraged you to activate Jakob last, which ran counter to how I’d normally want to use him. As above, Jakob has one of the most reliable ways of putting Brilliance on the enemy, so it seems logical to activate him early to pass out Brilliance for the rest of your crew to abuse. So at this stage I feel like Woke Up With a Hand is a take-it-or-leave-it kind of upgrade. I’m sure I’ll use it again in later games, but it’s not so good that I’ll have trouble swapping it out.

As hilarious and useful as the Squeel Trigger is, I took Expert Cheater mainly for the ability to cheat face down. I love the mind games you can play on your opponent with it and in a more practical sense it allows you to force your opponent to cheat his high cards by cheating your low to moderate cards face down. The negative is that it seems to run counter to Woke up with a Hand (which prefers if you keep as many cards on hand as possible before Lynch activates). You probably don’t lose too much by taking both, but I still think I’ll normally take only one of these two upgrades in games.

Addict was an upgrade I took in my first game, but I felt its loss in games 2 and 3 so back it went for game 4. For 1SS, a positive flip to attack and damage against brilliance models is very good and helps reduce your crew’s reliance on you having to cheat. I always took it on the Hungering Darkness over Jakob, but that was mostly because I never had the soulstones available for Addict to have to compete with other upgrade slots on Jakob. Either way, and whoever I give it to, I see myself taking Addict quite a lot.

So that leaves Wanna See a Trick – the upgrade I never took. To be honest, I’m still in two minds about this one. I was never quite convinced that I could get enough Aces in hand to make it worth using over another upgrade (like Addict). That said, the benefits don’t seem that bad for a 1SS upgrade - the damage is irresistible, you’re dropping cards that you wouldn’t use for much else and it doesn’t take up any of Jakob’s AP to use. The other benefit I didn’t notice at the time was the fact that you also shuffle the Aces and your discard pile into your fate deck afterwards. If you’ve already flipped the Red Joker and/or your other high cards then this is a neat way to recycle them back into your deck for the chance to flip them again. So does this make it worth the upgrade slot? I’m still undecided, but I’ll certainly at least give it a try down the track.


Hungering Darkness

Wow, talk about Nasty! One way or another, the Hungering Darkness definitely became the focus of both me and my opponent during games. It’s big, it hits hard and at least at 35SS it proved very difficult for my opponent to kill! The triggers for it’s Tendrils attack gave the HD a lot of flexibility. Low on wounds? Just auto-trigger Drain to heal for 2. Need to kill something dead? Flip or cheat a rams for Envelop to deal minimum 4 damage. The fact that it’s a Ca attack also got around Incorporeal (in my case, a lowly Grave spirit but still…), which was a nice bonus.

The ability to give out Brilliance with the Hungering Darkness (though the auto-trigger in melee or via the Mask-trigger on Heed My Voice) was unsurprisingly useful, especially when he was normally working with the support of my Illuminated. Still, I feel like I’d rather be handing out Brilliance with the AP from a Beckoner and Jakob. If nothing else, it means the Hungering Darkness can be far more effective against his target/s from the first AP, rather than having to do it himself.

Heed my Voice was great for disrupting/hurting enemy models from a distance but at least for me, most of the time I preferred to get all up in their business and hit them in melee.

One of the dilemmas with the Hungering Darkness is deciding which upgrade to take on Jakob for him – The Rising Sun to bring him back after he dies, or Endless Hunger to make him more dangerous when he’s alive. Because the games I played were small I ended up going with Endless Hunger, since I didn’t expect to have many chances to bring him back in time should my opponent kill him. It turned out to be a good choice. He proved more than capable of surviving the enemy, and that extra AP made all the difference in both killing key models and healing himself up with Drain. In larger games this might be a different story, but at this stage I’m happy to stick with Endless Hunger over The Rising Sun.

Since I ran the crew as 10-Thunders I never got the opportunity to try the infamous Nexus of Power. There’s no doubt that the upgrade makes him all but unkillable for as long as you have soulstones available, but even so I’m not sure it’s worth it when the Hungering Darkness himself isn’t leading the crew. Jakob already starts with a low soulstone cache, so you’re looking at spending 6-7SS just to have the upgrade and enough soulstones to make it worth while. That’s a whole extra Illuminated (or Silurid) so considering the existing resilience of the Hungering Darkness (not to mention the ability to bring it back!), I don’t think Nexus of power is worth it in a Jakob Lynch crew. The only exception I can think of is if you’re planning to use the Hungering Darkness a for your Bodyguard scheme.


Illuminated

While the Hungering Darkness is undoubtedly a powerhouse in the crew, the Illuminated have proven to be the backbone. For 7SS, Illuminated are arguably one of the most solid minions available to the Neverborn. Armour and Regenerate make them tough to put down and while their Hardened Brilliance attack is good on it’s own, it becomes absurd when you start hitting models with Brilliance. I’m actually not sure what else I can say about them at this stage. In my games with them they kicked arse and took names, and I honestly don’t see myself taking less than two in any Jakob Lynch crew.


Beckoners

I’ve always been a big fan of models with movement effects. In a game that puts a lot of value on positioning and claiming objectives, the ability to move your or your opponent’s models around offers a lot of utility. Needless to say then, I was looking forward to seeing my Beckoner on the table. On the whole, she did pretty much what I expected her to. She Lured friendly models up, Lured enemy models out of safety and gave out Brilliance with her Sales Pitch Trigger from Despicable Promises.  On the other hand, Lure and Despicable Promises were the only Actions or Abilities I ever used on her. I never found an opportunity to use Pleasant Distraction and I never got close enough to the action to benefit from any of her Brilliance-specific abilities. On the plus side, she was never in a position to be targeted by my opponent either. Like Jakob, she survived every game I played with her. With that in mind, in the future I might try to be a little more aggressive with her, if only to see whether these abilities make that approach worthwhile.

Overall then, she was a great piece that I’d almost always want to include with Jakob. But as good as she was, I’m not yet convinced I need more than one Beckoner in larger games, especially when I start getting into Jakob’s Wave 2 crew members.


Rail Workers

Okay, so these are 10-Thunders rather than Neverborn, but I used them in 3 games so I might as well give my thoughts. :P

My reason for taking Rail Workers was because I needed something cheap to grab objectives, and those were the best choice in my bag at the time! Rail Workers also have at least some synergy with Jakob, being able to pick up any Ace you discarded to use Implacable Assault for positives to attack and damage, itself a pretty potent combination given the Rail Workers melee stats.

In my games, the Rail workers performed adequately for dropping scheme markers, mainly because my opponent was too busy dealing with the offensive power from the rest of my crew to worry about my flanking Rail Workers. Coming from a Neverborn background I definitely missed having something faster than a Wk4 minion for such a role but hey, they did the job I asked of them so there’s no complaints there!
That said, the Rail Workers more than made up for their slowness in sheer resilience and killing power. While they’re hardly going to replace the Illuminated as front-line heavy hitters, they still packed quite a punch for their 5SS cost. One fun moment was when I discovered that a Rail Worker could hold a Silurid in place with his Pin trigger, preventing it from moving or pushing out of combat. A Silurid is usually my go-to model for objective-based schemes like Breakthough and Power Ritual, so seeing one get held up and killed by a cheap Rail Worker has given me a lot of respect for the little guy.

Had I been using Jakob as a Neverborn Master there’s no doubt I would have replaced the Rail Workers with Terror Tots or a Silurid. In 10-Thunders, if I had access to more models I probably would have replaced the Rail Workers with Torakage. However in retrospect the additional combat capabilities the Rail Worker offered really benefited my crew, especially when it came to killing enemy flankers to deny my opponent’s objectives. This experience has forced me to rethink how much value I place on super-fast objective grabbers like my beloved Silurid. There’s no doubt they have their place, but so long as I’m avoiding the particularly “long distance” scheme marker schemes like Power Ritual and breakthrough, I might actually be better off going with a cheaper, less specialised model like the Rail Worker. In other words, there’s something to be said for a minion who’s able to offer a lot more than just a tool for making interact actions.


2000+ Words isn’t too much…right?

Well that’s it for now. Needless to say, I’m aiming for this to be the first in a series of posts, with at least one other post for each Neverborn Master and hopefully a few follow ups for each as I figure each master out a little better. In the mean time, feel free to post your thoughts in the comments section, especially in terms of things I might have missed!

Later,

Adrian

Monday 7 October 2013

Yet Another Bloody Blog…


Perhaps it’s just the Malifaux community, but it seems like every man, woman and their dog is starting a blog these days. Well like the mindless sheep I surely must be, I’ve decided to push ahead and start a blog of my own. Will it be good? Will I be able to stick with it for more than a few posts? Perhaps most importantly, will anyone actually care?! Only time will tell but for now, it’s enough that I’ve finally made a start on this damn thing!

Anyway, every body of work needs an introduction and since this is my first post (aside from the test post a year ago…never mind that) I thought I might start with a bit of a Q&A about me and what this blog will be about.

Who are you?

I’m Adrian - 31 year old human male, but most people who read this blog will probably know me as Rathnard – the guy who posts everything in pink on the Wyrd Forums. I strongly suspect that’s the only reason most people know me, but selecting garish colours for posts and stubbornly sticking to them isn’t my only talent. I’m also very heavily involved in all things Wyrd and Malifaux, and have been for about 3 1/2 years now. In addition to having more than half the crews in the game, I’m also;

  •  Henchman and more recently, one of the forum Moderators for Wyrd Miniatures,
  • An admininstrator for the PullMyFinger Malifaux Strategy Wiki,
  • Administrator to the Wyrd Chronicles,
  • Playtester for many of the past releases by Wyrd Miniatures, specifically Showdown and every Malifaux book released after the original rulebook.
  • Co-host for the Aethervox podcast, which may or may not be putting out another episode. :P


Do you do anything outside of Malifaux?
Before delving into Malifaux I played Warhammer 40k and Fantasy (probably like most other tabletop wargamers) for about 13 years, as well as the various other Games Workshop specialist games when my gaming group was struck by the urge to do so. I switched to Malifaux before the Perth wargaming community was swamped by the billions of skirmish games now available, but I have dabbled in a few other games, including Hordes, Dropzone Commander and Infinity. I’ve also got Wild West Exodus and Deadzone models from their respective Kickstarters on their way, so I’m hoping to at least have a dabble in the both, especially the latter. I miss playing Necromunda, and Deadzone seems like a good replacement rules system.

I’m also club president for one of the long-standing gaming clubs here in Perth, called Outpost 6030, and have organised or helped to organise more than a few local tournaments and leagues, both for Malifaux and other game systems.

Okay, lets try again, do you do anything outside of Wargaming?

Hah, yes well believe it or not, I do have a life outside of Wargaming. Currently I’m a stay-at-home Dad, looking after one of the most important people in my world - my 16 month old daughter Miranda. The above photo is the ugliest one I have of her...she's the one without the beard. I also have a PhD in Medical Genetics and up until April of this year was employed as a research scientist. Unfortunately (or fortunately, depending on your perspective) that job had to end. I’ll save you the details (might be a topic for another post), but the end result is that I’m much happier being a stay at home dad and my wife Rose is much happier working.

Why are you starting a Blog?
There are a few reasons. For one, I enjoy writing and I’ve been wanting to do more of it, so this seems like a good excuse to do so. I have a regular article on the Wyrd Chronicles too, but I’d like to be able to write stuff that’s a little less developed and a little more personal. For instance while I might do a tactics article for a certain Master in the Chronicles, I’d only want to do it once I feel confident that I know what I’m talking about. Having a blog should therefore allow me to post stuff more akin to personal opinion or initial (perhaps poorly informed) thoughts.

What will this Blog be about?
Mostly wargaming and Malifaux in particular. It is, after all, my main (arguably my only) hobby so chances are that I’ll be writing alot about my favourite tabletop wargame. However I do hope to include some more personal topics as I go along. Don’t worry, I’ll make it clear which ones they are so you can skip them without much difficulty. ;)

Gosh, you sound like such an exciting person! When would I be able to meet up with you?
Well if you happen to find yourself in Perth, Australia then you’re in luck – just give me a buzz and I’m sure we could arrange a game or something. Failing that, I’m coming to Gencon in August of 2014! Flights from Australia aren’t cheap and opportunities to leave my responsibilities as a Dad are rare. So this might well be my only chance to attend the “Best Four Days in Gaming” (well, that’s what the Gencon website tells me…). Needless to say I’m pretty excited about this, and am definitely looking forward to meeting all those people I’ve talked to via the forums/email, but never met in person.

Wait a second…why isn’t this post in Pink?!
What? Yes it is! It's a very dark pink. Honest. ;) I did think about sticking with black for this blog. One thing I’ve found is that posting in pink (or purple) can be a hassle, mainly when I’m trying to post something on the Wyrd forum using my mobile phone (have you tried typing in the requisite colour code using those tiny smart phone keypads?). That said, I still enjoy posting in unusual colours, so for now I thought I'd stick with the pink (or purple...).

That said, if the colour choice is proving a problem for my 1-2 regular readers (Hi Rose!) then just let me know and I'll consider sticking with black instead. 

---

That will do for now. Expect another, much more interesting blog post shortly. I have some fun ideas in mind (well, fun for me!), so I’m looking forward to seeing them come to fruition! In the mean time if you do have any more questions, just post them in the comments section and I'll endevour to answer.

Later,


Adrian